In this series of blog posts we are creating a calendar in our Django and React application using the FullCalendar library. In the previous post we completed the setup and implementation of a basic FullCalendar.
In this post we continue and explore how we can use different types of calendar views, and let the user switch views by using buttons.
Full project code is available here!
What options do we have?
FullCalendar allows us to display events in multiple ways:
- DayGridView: Display events per day, we have the option to display 1 day, a week, a month, or a year.
- TimeGridView: Displays events per day, but also with the time on the left axis.
- ListView: Displays events in a list. This list can of a day, per week, per month, or per year.
- Multi-Month view: Displays multiple months at the same time.
- Custom views: You have the option to create your own view based on your requirements. For example: A calendar displaying the next three months.
- Next steps..
FullCalendar DayGridView
The first view we’ll examine is the Day Grid View. This view allows you to present your calendar in a few different ways, with the ability to split the display into a single day, a week, a month, or even a year. By adjusting the initialView prop, you can easily switch between these different perspectives.
With the DayGridView plugin you can pick between the views dayGridDay, dayGridWeek, dayGridMonth, and dayGridYear.
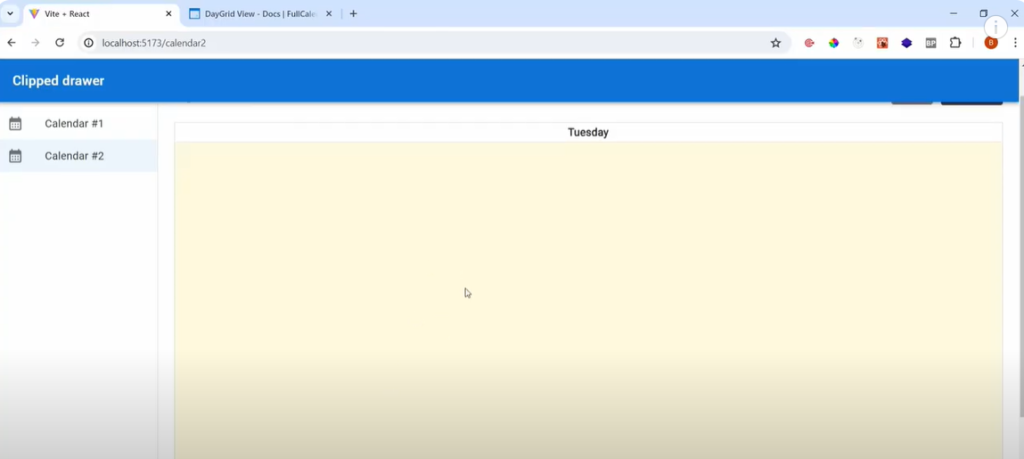
For example, we can change the initialView to dayGridDay, which results in the calendar showing 1 day at the time.
<FullCalendar
        plugins={[ dayGridPlugin ]}
        initialView="dayGridDay"
        events={[
            {title : 'Event #1', start: '2024-04-17'},
            {title : 'Event #2', start: '2024-04-19', end: '2024-04-21'},
            {title : 'Event #3', start: '2024-04-24T12:00:00', allDay: false},
        ]}
    />
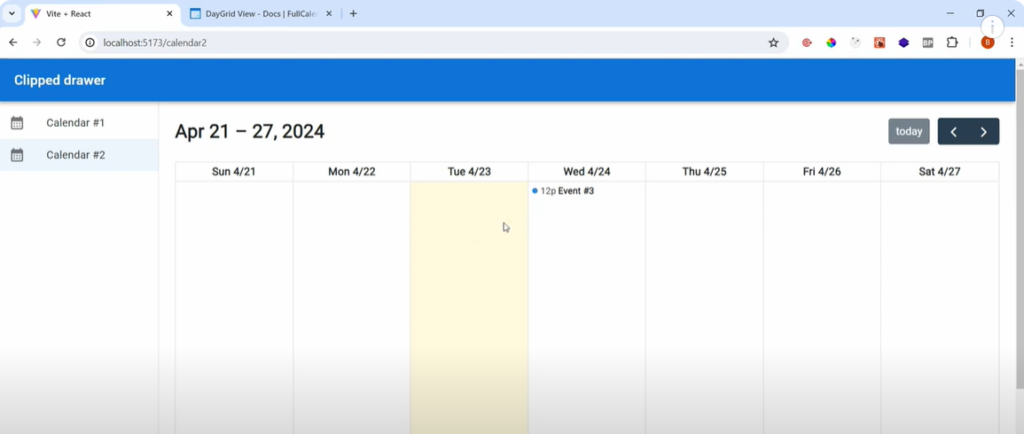
When we change the initialView to dayGridWeek we will get 1 week at the time, split in days.
The DayGridYear shows a full year Calendar. You can scroll down and see all months in the year.
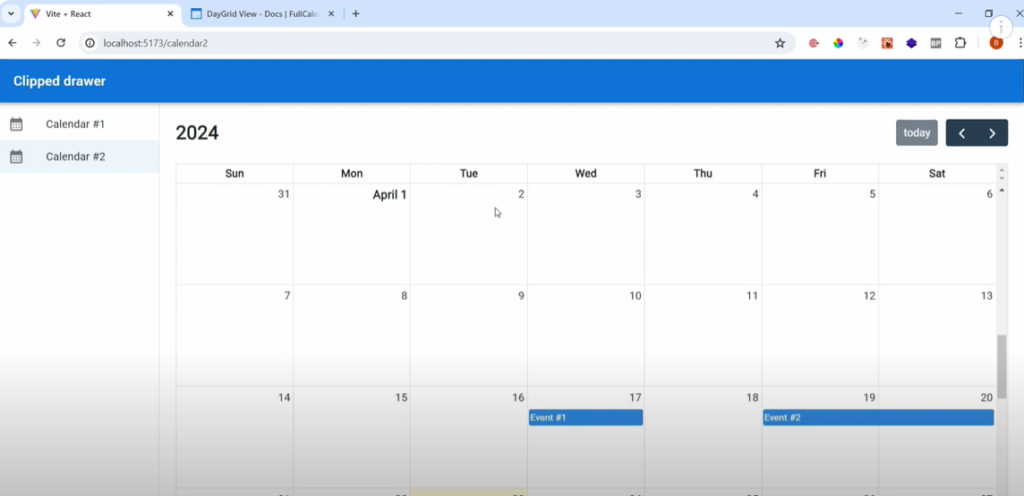
And when we go back to the DayGridMonth (which was our default) we get the same view, but then for one month.
Switching Views with Buttons
While the ability to change views is great, we want to give our users the power to switch between these views easily. FullCalendar provides a convenient way to add buttons to the calendar toolbar, allowing users to toggle between the different views.
To set up the view switching buttons, we can use the headerToolbar prop. This prop accepts an object where we can specify the buttons we want to display on the left, right, and center of the toolbar.
For example, we can add buttons for “Day“, “Week“, “Month“, and “Year” on the right side of the toolbar, and “Previous” and “Next” buttons on the left side to navigate through the calendar. We can also include a title in the center to provide context for the current view.
import {React} from 'react'
import FullCalendar from '@fullcalendar/react'
import dayGridPlugin from '@fullcalendar/daygrid'
const MyCalendar2 = () => {
return (
<FullCalendar
plugins={[ dayGridPlugin, timeGridPlugin, listPlugin,multiMonthPlugin ]}
initialView="dayGridMonth"
events={[
{title : 'Event #1', start: '2024-04-17'},
{title : 'Event #2', start: '2024-04-19', end: '2024-04-21'},
{title : 'Event #3', start: '2024-04-24T12:00:00', allDay: false},
]}
headerToolbar = {{
left: 'prev,next' ,
center: 'title',
right: 'dayGridWeek, dayGridMonth, dayGridYear'
}}
/>
)
}
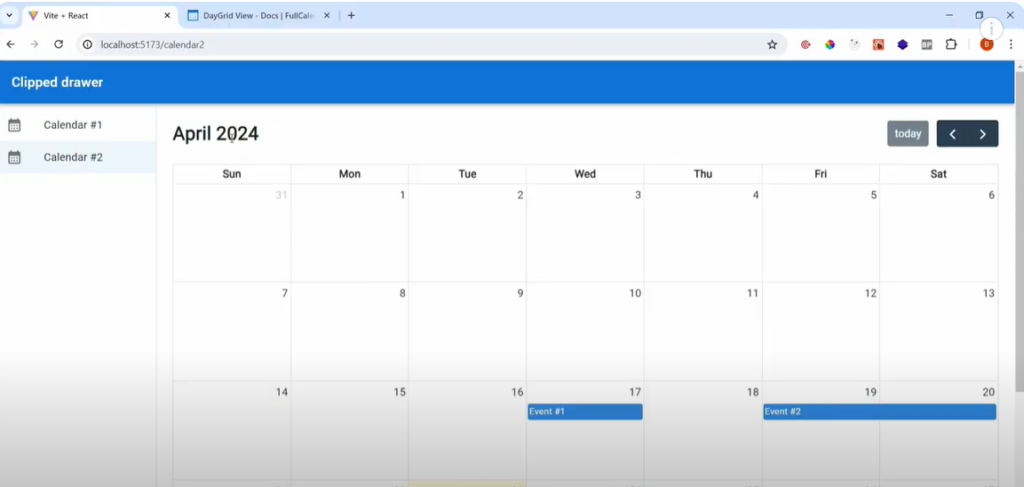
export default MyCalendar2This will render buttons for different views, which will look like this:

The Day Grid View is just the beginning. FullCalendar offers several other views to enhance your calendar’s functionality:
FullCalendar TimeGridView
The Time Grid View displays your calendar with the hours of the day on the left side, providing a more detailed view of your events and appointments. This is particularly useful if you need to see the specific time slots for your events.
With the TimeGridView we have the options of using the timeGridDay and timeGridWeek.
To use the Time Grid View, we need to install the @fullcalendar/timegrid package.
python -m pip install @fullcalendar/timegridNext we need to import the timeGridPlugin to use the views.
...
import timeGridPlugin from '@fullcalendar/timegrid'
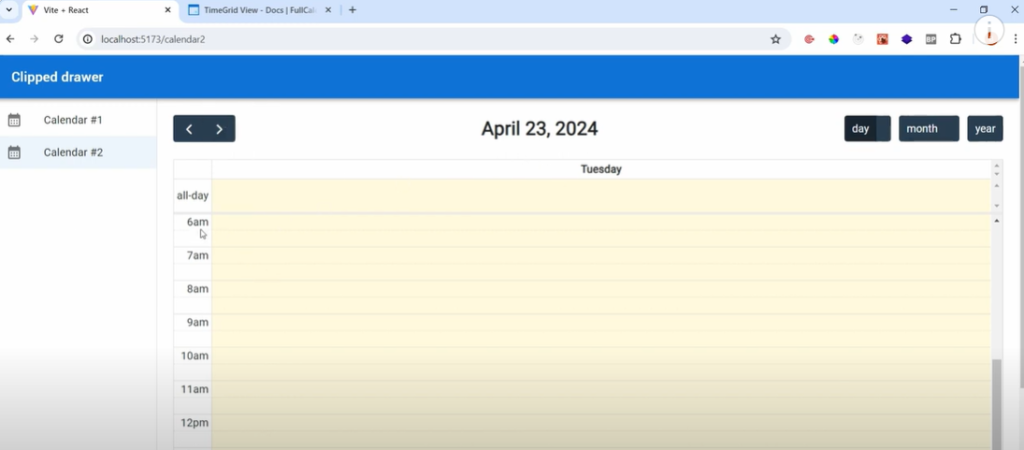
...Now we need to add the timeGridPlugin to our Calendar, and we can set one of the options as the InitialView (and also include it in the buttons)
...
 <FullCalendar
        plugins={[ dayGridPlugin, timeGridPlugin ]}
        initialView="timeGridDay"
        events={[
            {title : 'Event #1', start: '2024-04-17'},
            {title : 'Event #2', start: '2024-04-19', end: '2024-04-21'},
            {title : 'Event #3', start: '2024-04-24T12:00:00', allDay: false},
        ]}

        headerToolbar = {{
          left: 'prev,next' ,
          center: 'title',
          right: 'timeGridDay, dayGridMonth, dayGridYear'
        }}
    />
...
This looks like this:
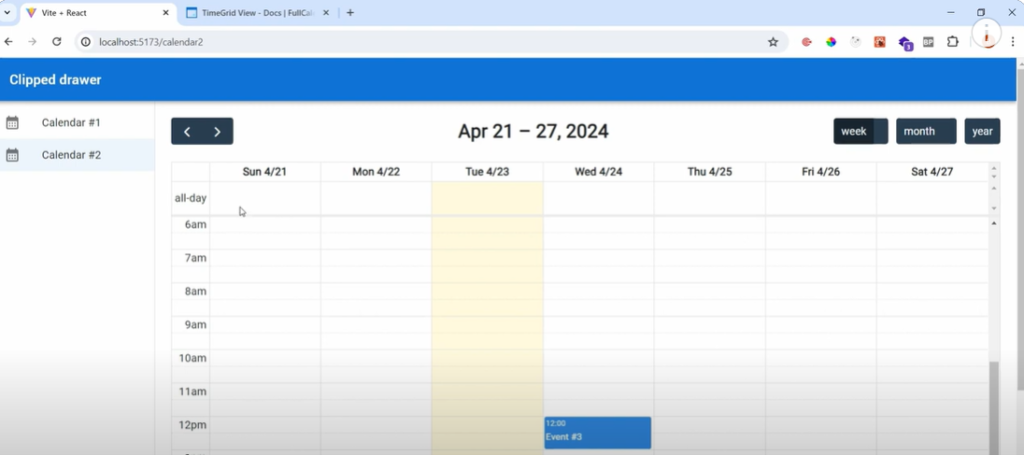
We can also use the “timeGridWeek” is we change the code to this:
...
 <FullCalendar
        plugins={[ dayGridPlugin, timeGridPlugin ]}
        initialView="timeGridWeek"
        events={[
            {title : 'Event #1', start: '2024-04-17'},
            {title : 'Event #2', start: '2024-04-19', end: '2024-04-21'},
            {title : 'Event #3', start: '2024-04-24T12:00:00', allDay: false},
        ]}

        headerToolbar = {{
          left: 'prev,next' ,
          center: 'title',
          right: 'timeGridDay, timeGridWeek,dayGridYear'
        }}
    />
...
And our calendar than looks like this:
FullCalendar ListView
The List View presents your calendar events in a simple, easy-to-scan list format. This view can be customized to show the list for a single day, a week, a month, or even a year, depending on your users’ needs.
Options for a list are listDay, listWeek, listMonth, and listYear
To enable the List View, we again need to an install to use the @fullcalendar/list package.
python -m pip install @fullcalendar/list Similar to before we need to import the listPlugin.
...
import listPlugin from '@fullcalendar/list'
...
We can add the listPlugin to the plugins and change the InitialView and button to use ListDay:
...
 <FullCalendar
        plugins={[ dayGridPlugin, timeGridPlugin, listPlugin ]}
        initialView="listDay"
        events={[
            {title : 'Event #1', start: '2024-04-17'},
            {title : 'Event #2', start: '2024-04-19', end: '2024-04-21'},
            {title : 'Event #3', start: '2024-04-24T12:00:00', allDay: false},
        ]}

        headerToolbar = {{
          left: 'prev,next' ,
          center: 'title',
          right: 'listDay, timeGridWeek,dayGridYear'
        }}
    />
...
Output then looks like this:

When we change this to listWeek it looks like this. We can also use listMonth and listYear. In my case this generates the same overview since I don’t have that many events.

FullCalendar multiMonthView
The Multi-Month View allows you to display multiple months simultaneously, providing a high-level overview of your calendar. This can be particularly useful for users who need to plan events or appointments further in advance.
This plugin has one view: multiMonthYear
To use the multiMonthView, we need to install the @fullcalendar/multimonth package.
python -m pip install @fullcalendar/multimonthNext we import the multiMonthPlugin into our calendar.
...
import multiMonthPlugin from '@fullcalendar/multimonth'
...
We can then add a “multiMonthYear” button to the initialView and the buttons. .
...
 <FullCalendar
        plugins={[ dayGridPlugin, timeGridPlugin, listPlugin, multiMonthPlugin]}
        initialView="multiMonthYear"
        events={[
            {title : 'Event #1', start: '2024-04-17'},
            {title : 'Event #2', start: '2024-04-19', end: '2024-04-21'},
            {title : 'Event #3', start: '2024-04-24T12:00:00', allDay: false},
        ]}

        headerToolbar = {{
          left: 'prev,next' ,
          center: 'title',
          right: 'listDay, timeGridWeek,multiMonthYear'
        }}
    />
...
And this view displays multiple monthly calendars.
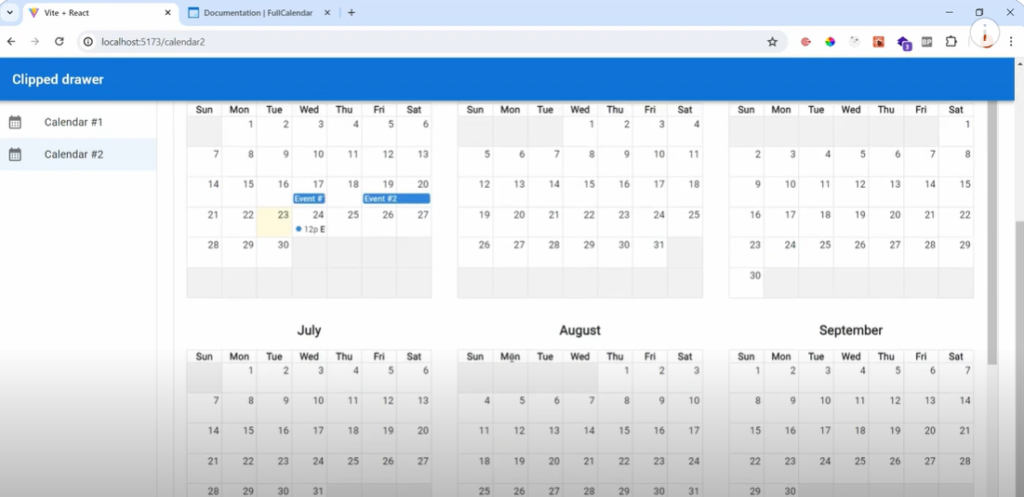
Creating Your Own Specific Views
While FullCalendar provides a wide range of built-in views, you may sometimes need to create a custom view to better suit your specific requirements. Fortunately, FullCalendar makes this process relatively straightforward.
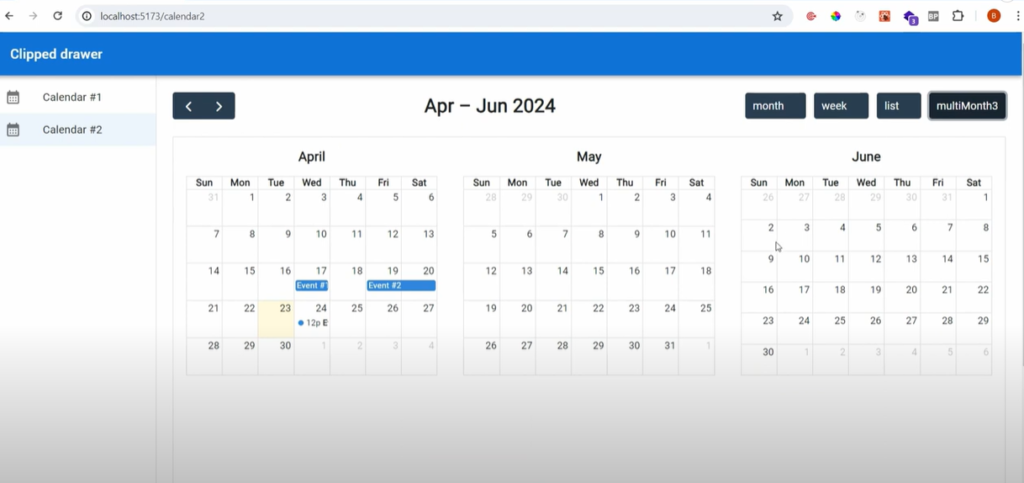
By defining a views attribute in the FullCalendar configuration, you can create a custom view that meets your needs. For example, you can create a “multiMonth3” view that displays only the next three months, with a specific title format and column header format.
...
        views = {{
           multiMonth3:{
              type: 'multiMonth',
              duration: {months: 3},
              titleFormat: {month: 'short', year: 'numeric'},
              columnHeaderFormat: {weekday:'short'},
              buttonText: "3 Months"
           }
        }}
...
You need define the type of view you want to customize, and then you can set a duration, format the title, and add a specific text for the button. And of course there are much more options…..My custom view looks like this:
Next steps…
In this post, we’ve explored the powerful capabilities of FullCalendar’s views and view switching buttons. By leveraging the Day Grid View, Time Grid View, List View, and Multi-Month View, you can create a calendar that offers a rich and engaging user experience.
As we move forward, we’ll continue to build upon this foundation, integrating data from your Django backend to populate the calendar with real events and appointments.