

In this blog post, are creating a calendar in our Django and React application using the FullCalendar library. FullCalendar is a popular JavaScript calendar library designed specifically for integration with popular front-end frameworks like React, Vue, and Angular. It offers a wide range of features and customization options, making it an excellent choice for building dynamic and feature-rich calendars.
In this 1st article we focus on the basic setup of FullCalendar. We will do that by:
- Showing our Django & React Application
- Install the FullCalendar Package
- Creating a Calendar Component and Page
- Displaying our Basic Calendar
- Adding events
- Next steps…
Project code is available on GitHub.
Our Django and React Application
During this tutorial I use a basic Django & React application. As long as you have a React JS frontend you can follow along with this tutorial.
If you don’t have an application yet, you can watch the videos below to successfully complete the setup.
In our application I have a navigation menu with some links to different pages. On one of the pages we are going to create our calendar.

Installing FullCalendar
To use FullCalendar we need to install a package into our React JS Frontend. We need the core FullCalendar library, the FullCalendar React plugin, and the FullCalendar Daygrid plugin. These packages will provide us with the tools we need to integrate the calendar into our Django and React application.
In your frontend terminal you can use the commands below to install the packages:
npm install @fullcalendar/core @fullcalendar/react @fullcalendar/daygridCreating the Calendar Page and Component
With the installs complete, we’ll create a new page in our application where we want to display the calendar called Calendar1.jsx.
import {React} from 'react'
import MyCalendar1 from './calendars/MyCalendar1'

const Calendar1 = () => {

  return (
    <div>
       This is where we will display our Calendar.
    </div>
  )
}

export default Calendar1
Next I also import this page into my App.jsx file, and I create a route for this new page.
import './App.css'
import Home from './components/Home'
import About from './components/About'
import Navbar from './components/Navbar'
import {Routes, Route, useLocation} from 'react-router-dom'
import Calendar1 from './components/Calendar1'

function App() {
  return (
    <>
        <Navbar
            content={
              <Routes>
                    <Route path="/" element={<Home/>}/>
                    <Route path="/calendar1" element={<Calendar1/>}/>
                    <Route path="/about" element={<About/>}/>
              </Routes>
        }/>
   </>
  )
}

export default App
Since I want to make this reusable, I create a new jsx file called MyCalendar1 where we will put all of the code for our FullCalendar.
import {React} from 'react'

const MyCalendar1 = () => {

  return (
    <div>
         We will put the code for our calendar here

   </div>
  )
}

export default MyCalendar1
Displaying the Basic Calendar
Now, it’s time to bring the calendar to life. We’ll start by importing the necessary FullCalendar components and plugins into our MyCalendar1 component.
...
import FullCalendar from '@fullcalendar/react'
import dayGridPlugin from '@fullcalendar/daygrid'
...
Then, we’ll use the FullCalendar component provided by the library in our return statement to render a basic calendar on the screen. We need to specify a plugin (in this case dayGridPlugin) and the initial view we want to render (in this case dayGridMonth).
...
return (
    <FullCalendar
        plugins={[ dayGridPlugin ]}
        initialView="dayGridMonth"
    />
  )
...
There are a lot of different plugins and views you can use. In one of the next posts I will outline the ones that are most commonly used.
Our full MyCalendar1.jsx file now looks like this:
import {React} from 'react'
import FullCalendar from '@fullcalendar/react'
import dayGridPlugin from '@fullcalendar/daygrid'

const MyCalendar1 = () => {

  return (
    <FullCalendar
        plugins={[ dayGridPlugin ]}
        initialView="dayGridMonth"
        events={[
            {title : 'Event #1', start: '2024-04-17'},
            {title : 'Event #2', start: '2024-04-19', end: '2024-04-21'},
            {title : 'Event #3', start: '2024-04-24T12:00:00', allDay: false},
        ]}
    />
  )
}

export default MyCalendar1
We now want to use this calendar in our Calendar1.jsx file. To do that we import the MyCalendar1 on top of the file, and put the block MyCalendar1 in our return statement.
import {React} from 'react'
import MyCalendar1 from './calendars/MyCalendar1'
const Calendar1 = () => {
return (
<div>
<MyCalendar1/>
</div>
)
}
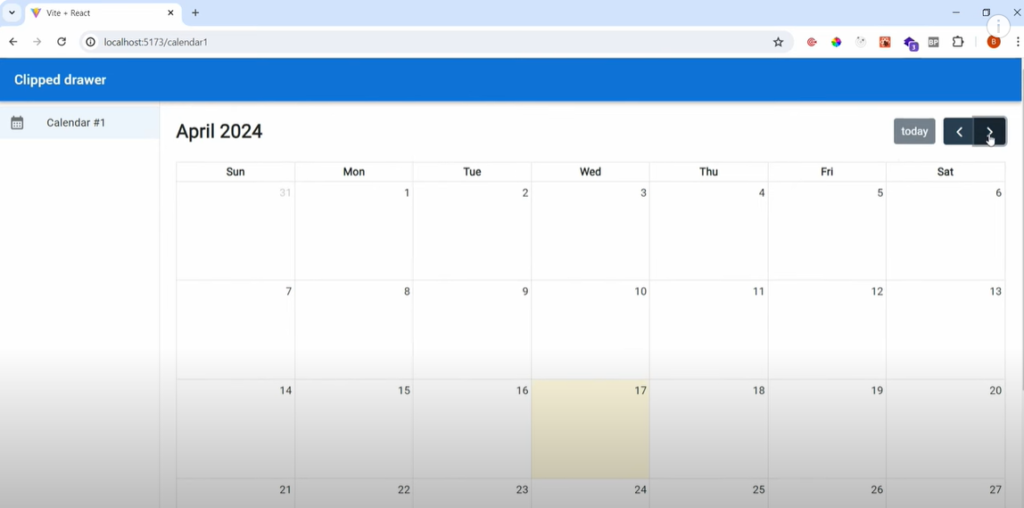
export default Calendar1If we now start our server by using npm run dev we will see the end result. This initial setup will allow us to navigate through the different months and years using the built-in controls.
Adding Events to the Calendar
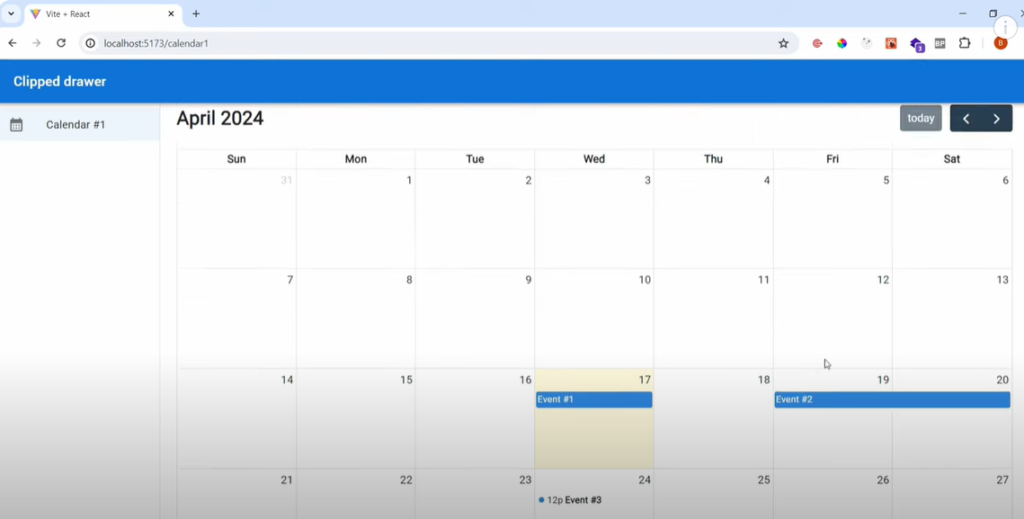
To make the calendar more interesting, we’ll add some hardcoded events to the calendar. We’ll create an “events” array and pass it as a prop to the FullCalendar component. This will allow us to see the events displayed on the calendar:
import {React} from 'react'
import FullCalendar from '@fullcalendar/react'
import dayGridPlugin from '@fullcalendar/daygrid'

const MyCalendar1 = () => {

  return (
    <FullCalendar
        plugins={[ dayGridPlugin ]}
        initialView="dayGridMonth"
        events={[
            {title : 'Event #1', start: '2024-04-17'},
            {title : 'Event #2', start: '2024-04-19', end: '2024-04-21'},
            {title : 'Event #3', start: '2024-04-24T12:00:00', allDay: false},
        ]}
    />
  )
}

export default MyCalendar1
We will now see the events on our Calendar1 page.
There are lot of attributes/options you can use for your events. A list of the attributes can be found here.
Next steps…
With the basic calendar and events in place, we’ll take a closer look at the various features and customization options offered by FullCalendar.
In the next post we will explore different calendar views (month, week, day, list), and see how we can use buttons to switch between the different views.
Later on, we’ll also discuss how to integrate the calendar with our Django backend to display data from the database.


