In this series of blog posts we are creating a calendar in our Django and React application using the FullCalendar library. In this third post we continue and explore how we can display our database data from our backend on the FullCalendar.
Full project code is available here!
Steps for displaying Database data on the FullCalendar
To complete this, we will take the following steps:
- Installing Packages in our Python Django Backend
- Creating a Database Model and Adding Some Data
- Create a Url, Serializer, and View
- Installing Packages in our React JS Frontend
- Get our Backend data to the Frontend
- Passing the data to our FullCalendar
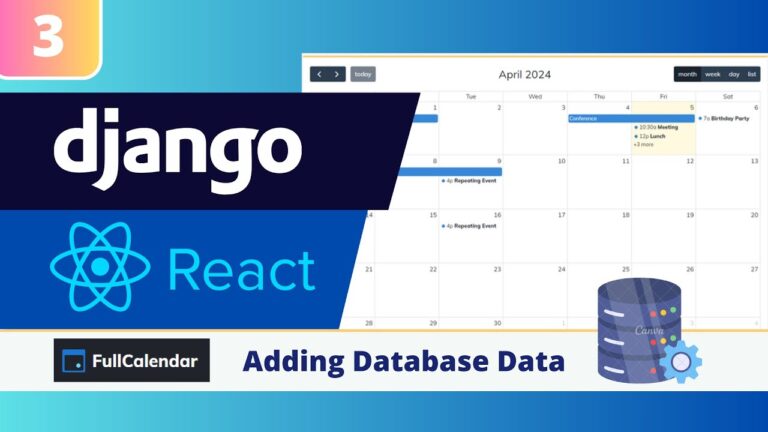
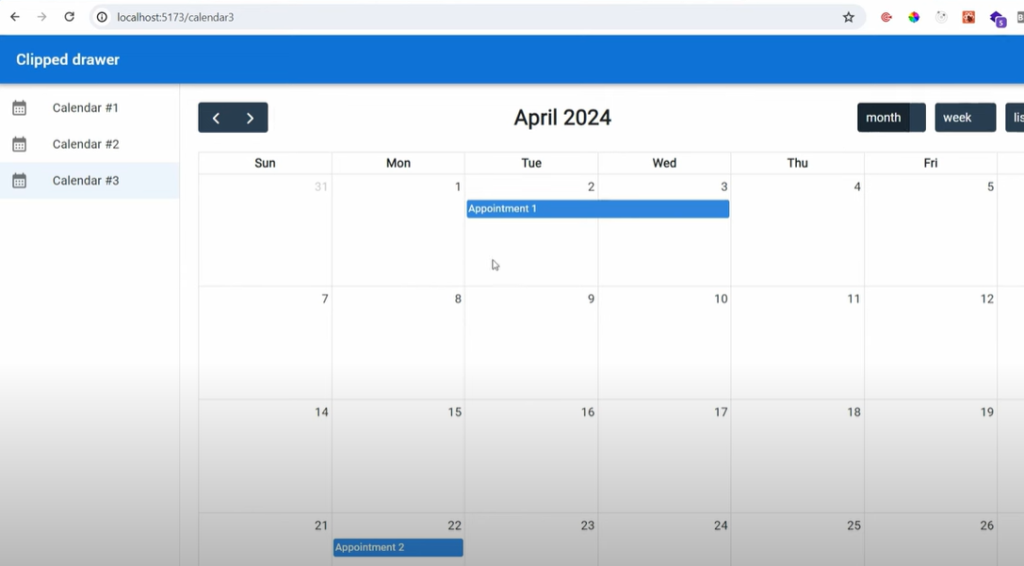
In the end, we will realize the picture below!
Installing Packages in our Python Django Backend
First, we’ll install Django REST Framework, which provides tools for building APIs. We can do this by running:
python -m pip install django-rest-framework Next, we’ll install Django CORS Headers, which allows our frontend to make requests to the backend. We can install this by running pip install django-cors-headers.
python -m pip install django-cors-headersTo be able to use these packages, we need to add rest_framework and corsheaders to our the installed apps inside our settings.py file.
...
INSTALLED_APPS = [
    'django.contrib.admin',
    'django.contrib.auth',
    'django.contrib.contenttypes',
    'django.contrib.sessions',
    'django.contrib.messages',
    'django.contrib.staticfiles',
    'mycalendar',
    'rest_framework',
    "corsheaders",
]
...
We also need to add a line to our middleware to make sure cors headers is working correctly. We need to add: “corsheaders.middleware.CorsMiddleware”.
...
MIDDLEWARE = [
    "corsheaders.middleware.CorsMiddleware",
    'django.middleware.security.SecurityMiddleware',
    'django.contrib.sessions.middleware.SessionMiddleware',
    'django.middleware.common.CommonMiddleware',
    'django.middleware.csrf.CsrfViewMiddleware',
    'django.contrib.auth.middleware.AuthenticationMiddleware',
    'django.contrib.messages.middleware.MessageMiddleware',
    'django.middleware.clickjacking.XFrameOptionsMiddleware',
]
...
Creating a Database Model and Adding Some Data
With the backend setup complete, we can now create a database model to store our appointment data. In the models.py file, we’ll define an Appointment model with fields for the name, start date, end date, comments, status, created date, and modified date.
from django.db import models

class Appointments(models.Model):
    name = models.CharField(max_length= 200)
    start_date = models.DateField()
    end_date = models.DateField()
    comments = models.CharField(max_length= 500, blank=True, null=True)
    status = models.CharField(max_length= 100)
    created = models.DateTimeField(auto_now_add=True)
    modified = models.DateTimeField(auto_now = True)

    def __str__(self):
        return self.name
After defining the model, we’ll need to migrate the changes to the database. We first run the command below in our terminal.
python manage.py makemigrationsAnd then enforce the changes to our database with the migrate command.
python manage.py migrateAs a last step we register the model in the Django admin portal so we can manually add some test data.
from django.contrib import admin
from .models import *

admin.site.register(Appointments)
I then went to my admin portal, and I created some appointments so that we have data to display in our frontend.
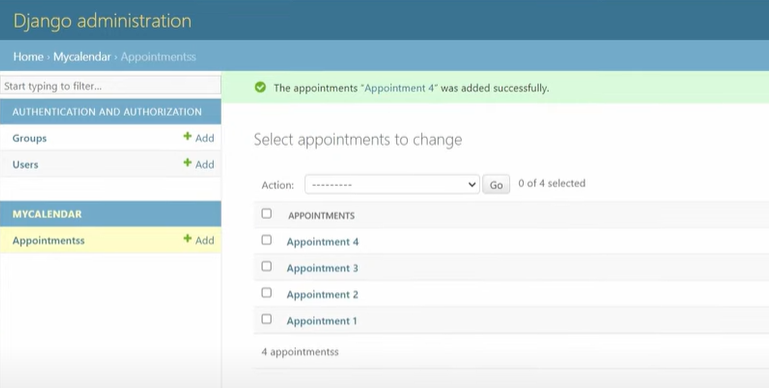
To be able to use the admin portal you need to create a new user. The YouTube video describes how to do this (in case you don’t know how)
Create a Url, Serializer, and View
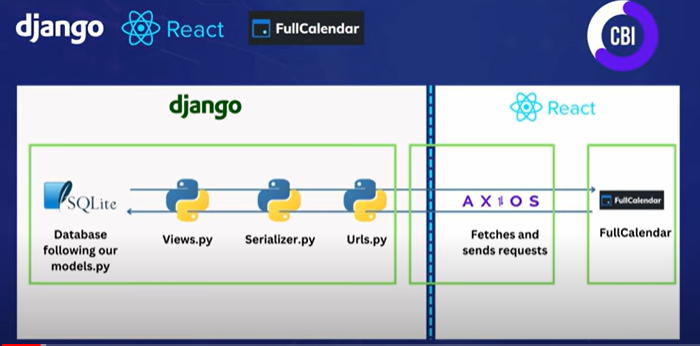
To make the appointment data available to the frontend, we’ll create a serializer, a view, and a URL. The serializer will convert the database data into a JSON format that the frontend can understand. The view will define the logic for retrieving the data, and the URL will specify the endpoint where the frontend can access the data.
In the serializers.py file, we’ll create an AppointmentSerializer that maps the fields from the Appointment model to the format expected by the frontend.
from rest_framework import serializers
from .models import *

class AppointmentSerializer(serializers.ModelSerializer):
    title = serializers.CharField(source='name')
    start = serializers.DateField(source='start_date')
    end = serializers.DateField(source='end_date')

    class Meta:
        model = Appointments
        fields = ('id','start', 'end','title')
We change the names of the fields to title, start, and end, since that are the names that FullCalendar expects.
In the views.py file, we’ll create an AppointmentViewSet that uses the AppointmentSerializer to serialize the data and return it in a response.
from rest_framework import viewsets, permissions
from .serializers import *
from rest_framework.response import Response
from .models import *

class AppointmentViewset(viewsets.ViewSet):
    permission_classes = [permissions.AllowAny]
    queryset = Appointments.objects.all()
    serializer_class = AppointmentSerializer

    def list(self, request):
        queryset = Appointments.objects.all()
        serializer = self.serializer_class(queryset, many=True)
        return Response(serializer.data)
Finally, in the urls.py file, we’ll define the URL endpoint for the appointment data using a router. This will create the url that we can use as the API.
from django.urls import path
from .views import *
from rest_framework.routers import DefaultRouter
router = DefaultRouter()
router.register('appointments', AppointmentViewset, basename='appointments')
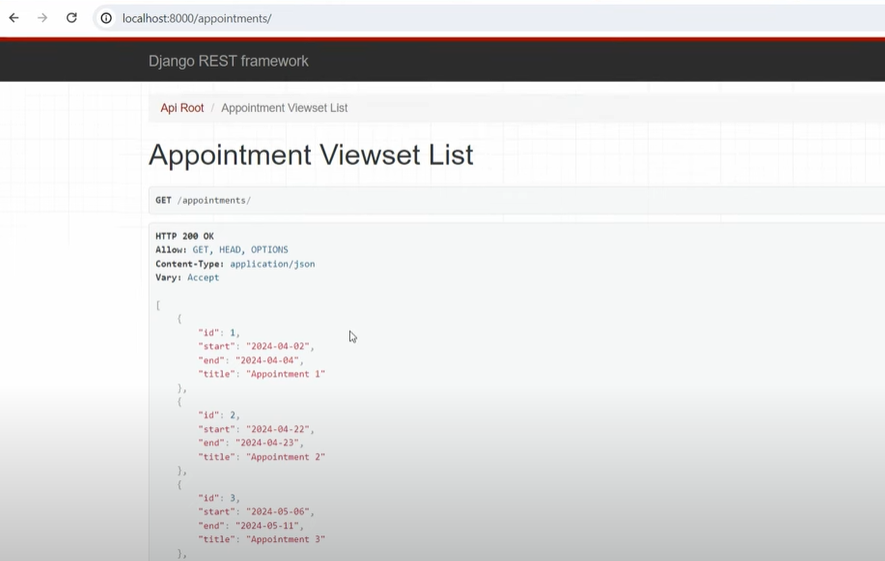
urlpatterns = router.urlsIf we now start the server, and we go to the backend URL we see the appointments link.
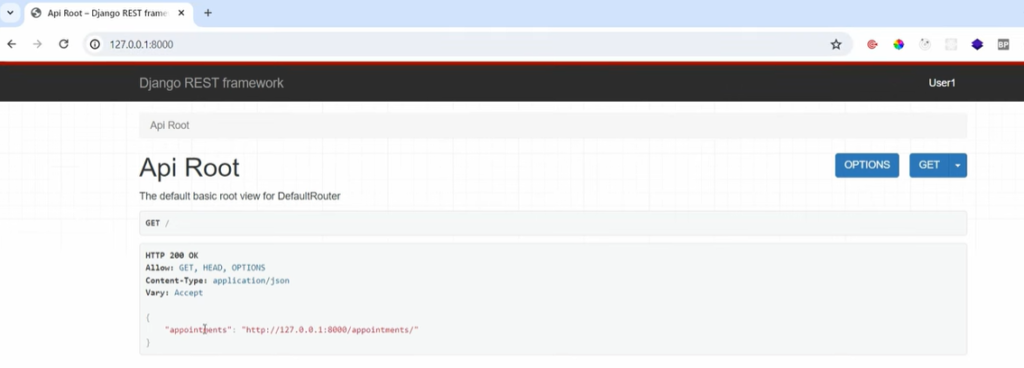
If we click on the link, we see the data we created earlier. We need to get this data to the frontend.
Installing Packages in our React JS Frontend
To be able to get the data from the url to the React JS frontend, we need to install Axios so we can get the data. So we install that package in our Frontend terminal.
npm install axiosGet our Backend data to the Frontend
On the frontend, we’ll use Axios to make a request to the backend and retrieve the appointment data. We’ll create a reusable Axios instance in the AxiosInstance.jsx file, which will handle the base URL and other configuration settings.
import axios from 'axios'

const myBaseUrl = 'http://127.0.0.1:8000/';
const AxiosInstance = axios.create({
    baseURL: myBaseUrl,
    timeout: 5000,
    headers: {
        "Content-Type":"application/json",
        accept: "application/json"
    }
});

export default AxiosInstance
Now we can use this AxiosInstance to fetch the data. We import the AxiosInstance to our file, and create a constant called GetData that gets the data by providing the name of the url that we defined in our backend.
We also create a constant called events, and setEvents. We use setEvents to store the data that our API retrieves in the events constant.
We then use the useEffect hook (which we also import) to trigger the GetData constant whenever the page loads.
import {React, useEffect, useState} from 'react'
import MyCalendar3 from './calendars/MyCalendar3'
import AxiosInstance from './AxiosInstance'
const Calendar3 = () => {
const [events, setEvents] = useState()
const GetData = () => {
AxiosInstance.get(`appointments/`).then((res) =>{
setEvents(res.data)
console.log(res.data)
})
}
useEffect(() =>{
GetData();
},[] )
return (
<div>
<MyCalendar3/>
</div>
)
}
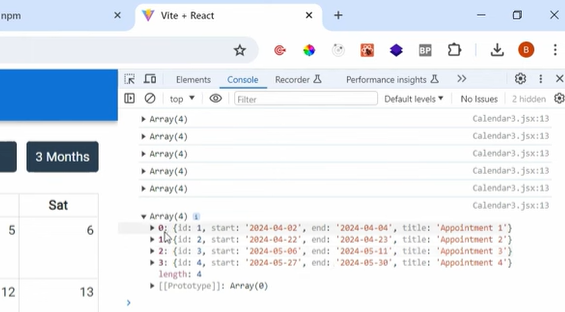
export default Calendar3In our GetData constant we did a console.log() so we can see the data when we start our frontend server. When I start the server and go the console I see this:
Displaying the Data in the FullCalendar
We now need to make sure that we can pass those events to our Calendar. We first change our MyCalendar3 file, where we add a parameter called MyEvents, and then state that the events parameter in our FullCalendar function is equal to that.
import {React} from 'react'
import FullCalendar from '@fullcalendar/react'
import dayGridPlugin from '@fullcalendar/daygrid'
import timeGridPlugin from '@fullcalendar/timegrid'
import listPlugin from '@fullcalendar/list'
import multiMonthPlugin from '@fullcalendar/multimonth'

const MyCalendar3 = ({myEvents}) => {

  return (
    <FullCalendar
        plugins={[ dayGridPlugin, timeGridPlugin, listPlugin,multiMonthPlugin ]}
        initialView="dayGridMonth"
        events={myEvents}

        views = {{
           multiMonth3:{
              type: 'multiMonth',
              duration: {months: 3},
              titleFormat: {month: 'short', year: 'numeric'},
              columnHeaderFormat: {weekday:'short'},
              buttonText: "3 Months"
           }
        }}

        headerToolbar = {{
          left: 'prev,next' ,
          center: 'title',
          right: 'dayGridMonth, timeGridWeek, listDay, multiMonth3'
        }}
    />
  )
}

export default MyCalendar3
We can then need to add a the parameter to our MyCalendar3 block in our Calendar3.jsx page. There we state that MyEvents will be equal to the events constant in our Calendar3.jsx file.
import {React, useEffect, useState} from 'react'
import MyCalendar3 from './calendars/MyCalendar3'
import AxiosInstance from './AxiosInstance'

const Calendar3 = () => {

  const [events, setEvents] = useState()

  const GetData = () => {
    AxiosInstance.get(`appointments/`).then((res) =>{
      setEvents(res.data)
      console.log(res.data)
    })

  }

  useEffect(() =>{
    GetData();
  },[] )

  return (
    <div>
       <MyCalendar3
        myEvents={events}
       />
    </div>
  )
}

export default Calendar3
With these steps completed, we should now see the appointment data from our Django database displayed in the React JS FullCalendar.
Next steps…
In this blog post, we’ve covered the entire process of integrating Django database data with a React JS FullCalendar. We started by setting up the backend, created a database model, enabled the backend to send data to the frontend, and then fetched and displayed the data in the frontend. This comprehensive approach ensures that your calendar application can seamlessly integrate with your Django backend and provide a rich, data-driven experience for your users.
In the next blogpost we will see how we can give different events different colors!