


In this brand new tutorial series we are deploying a full stack web application using Python Django in the Backend and React JS in the Frontend. This series is split in 6 parts:
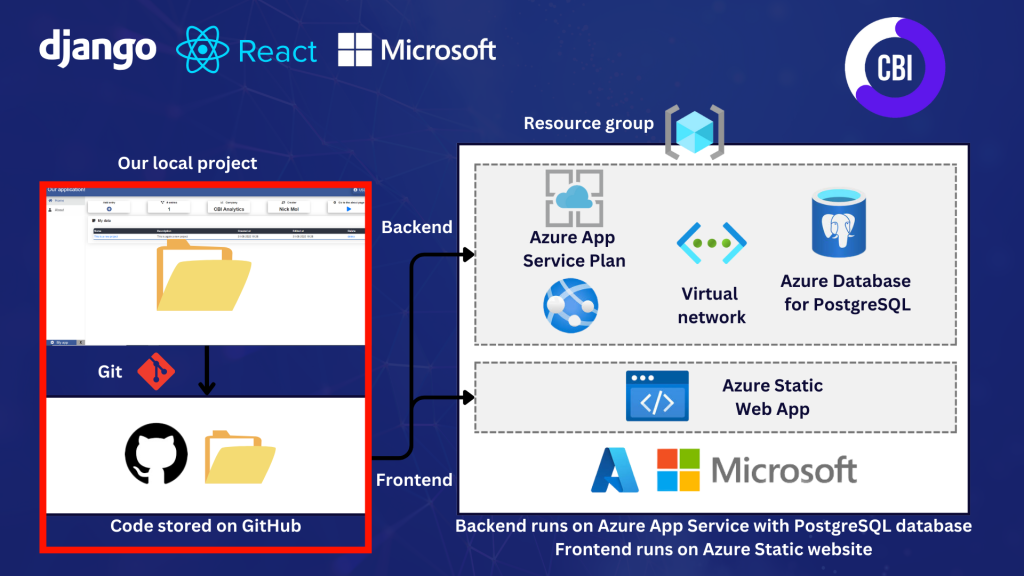
In todays post we push our GitHub using Git The full project code is available on GitHub. You can find a link to the Youtube video on the bottom of the post.
What are we going to do?
We will push our code to GitHub using Git through 5 steps:
- Discuss options for deployment.
- Initialize Git in our local code repository.
- Creating a GitHub repository.
- Pushing our code to GitHub.
- Test and process updates to the code.
To follow along you need to install Git on your computer, and create a GitHub account (which is free).
Options for deployment
For your deployment you have two options:
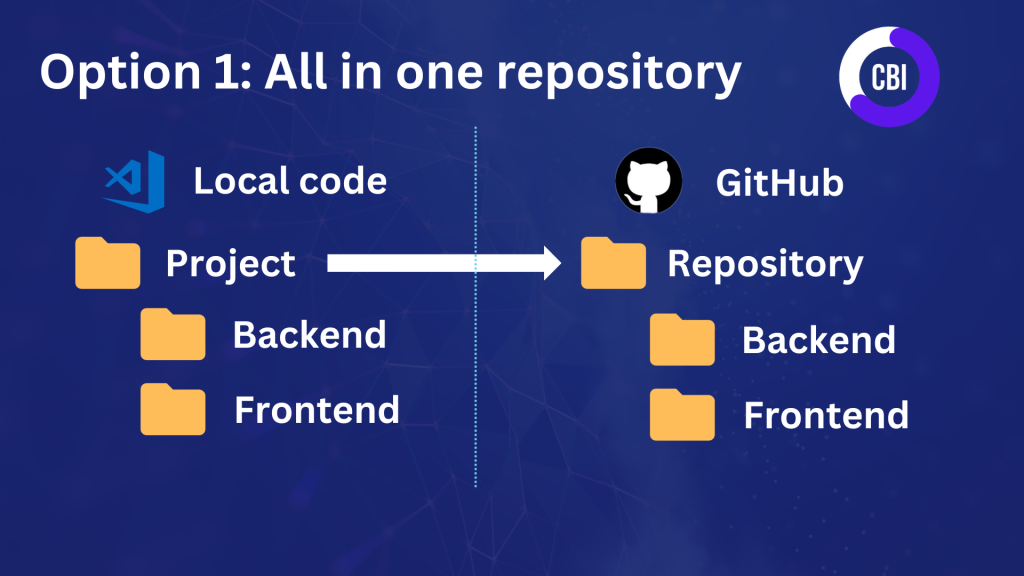
Option 1: Put our backend and frontend in one GitHub repository. This means that every time we commit, both deployments of backend and frontend are redeployed.
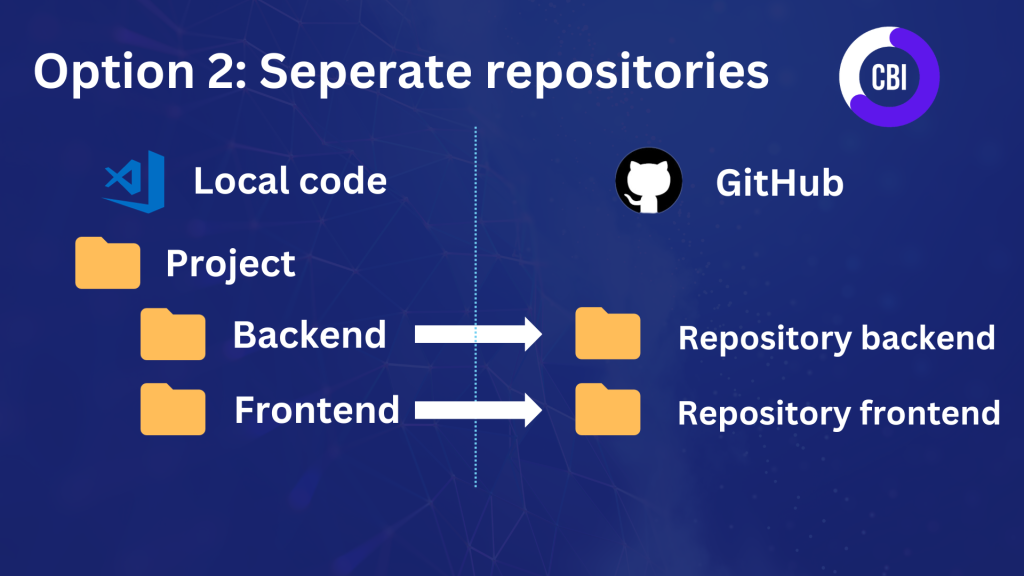
Option 2: Backend and frontend in seperate repositories. Prevents deployment of both frontend or backend when only one is changed. Does mean that you need to create two GitHub repositores and constantly need to commit twice if you make change in backend and frontend.
We go for option 1, since it is a very small application. If different teams or people are developing the backend and frontend I would recommend to split the repositories.
Initialize Git in local code repository
Open a new terminal and make sure that you are in the highest level of your project. We start with a few commands for configuration.
Set the user name:
git config --global user.name "Your Name"Set the email adress:
git config --global user.email "your@email.com"Do two commands with some basic configuration.
git config --global push.default matching
git config --global alias.co checkout
Now we can initiate Git!
git initYou will see two changes on your computer. In your project folder in the file explorer you will see a new folder called .git. All of the files will be green with a U, that means that you have Untracked files.

Now we need to add the untracked files to our Git repository. We do that with two commands in the terminal.
Git add .
Git add -am 'initial commit'
Git add selects all files. Git commit takes those files and adds them, and adds a message of initial commit. The message will be visible as a comment on GitHub.
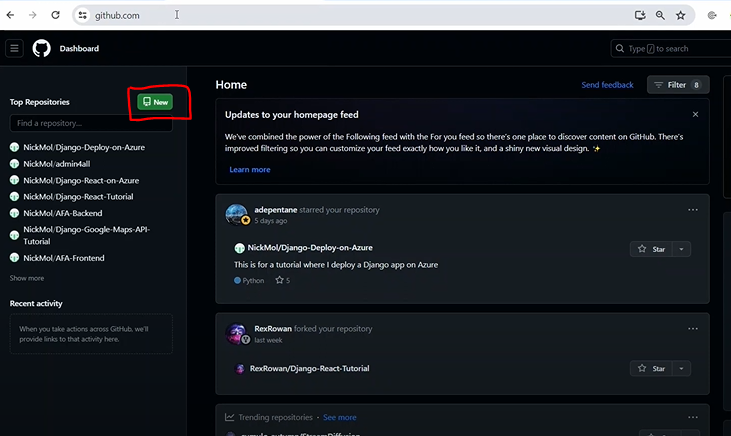
Creating a GitHub repository
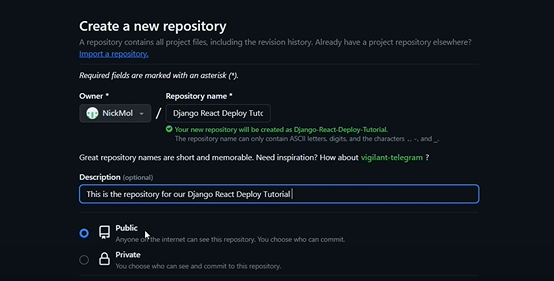
Now we create the repository where we want to store the code. Log in on the GitHub site, and click on new repository.
To create a new repository we fill in a repository name (Django React Deploy Tutorial in my case). We add a description and keep the repository on public.
After filling these fields we click on Create repository.
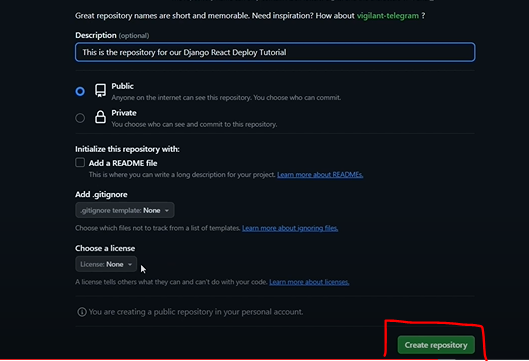
My code is meant to be viewed by others. If you don’t want your code to be publically available by others, set the repository on Private!
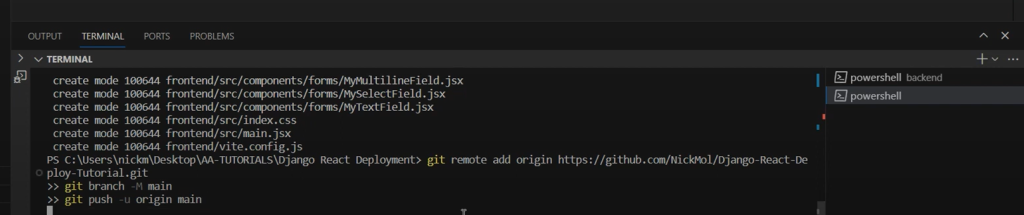
Pushing our code to GitHub
After the creation of our GitHub repository we get the option to push an existing repository from the command line.
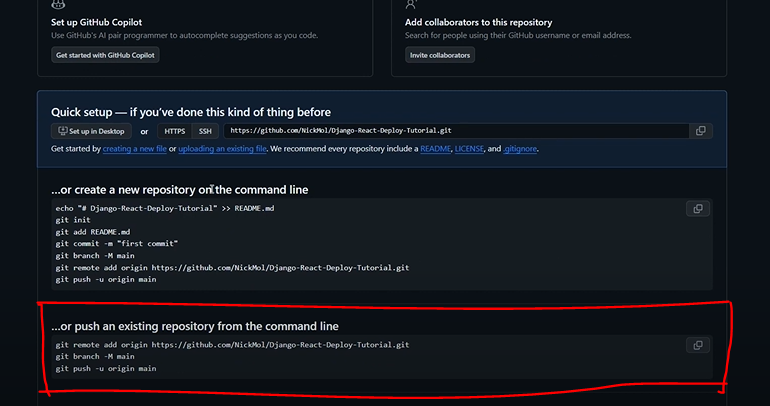
Copy that codeblock and run it in your terminal.
If you now refresh the GitHub repository page you will see your code.

Processing updates to GitHub
When you make updates to your code you want to republish the latest version to GitHub. You can do that with three commands.
Adding all files to Git :
git add .Commit the changes and add a message:
git commit -am "your message"Push the changes to GitHub:
git pushYou will see the updates in the GitHub repository. In this case I added the message: Change to about page.

In your local project updated files will be marked with a M in orange (modified). New files will be marked in green with a U (untracked).


