In this tutorial I will show you how you can deploy a Django & React application on Microsoft Azure. Over the course of several posts we will go through the following steps:
- #1: Architecture of Django & React deployment
- #2: Make changes to our source code
- #3: Push our code to GitHub with Git
- #4: Deploy Django code to Azure
- #5: Deploy React code to Azure
In this post we will explain the pre-requisites for this tutorial, show the structure of the application and take a look at the architecture and costs for the deployment on Microsoft Azure.
The full project code is available on GitHub
Prerequisites & tools
To deploy your app on Azure you will need an Azure account, which you can setup for free (you will need to provide your credit card details). You will also need a GitHub account which is easy to setup for free.
During this deployment I am using the following tools:
- Code editor: Visual Studio Code
- Python: 3.8.20
- Django: 4.2
- React: 18.2.0
Our application
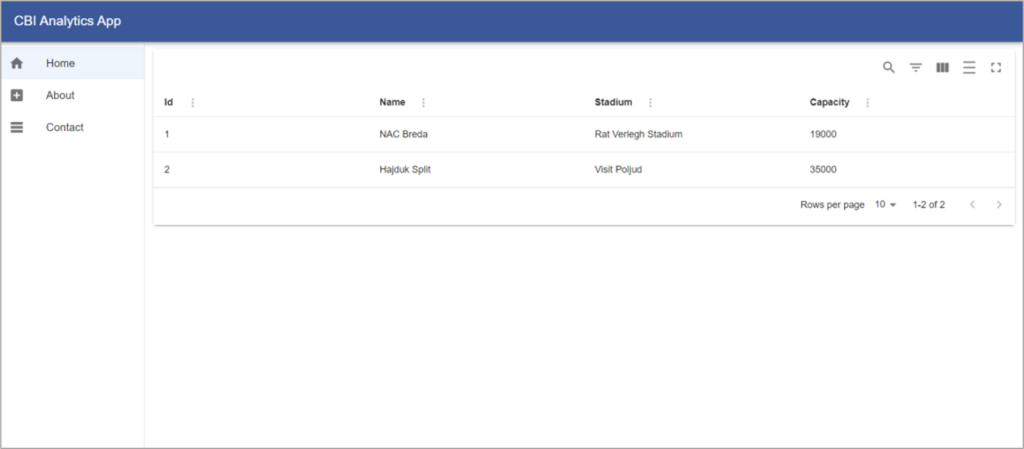
The Django React application that we will be deploying is a basic application which shows data in a table from some football clubs. It also has a navigation menu showing some different pages.
The app we will be deploying is very basic, since the main objective is to show how to get a Django and React app to work on Azure.
My project is stored in a folder called DJANGO_REACT. Inside this folder I have seperate subfolders for my Django code (BACKEND) and my React JS code (FRONTEND).
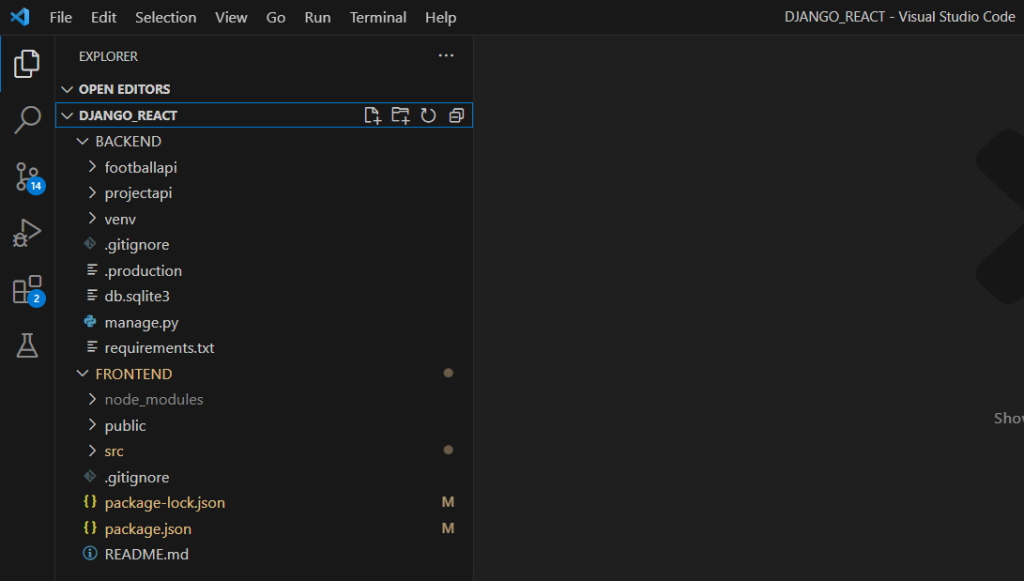
In the Django code you will see that I have created a Virtual Environment in my Django code to store the packages used in my project.
A virtual environment stores the packages used in a project. You can only install one version on your system, but different projects across different times will perhaps use different versions of a package. A virtual environment enables you to use a specific version of a package in your project.
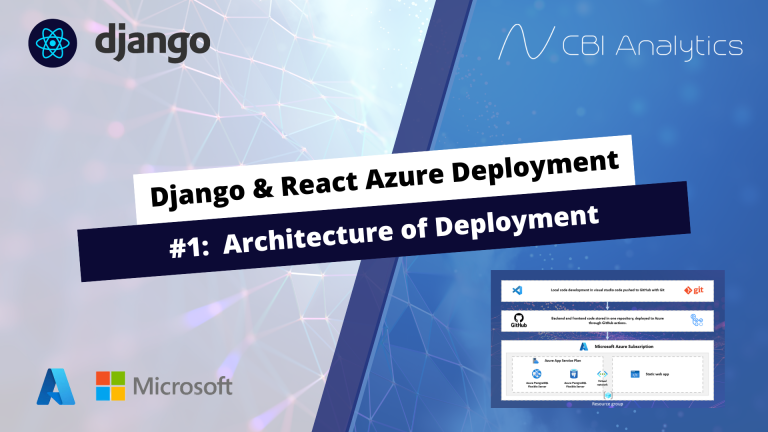
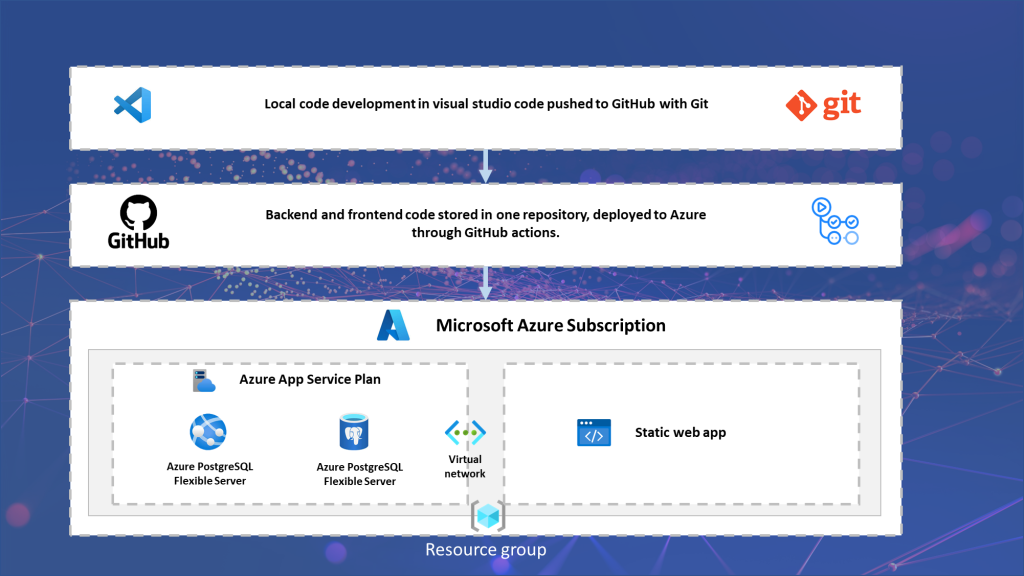
Architecture for Azure Deployment
The architecture of the total deployment is displayed below. On my local computer I have developed the app on Visual Studio code. I use Git to push my code to GitHub repository. From here we can push the code to Azure.
In this instance I have stored my Backend and Frontend code in 1 repository. You can also split it in two seperate repositories if required.
On Azure we will create a resource group which functions as a container for all the services we will deploy. For the django backend we use the Web + Database service of Azure App Service Plan. This automatically creates a PostgreSQL database (flexible server) and app service for our python code.
Azure automatically creates a virtual network and privatelink for our Azure App Service Plan which complies with best practices for security.
For our Frontend code we will use a Static Web App. This can serve our React JS code which the user will see in the browser.
Costs of this deployment
An important consideration for your deployment will be costs. In this setup I have selected the cheapest option for each service. The total monthly costs for this deployment are 49,26 Euro.
This is relatively high if you compare it to the base packages of pythonanywhere, Heroku, or others. However, the lowest tier for Azure already provides you with quite some services and power Therefore, it is hard to compare. Also hugely dependent on your use case.
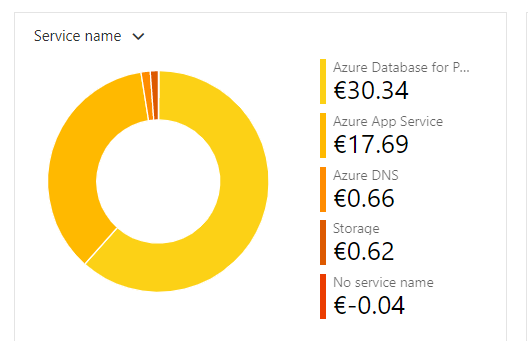
The static web app is not included in this overview. I picked the free tier so no costs are associated with this service.
Let’s get started!
Now that we have explained the app and the architecture we will continue to deploy our application. Next step: Make changes to our source code.