

In this tutorial series I show how you can use the Google Maps API in your Django application. This API can be used for geocoding, reverse geocoding, distance calculations, and displaying maps in your application.
In this post we will use the Google Maps Geocoding API to convert location info such as an adress, zipcode, and city into coordinates (latitude and longitude). The video below shows the end result!
The full code is available on my github.
Before you can use the Google Maps API you need the following things:
- Enable the Google Maps API on the Google Cloud Platform.
- Specify the credentials of the API in the settings.py file of your Django app.
Both of these steps have been covered in the previous blogpost.

In this post I will show you:
- My model structure and data
- Installing the Google Maps Python Client
- Google API key in Settings and Views.py
- Creating urls and views
- Calculating the Geocode
- Extracting the latitude and longitude based on model data
Model structure and data
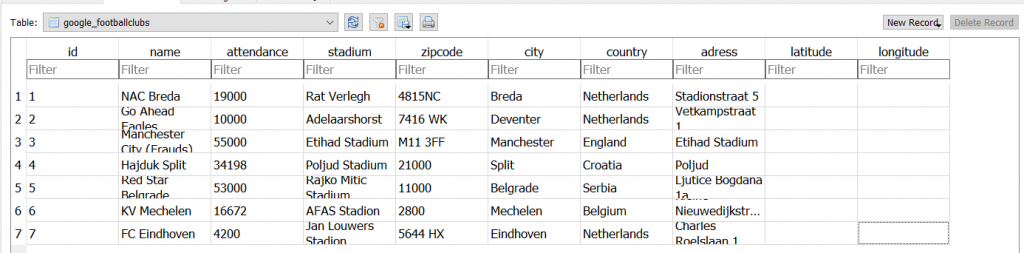
In my application I have a model that collects data from football clubs. I gather the adress, city, and country from the club, and I want to translate that to a latitude and longitude. My models.py file looks like this:
models.py
class FootballClubs(models.Model):
    name = models.CharField(max_length=200, unique=True)
    attendance = models.IntegerField(blank=True, null=True)
    stadium = models.CharField(max_length=200,blank=True, null=True)
    zipcode = models.CharField(max_length=200,blank=True, null=True)
    city = models.CharField(max_length=200,blank=True, null=True)
    country = models.CharField(max_length=200,blank=True, null=True)
    adress = models.CharField(max_length=200,blank=True, null=True)
    latitude = models.CharField(max_length=200,blank=True, null=True)
    longitude = models.CharField(max_length=200,blank=True, null=True)


    def __str__(self):
        return self.name
I have added some data in the database. Based on the adress information we will fill in the latitude and longitude.
Installing the Google Maps Python Client
For this tutorial we use Googles Python client. This client makes geocoding and other task incredibly easy. Go top your terminal and install the following package.
(venv) PS C:\Users\nickm\Desktop\GOOGLE MAPS\google_project
pip install googlemaps
Google API key in Settings and Views.py
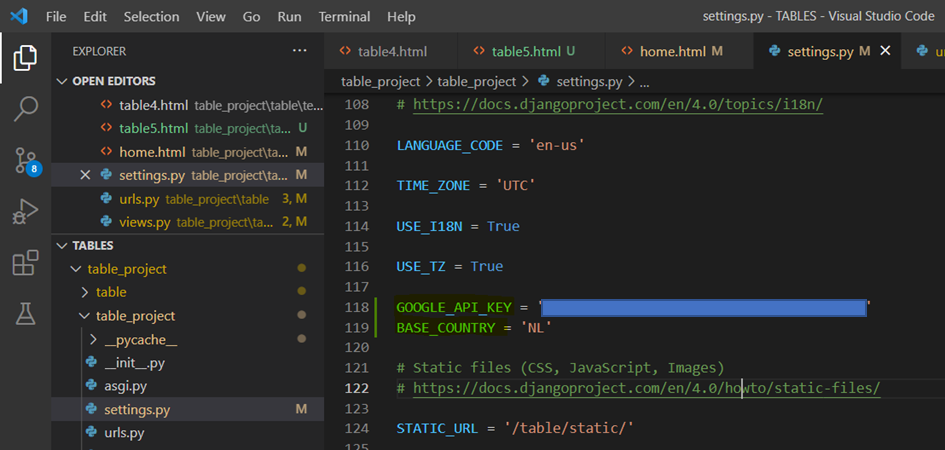
To use the features from the package, we first need to make sure that we specify our API key in our settings.py. We created this API in our previous tutorial. In addition, we set the base country to NL, since this is my home country.
Don’t worry, this does not affect the performance whatsoever. I have foreign adresses and everything works perfectly!
On top of our views.py file we import the google maps package we just installed as well as json. This will come in handy later. We also need to import our settings, since we will need the GOOGLE_API_KEY to make requests.
Views.py
import googlemaps
import json
from django.conf import settings
Creating urls and views
Let’s create a url, view , and template to display a basic example of what we are going to do with out model data. First create a url named geocode.
urls.py
from .views import *
from django.urls import path, include
from google import views as view

urlpatterns = [
   path('',view.home, name="home"),
   path('geocode',view.geocode, name="geocode"),
]
In our views.py, we create an empty view for geocode.
views.py
def geocode(request):

    context = {

    }
    return render(request, 'google/geocode.html',context)
In our templates folder we create a html file named geocode.html.
geocode.html

{% extends 'google/base.html' %}
{% block content %}

<div class="pageholder">
    <div class="titleholder">
        <div class="title"><i class="fas fa-compass mr-2"></i> Google       Maps #1: Geocoding </div>
    </div>

    <div class="linkholder">

    </div>


</div>
{% endblock %}
Basic geocode example
In our geocode view we are going to take the basic example from the documentation, and check what happens if we put this in our view. We use the following code in our view:
views.py

def geocode(request):
    gmaps = googlemaps.Client(key= settings.GOOGLE_API_KEY)
    result = gmaps.geocode(str('Stadionstraat 5, 4815 NC Breda'))

    context = {
        'result':result,
    }
return render(request, 'google/geocode.html',context)- gmaps : Makes a request to the google maps client, and specifies our api key from our settings. This is an authorization step. It is critical that you do not share your api key with anyone!
- result: uses the google client through gmaps, and requests to geocode the adress of the stadium of NAC Breda.
We can now view this in our html file by adding the following code.
geocode.html
...
<div class="linkholder">
        {{result}}
</div>
...
The result is a very long string with all kinds of nested data. In my browser it looks unreadable.

Luckily, Google has provided us with a more readible example, which shows exactly what information is in the result.
{
   "results" : [
      {
         "address_components" : [
            {
               "long_name" : "1600",
               "short_name" : "1600",
               "types" : [ "street_number" ]
            },
            {
               "long_name" : "Amphitheatre Parkway",
               "short_name" : "Amphitheatre Pkwy",
               "types" : [ "route" ]
            },
            {
               "long_name" : "Mountain View",
               "short_name" : "Mountain View",
               "types" : [ "locality", "political" ]
            },
            {
               "long_name" : "Santa Clara County",
               "short_name" : "Santa Clara County",
               "types" : [ "administrative_area_level_2", "political" ]
            },
            {
               "long_name" : "California",
               "short_name" : "CA",
               "types" : [ "administrative_area_level_1", "political" ]
            },
            {
               "long_name" : "United States",
               "short_name" : "US",
               "types" : [ "country", "political" ]
            },
            {
               "long_name" : "94043",
               "short_name" : "94043",
               "types" : [ "postal_code" ]
            }
         ],
         "formatted_address" : "1600 Amphitheatre Pkwy, Mountain View, CA 94043, USA",
         "geometry" : {
            "location" : {
               "lat" : 37.4267861,
               "lng" : -122.0806032
            },
            "location_type" : "ROOFTOP",
            "viewport" : {
               "northeast" : {
                  "lat" : 37.4281350802915,
                  "lng" : -122.0792542197085
               },
               "southwest" : {
                  "lat" : 37.4254371197085,
                  "lng" : -122.0819521802915
               }
            }
         },
         "place_id" : "ChIJtYuu0V25j4ARwu5e4wwRYgE",
         "plus_code" : {
            "compound_code" : "CWC8+R3 Mountain View, California, United States",
            "global_code" : "849VCWC8+R3"
         },
         "types" : [ "street_address" ]
      }
   ],
   "status" : "OK"
}
So, how do we get access to the coordinates? Well, to do that we need to use json.dumps and json.loads. Next we can move into the hierarchy and select the components that we need. Change the code of your view to this:
views.py

def geocode(request):
    gmaps = googlemaps.Client(key= settings.GOOGLE_API_KEY)
    result = json.dumps(gmaps.geocode(str('Stadionstraat 5, 4815 NC Breda')))
    result2 = json.loads(result)
    adressComponents = result2[0]['geometry']

    context = {
        'result':result,
        'adressComponents':adressComponents
    }
return render(request, 'google/geocode.html',context)- json.dumps: Will convert our python response into a string. This is needed
- json.loads: Takes a string and returns a json object. This object we can query!
- result: We can query the result 2, so we mention that we want to look into the first tree by specifying the 0, and then simply mention the name of the level we want to see.
If we print the adressComponent in our template, we get the following output. The bottom lines of code display only the data from within geometry!


So, if we want the latitude and longitude, we can simply request these in our view like below. We need to drill down into geometry, location, and then lat/lng.
views.py

def geocode(request):
    gmaps = googlemaps.Client(key= settings.GOOGLE_API_KEY)
    result = json.dumps(gmaps.geocode(str('Stadionstraat 5, 4815 NC Breda')))
    result2 = json.loads(result)
    latitude = result2[0]['geometry']['location']['lat']
    longitude = result2[0]['geometry']['location']['lng']
    context = {
        'result':result,
        'latitude':latitude,
        'longitude':longitude
    }
    return render(request, 'google/geocode.html',context)
And print them in our template like this:
geocode.html

....
     <div class="linkholder">
        Our latitude: {{latitude}}
    </div>

    <div class="linkholder">
        Our longitude: {{longitude}}
    </div>
...
This will return our required data!

Extracting the latitude and longitude of model data
This is nice, but I want to calculate the latitude and longitude with a click of a button from my model data, from different countries. To do this, I first make sure that my urls.py file has the following urls.
urls.py
from .views import *
from django.urls import path, include
from google import views as view

urlpatterns = [
   path('',view.home, name="home"),
   path('geocode',view.geocode, name="geocode"),
   path('geocode/club/<int:pk>',view.geocode_club, name="geocode_club"),
]
In our geocode view, we query our footballclubs data.
views.py
def geocode(request):
    clubs = FootballClubs.objects.all()
    context = {
        'clubs':clubs,
    }
    return render(request, 'google/geocode.html',context)
In our geocode.html we change the lat and long into a table with all of our clubs, the last column will have a link that triggers the geocode_club view with the id of a club. This view will geocode and store the lat and long in the database. This will follow later.
geocode.html
...
<table id="ourtable3" class="myTable2">
            <tr>
                <th> Club</th>
                <th> Adress</th>
                <th> Zipcode</th>
                <th> City</th>
                <th> Country</th>
                <th> Latitude</th>
                <th> Longitude</th>
                <th> Geocode</th>
            </tr>

            {%for a in clubs%}
            <tr>
                <td> {{a.name}}</td>
                <td> {{a.adress}}</td>
                <td> {{a.zipcode}}</td>
                <td> {{a.city}}</td>
                <td> {{a.country}}</td>
                <td> {{a.latitude|default_if_none:"Geocode to see latitude"}}</td>
                <td> {{a.longitude|default_if_none:"Geocode to see longitude"}}</td>
                <td>
                    {%if a.latitude and a.longitude != None%}
                        Location info is already geocoded!
                    {%else%}
                        <a href="{%url 'geocode_club' a.id%}">Geocode location info! </a>
                    {%endif%}
                </td>
            </tr>
            {%endfor%}
        </table>
...
In my app the output looks like this (I entered the data myself, CSS can be found on my Github).

The last thing we need to do is creating our geocode_club view, which is triggered by the link in the geocode column of the table.
views.py
def geocode_club(request,pk):
    club = FootballClubs.objects.get(id=pk)
    # check whether we have the data in the database that we need
    if club.adress and club.country and club.zipcode and club.city != None:
        # creating string of existing location data in database
        adress_string = str(club.adress)+", "+str(club.zipcode)+", "+str(club.city) +", "+str(club.country)

        # geocode the string
        gmaps = googlemaps.Client(key= settings.GOOGLE_API_KEY)
        intermediate = json.dumps(gmaps.geocode(str(adress_string)))
        intermediate2 = json.loads(intermediate)
        latitude = intermediate2[0]['geometry']['location']['lat']
        longitude = intermediate2[0]['geometry']['location']['lng']

        # save the lat and long in our database
        club.latitude = latitude
        club.longitude = longitude
        club.save()
        return redirect('geocode')
    else:
        return redirect('geocode')
return render(request, 'google/empty.html',context)- club: Gets the club we want to geocode for based on the id we sent with the request.
- if statement: Checks if the country, zipcode and city are present. We need these to calculate our geocode.
- adress_string : Takes the adress, zipcode, country, and city and adds them together into one big string. This is the input for our Google Maps request.
- The google magic: We geocode our adress_string, use json.dumps and json.loads so we are able to query the data, and then extract the latitude and longitude from the long string.
- Store the data: We store the latitude and longitude in our database, using the club we specified in the first line of the view. We redirect to our geocode page to check out the results!
Now you can check the results in your browser!
And we have achieved our goal!
This was a very long post, but hopefully you now have a better understanding of the geocoding API from Google.
In our next blogposts we will focus on calculating the distance between two locations, and visualizing the journey from point to point on a map!


