


In this tutorial series we will deploy our Django application on Microsoft Azure. There are many platforms suitable for deployment of your applications, such as Amazon, Heroku, or DigitalOcean. Today we will use the cloud computing platform of Microsoft as our platform for deployment!
We will deploy our app in three stages:
- Today we will push our project code to Github with Git. Githun will serve as our code repository, which will make deployment much easier.
- Next, we need to set up our Azure environment, so it is ready to receive our application.
- Last, we will make some changes to our apps settings, and actually deplot it on Azure.
What are we going to deploy?
In this series of posts we will deploy a very basic application on Azure. The app has a navbar with two navigation items, and enables users to Create, Read, Update, and Delete records. The video below will provide a basic overview of the UI and functionality on my local computer.
The CRUD functionality in the application will enable us to test the database once the app is deployed!
Let’s push our code to Github!
The first step is to push our code to Github. We will do this with the help of Git. Before continuing you will need to do two critical things:
- Install Git. Go to their website and install the version for your operating system.
- Create an account on Github.
We will follow several steps to deploy our code to Github:
- Configure Git in our project
- Adding a .gitignore file
- Save our code in our repository
- Create a SSH key and store in our Github account
- Create our Github Repository and push our code
- Handling updates to our code
Configure Git in our project
We start by configuring Git in our project. Luckily, this is very simple! Go to your command line of your code editor, and enter the following command. Be sure to use your own name:
git config --global user.name "Your Name"Next, we need to tell Git our email adress.
git config --global user.email "your@email.com"After setting our email we use the following two commands to set some additional settings for code pushing.
git config --global push.default matching
git config --global alias.co checkout
The final command will initialize Git in our project.
git initWe have now completed our first step! You will immediatly notice the difference. In my case (using Visual Studio Code) all of the files in my project are green and display a U. This means that all of this files are untracked. Essentially, they are all new files for Git which have not been added to the repository.
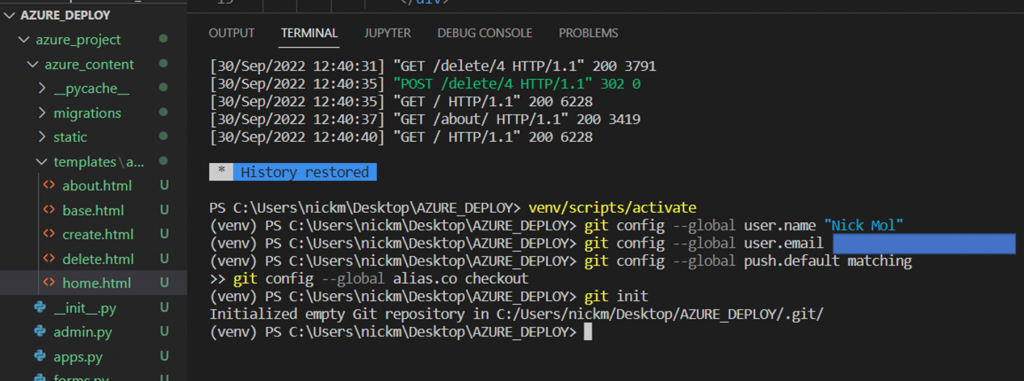
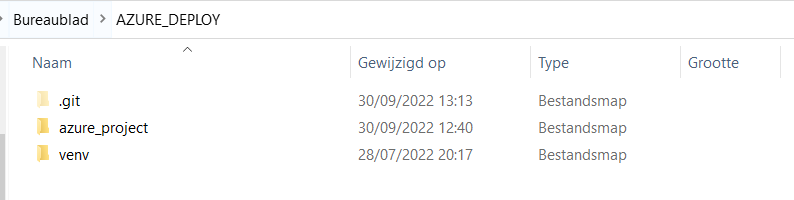
If you go to your project in your file explorer, you will notice a second difference. An additional hidden folder has been created in your project called git.
Adding a .gitignore file
Before we save our code to the repository, we want to exclude some files from the upload. Why? Our project contains some files that are very relevant for working in our local environment, but not for deployment.
We exclude file by adding a .gitignore file to the project. Create this file in the highest level of your project and paste in the code below.
# Byte-compiled / optimized / DLL files
__pycache__/
*.py[cod]
*$py.class


# Distribution / packaging
.Python
build/
develop-eggs/
dist/
downloads/
eggs/
.eggs/
lib/
lib64/
parts/
sdist/
var/
wheels/
pip-wheel-metadata/
share/python-wheels/
*.egg-info/
.installed.cfg
*.egg
MANIFEST

# PyInstaller
#  Usually these files are written by a python script from a template
#  before PyInstaller builds the exe, so as to inject date/other infos into it.
*.manifest
*.spec

# Installer logs
pip-log.txt
pip-delete-this-directory.txt

# Unit test / coverage reports
htmlcov/
.tox/
.nox/
.coverage
.coverage.*
.cache
nosetests.xml
coverage.xml
*.cover
*.py,cover
.hypothesis/
.pytest_cache/

# Django stuff:
*.log
local_settings.py
db.sqlite3
db.sqlite3-journal

# PEP 582; used by e.g. github.com/David-OConnor/pyflow
__pypackages__/

# Environments
.env
.venv
env/
venv/
ENV/
env.bak/
venv.bak/
The content of the file comes from a Microsoft example. Not all entries will be required, but better safe then sorry!
Example of the relevance of the .gitignore file is excluding our sqlite database in the upload. This database will only be used in our local development since we will shift to PostgreSQL in production.
Save our code in our repository
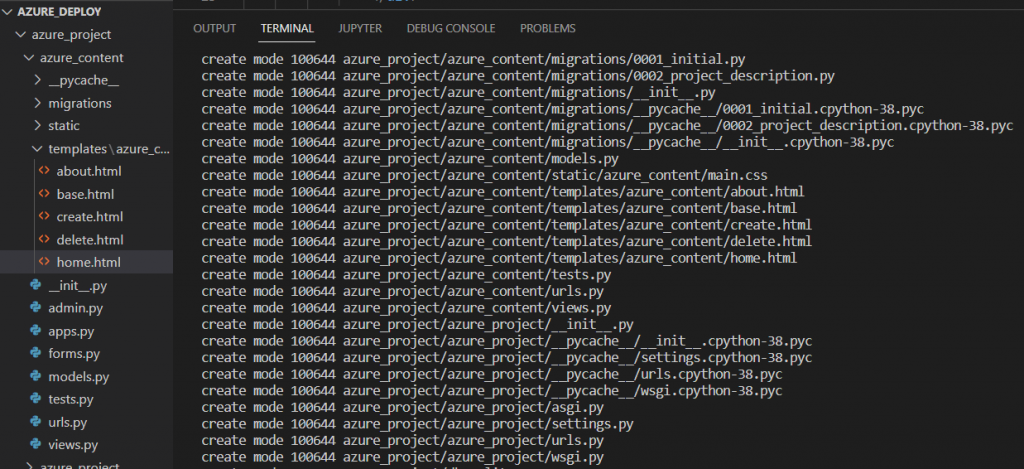
As mentioned before, all of our files have the status untracked. Let’s change this by storing our changed files in the Git repository. We start by adding all of our files (that’s what the dot means) to our repository.
git add .Thereafter, we actually commit the files, and we add a message so we know what happened in the commit. In this instance we want to show that this was our first commit.
git commit -am 'first commit'This message can be whatever you want it to be, and will be visible later on in our Github account. This makes it easy to track changes over time.
You will have noticed that all of the files have been added to our git folder.
Create a SSH key and store in our Github account
By pushing our code from our local computer to Github with Git, we must have some sort of authentication. We need to prove to Githun that we have the rights to push our content to the account.
One way of doing this is by specifying your username and token every time you make a change. However, this is cumbersome, and it would be easier to use an SSH key.
What is this SSH key? Basically, it is a unique token which will serve as out authentication mechanism. We store the key on our computer, and enter it on Github. Every time we commit a change github will match the key in the account with the key on the computer, taking care of authentication.
Let’s generate the key: Go to your terminal and type in the following code.
mkdir ~/.sshBeware: you need to deactivate your virtual environment if you are using one.
The terminal will ask you to set a password to protect the ssh file. I do not use a password, so I clicked enter in password and enter password again. Feel free to add a password if you like.
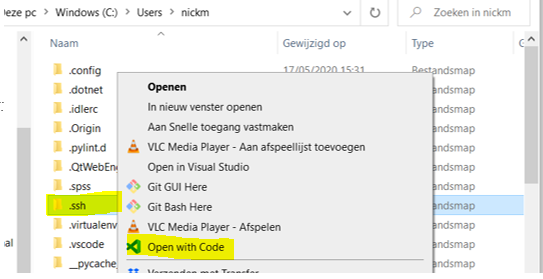
A ssh file is now created in a new directory. Now navigate into your .ssh folder, and type in the following command to get your full ssh key.
PS C:\Users\nickm\.ssh>

cat id_rsa.pub
Beware, you cannot just open the file in the ssh folder and copy the string on your clipboard. The command above will also include a ssh-rsa text, and specify the laptop and laptopname with your key. This is essential, because the key alone is not enough for Github.
Tip: you can easily navigate to the ssh folder in your code editor by right clicking the folder and selecting open with code.
We need to store the generated key in Github. Login to your Github account, and go to settings. Now click on the menu item SSH keys an GPG keys.
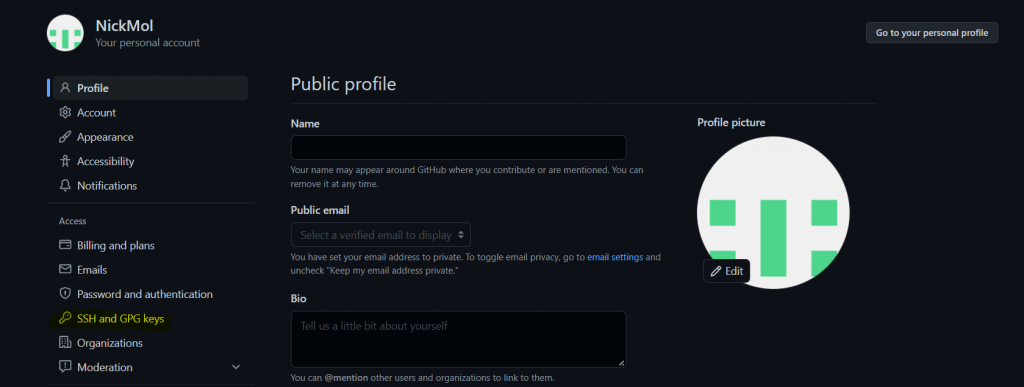
Now add the SSH code that you received in the following step, and save the entry. You do not need to add a title. You will now see your key in the SSH and GPG keys page.
Create our Github Repository and push our code
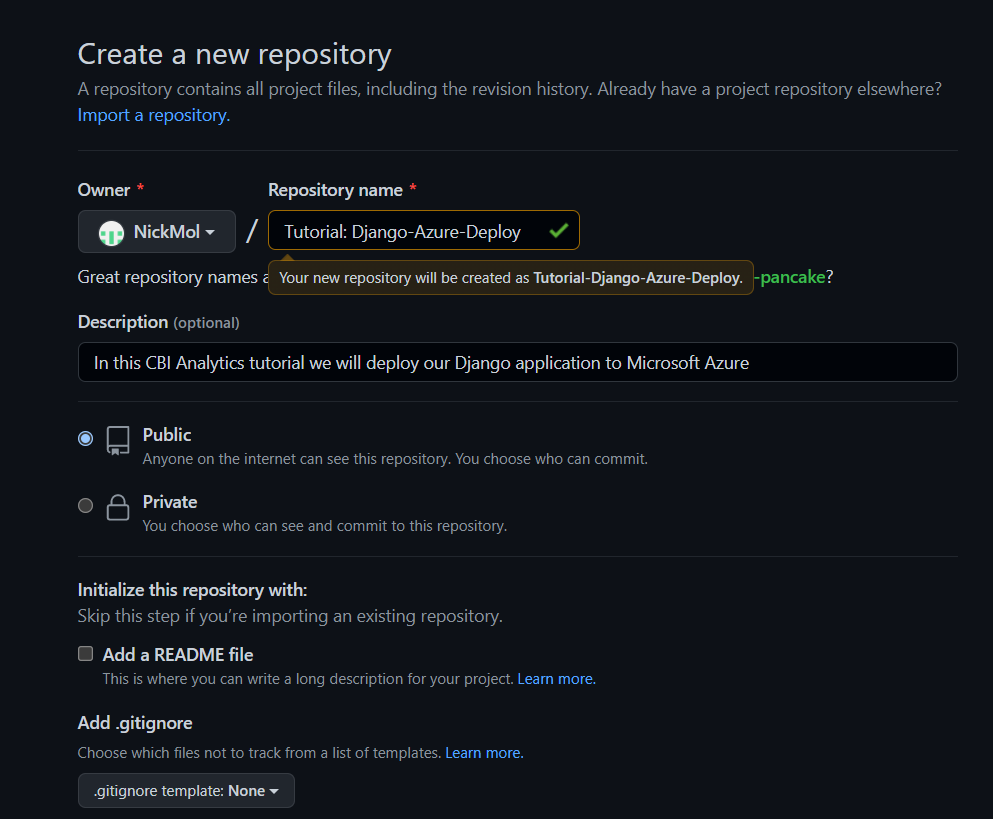
We have stored our code in the Git repository, and created the link between our computer and Github. So now it is time to create a Github repository, so we can actually push our code to our account!
Within your account click on repositories and then new. We pick a suitable name, and specify a short description. I set the repository on public, since I don’t mind others viewing my project. We click on create repository.
Beware: I strongly advise to pick private it you are building commercial applications or don’t want to expose your code to outsiders.
Github now provides us with the instructions what to do next. We want to push an existing repository from our command line so we need to execute the commands lined in red.
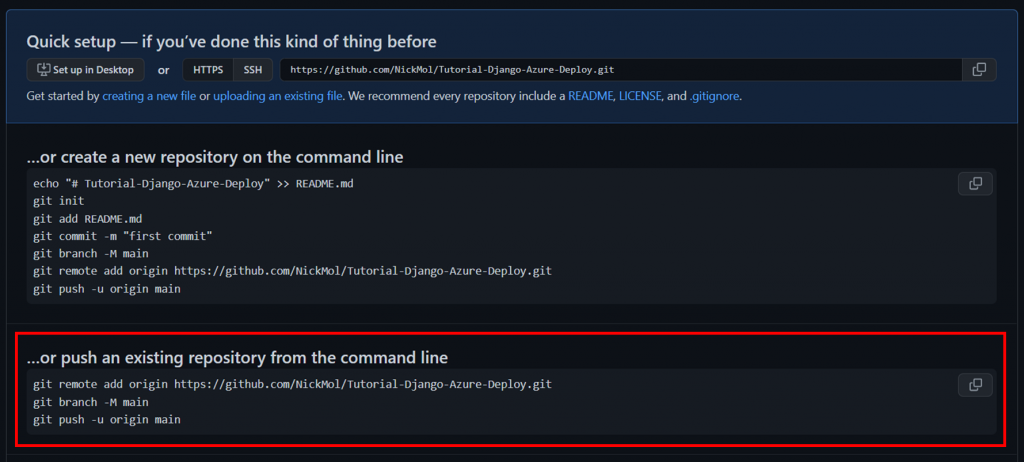
This means that we go back to our command line, and copy in the code from Github. In my case:
git remote add origin https://github.com/NickMol/Tutorial-Django-Azure-Deploy.git
git branch -M main
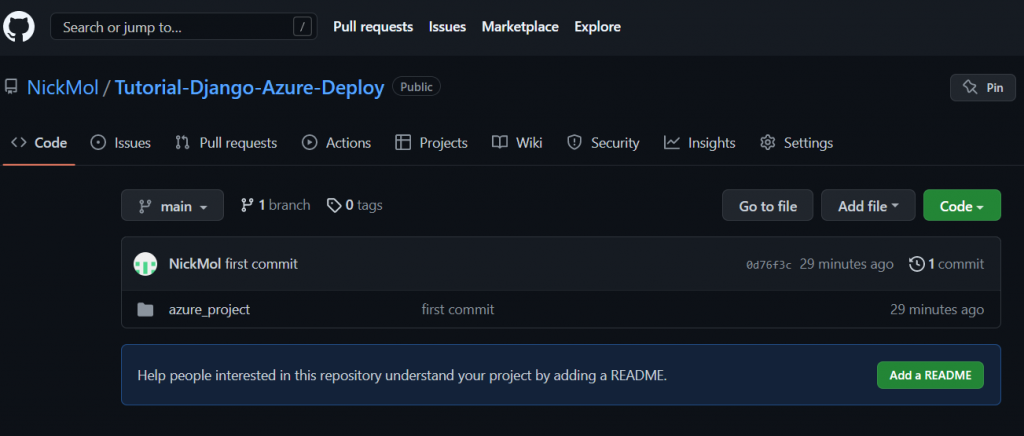
git push -u origin mainIf we refresh our Github page we will see our code including the message first commit from earlier!
Handling updates to our code
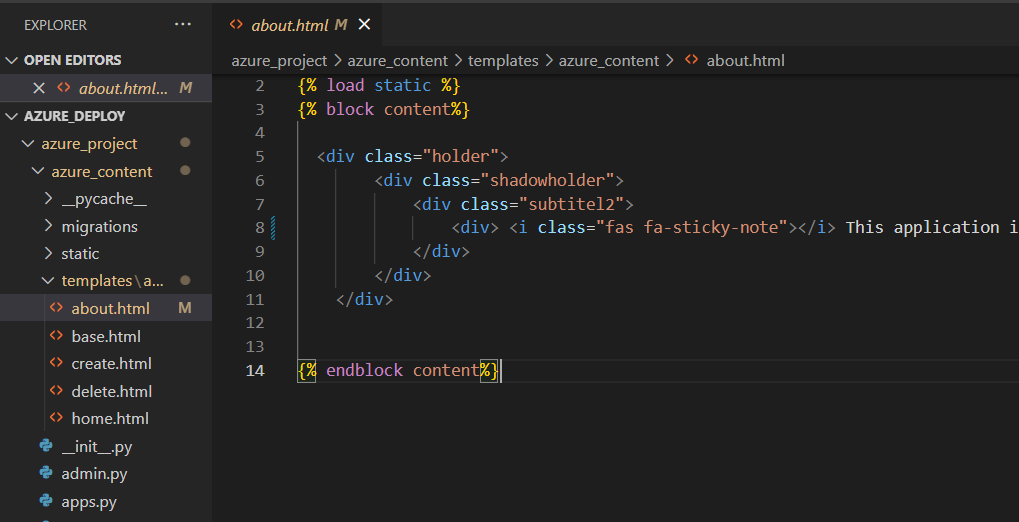
Of course, our code will be updated as we go along. So to illustrate this let’s make a small change and show how to add this to our Github repository.
I made a small change to our about.html file. You will immediatly see that the file is marked in orange with a M. This means that I modified the file, and that this change has not been processed.
To push this change to our Github, we need to execute three commands. We again start with git add, to add all of our changes.
git add . In order to track what changed where, we add a message to our commit statement, saying that this is our second commit.
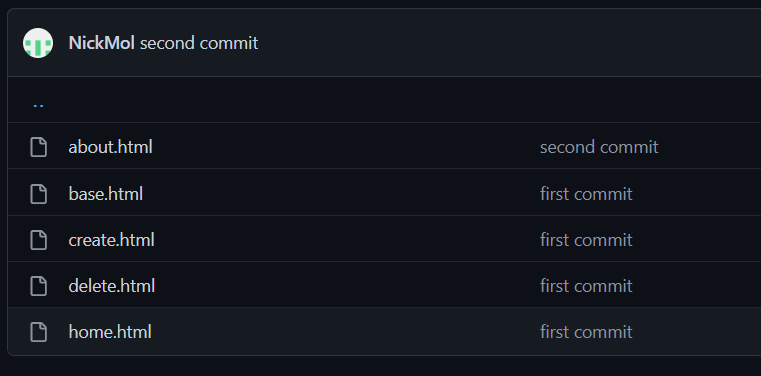
git commit -am 'second commit'The code is pushed to Github through our last command.
git pushIf I look in my repository, I clearly see that I have changed my about page in the second commit.
That is it for now!
We have succesfully pushed our code to Github. This is the first step towards deployment to Azure, or even other platforms. In the next post we will ready our Azure environment for the deployment!


