


In this tutorial series we will deploy our Django application on Microsoft Azure. There are many platforms suitable for deployment of your applications, such as Amazon, Heroku, or DigitalOcean. Today we will use the cloud computing platform of Microsoft as our platform for deployment!
We will deploy our app in three stages:
- Previously we pushed our project code to Github with Git. Githun will serve as our code repository, which will make deployment much easier.
- Today we set up our Azure environment, so it is ready to receive our application.
- In the next post, we will make some changes to our apps settings, and actually deploy it on Azure.
The source code of our project is available on my Github.
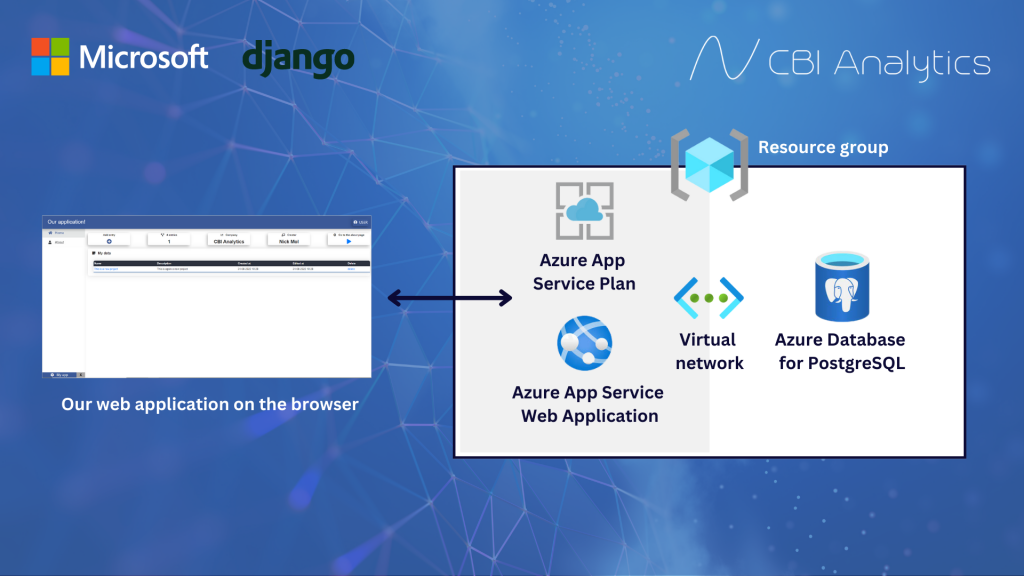
The Azure services we will be using
In this tutorial we will use several Azure services to get our app running on the browser.
- We will create a resource group. A resource group is a container for a bunch of services.
- Azure Database for PostgreSQL is used as our backend. This will be the database where we store all the information.
- Azure App Service Plan will help us with hosting the application. We will specifically use the Web Application Services to get the application going.
- The Virtual network will connect our app to our database. We do not set this up ourselves. Azure will do that for us in the web + database experience.
What do we need before we start
You will need several things to get started.
- An Azure account. You can create one for free here.
- You will need Python 3.7 or higher.
- You will need to install PostgreSQL on your local computer. You can install that here.
Steps for Azure deployment
In this tutorial we will follow several steps for readying our Azure environment.
- Create a resource group
- Creating an Azure App Service
- Creating the Python Web App
- Creating the PostgreSQL database
Since we use Azures web + database experience I will also briefly touch upon the advantages this has opposed to creating componentes seperately.
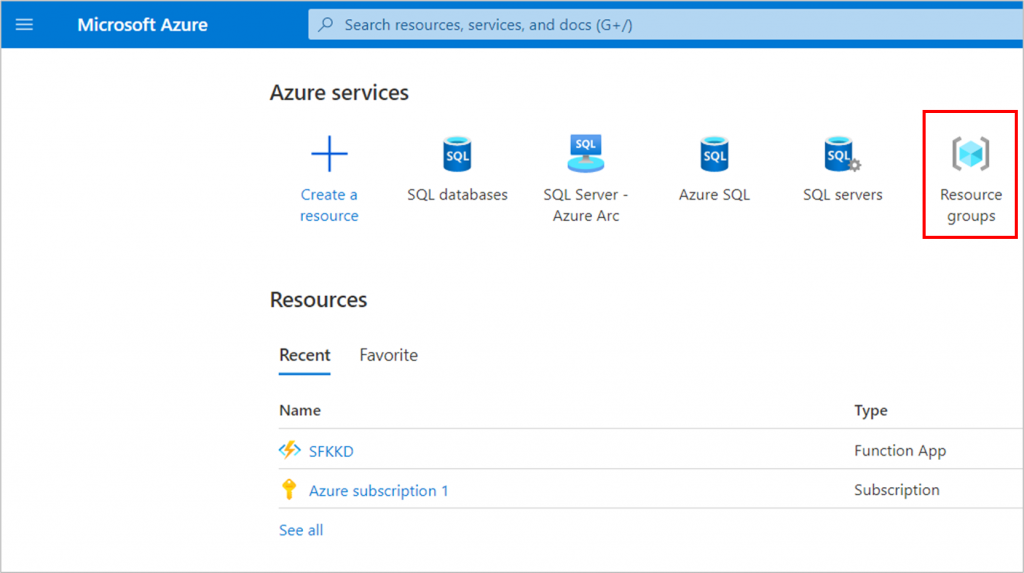
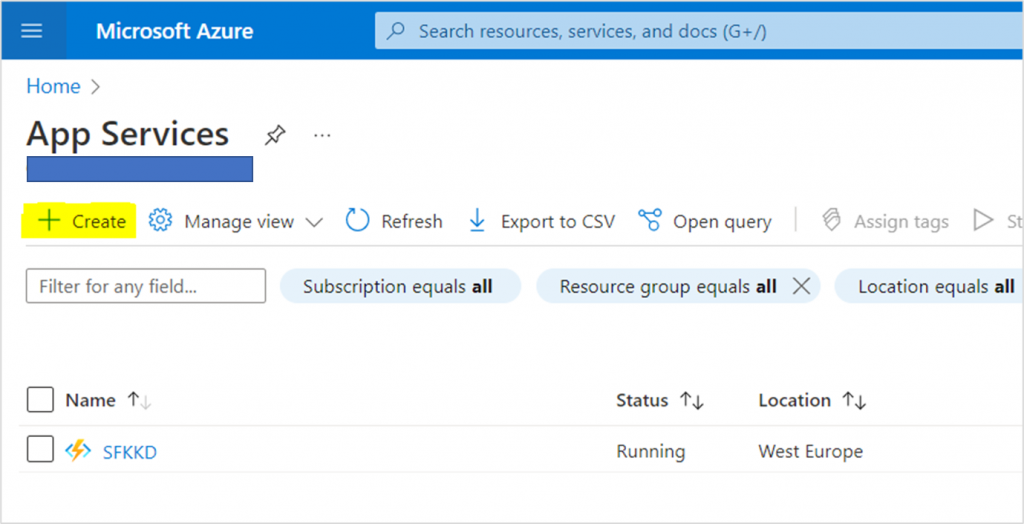
Creating a resource group
It is time to get started on our Azure account. We start by creating a resource group. As the image above indicated, the group acts as a container for the services of our application. Login, and search resource group on the top of the screen.
Click on create to create a new resource group. This group will be the container of our application. Give your resource group a name (My_application in my case) and select a region closest to your end users.
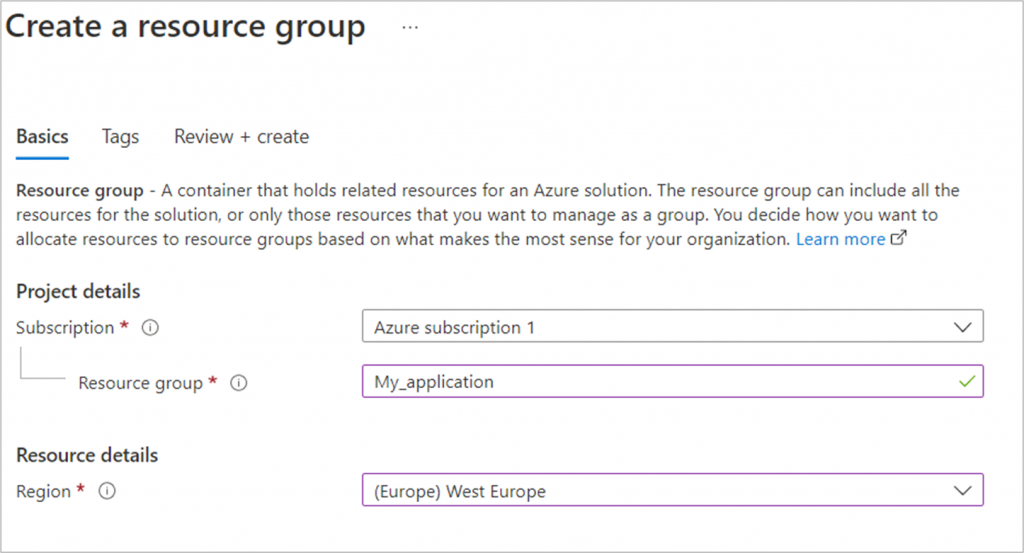
Click on review+create, and then create. We have now created our resource group for the application!
Creating an Azure App Service
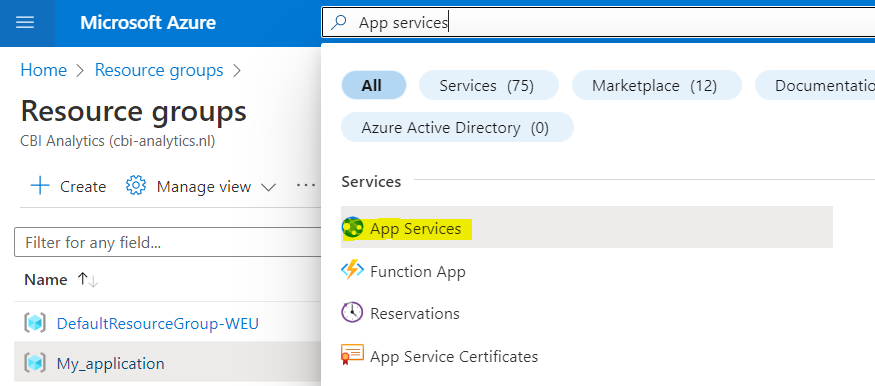
We have created the container for our services. We now need to start creating the services within the container. As you will recall from the image at the start, one of the components we need is Azure App services.
Search for app services in the search bar and select the service.
Click on create to create a new app service.
We click the link that guides us to the Web + Database experience. This will save us some time in configuration later!
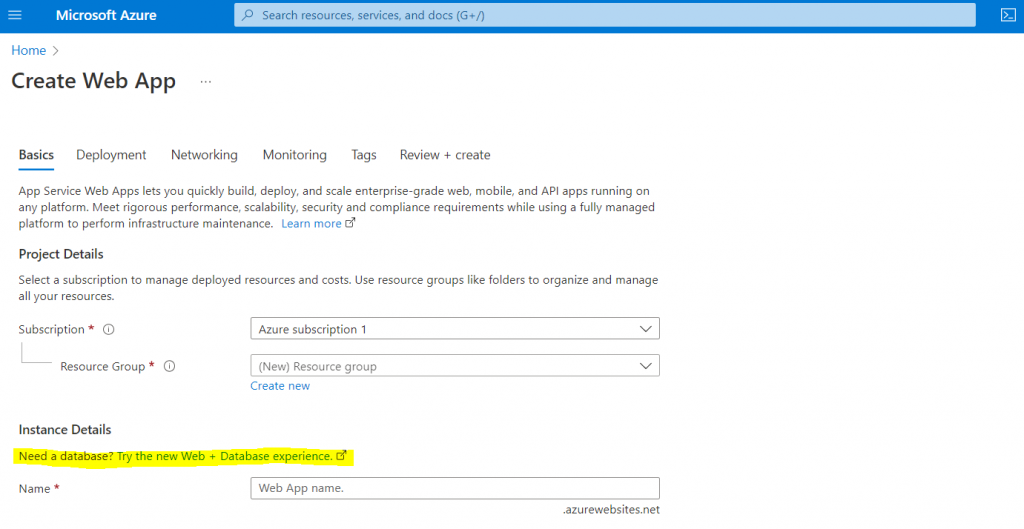
The web+database experience automatically links our database to our web application. This means that we do not have to connect the network or the database ourselves!
Creating the Python Web App
Let’s start with the information Azure requests for our web app. We supply the following information.
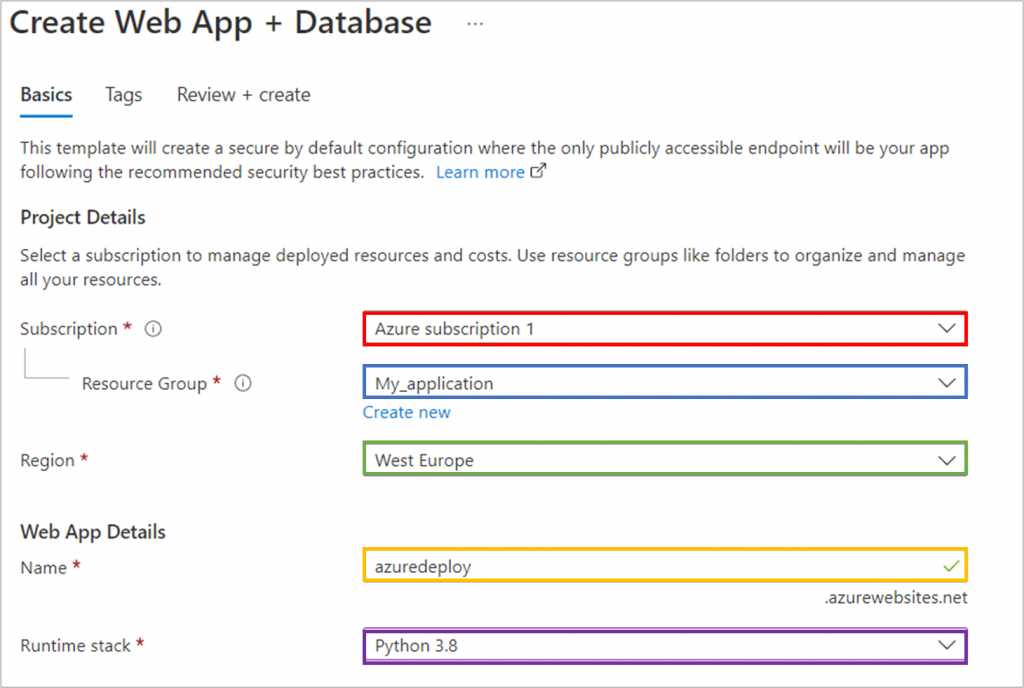
- The subscription we want to use for this project. This is your billing account.
- Under resource group we select the container we have created earlier in this post. In my case this is My_application.
- The region. Here you need to select the region closest to your end users.
- The name of the webapp. This name will also be used in the Azure url. In our case we select azuredeploy.
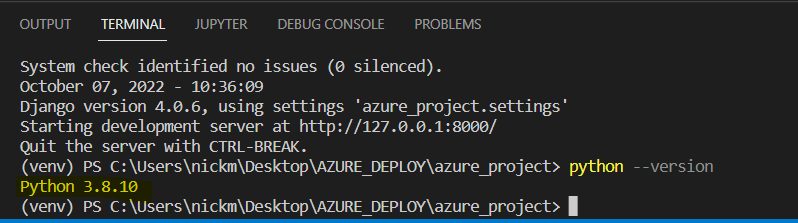
- As runtime stack we select Python 3.8. Why? In our project in Visual Studio Code we executed the command python –version in our terminal. We have used version 3.8 in development, so we will also use it in production.
It is common to buy a custom domain name so you have your own web adress instead of a long random string generated by Azure. We are not going to cover this in this tutorial, but you are able to change it later.
Now let’s scroll down and fill in the information for out database!
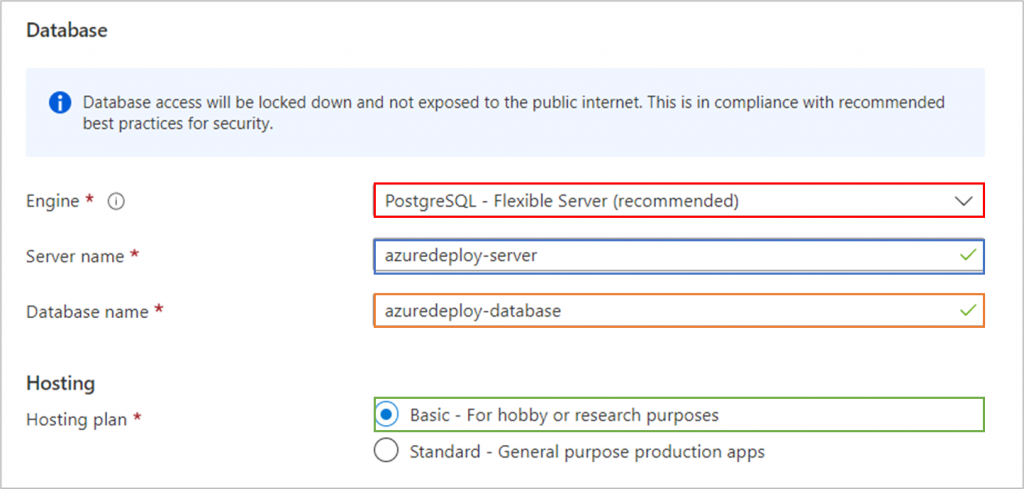
Creating our PostgreSQL Database
We also need to supply some information to Azure to create our preferred database.
- As our engine we select PostgreSQL. This is a commonly used database for Django web applications.
- Azure will ask to supply a server and database name. I choose to name them azuredeploy-server and azuredeploy-database.
- As the hosting plan we select basic since this is just a tutorial. Azure advises to use standard it you are going to create a production app.
It is common to change the hosting plan whilst the app is already deployed. So you can start with Basic, and scale up if needed.
We click on review+create to create our web app and database. And then on create to start the deployment. It can take some time before the deployment is complete!

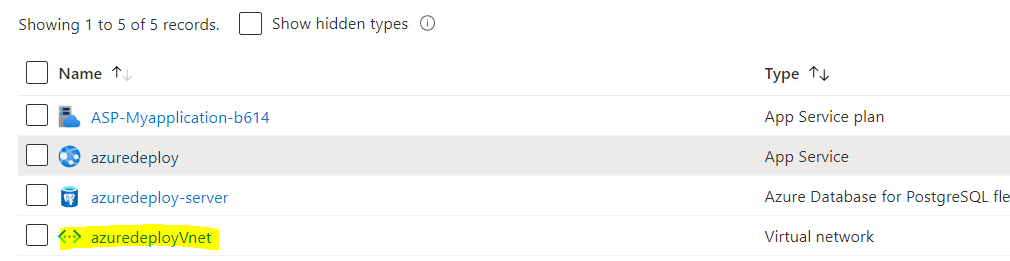
The advantages of the Azure web + database experience are showing!
By creating the web app together with the database Azure has already taken care of several configurations. Usually we would need to configure the network and database credentials to make sure our app has access to the database. But this has already been done!
If you nagivate to your resource group (My_application) you will see a list of services. You will notice that Azure has created a virtual network. This network ensures that the database and web app can communicate.
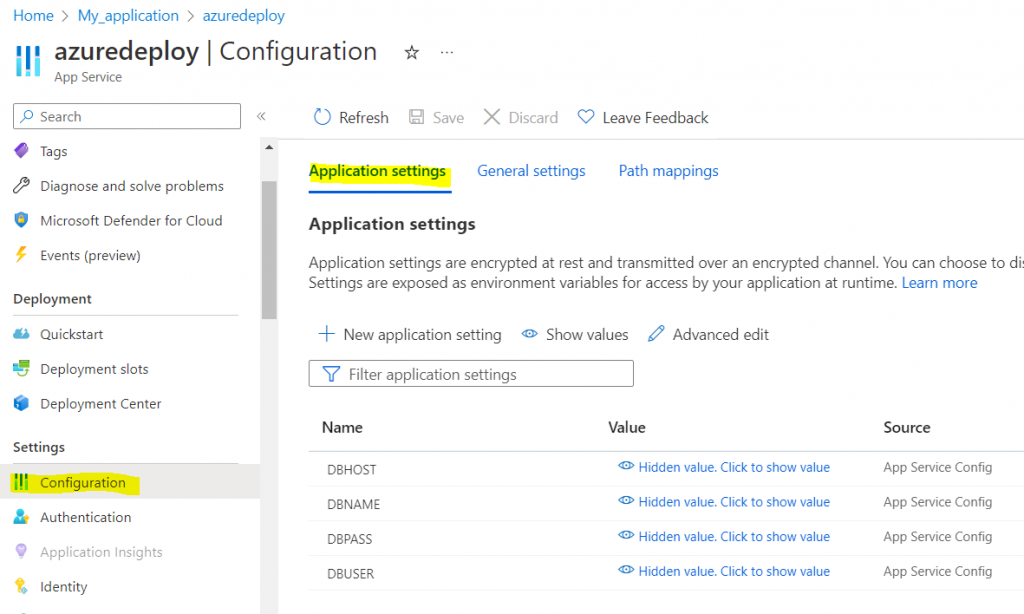
If you click on azuredeploy (the app service), and then go to configuration under settings you will see another advantage of us using the web + database experience. The database credentials have already been set up!
Our Azure environment is ready!
We are now done with the Azure setup. The Azure web + database experience has made it considerably more easy. In the next post we will push our code to Azure, and complete the deployment!


