


In this tutorial series we will deploy our Django application on Microsoft Azure. There are many platforms suitable for deployment of your applications, such as Amazon, Heroku, or DigitalOcean. Today we will use the cloud computing platform of Microsoft as our platform for deployment!
We will deploy our app in three stages:
- In our first post we pushed our project code to Github with Git. Github will serve as our code repository, which will make deployment much easier.
- In the second post we set up our Azure environment, so it is ready to receive our application.
- In this post, we will make some changes to our apps settings, and actually deploy it on Azure.
The source code of our project is available on my Github.
What are we going to do?
We previously pushed our code to Github, and set up the Azure environment. We are now ready to bring the code together with the environment. In this tutorial we will use Visual Studio Code as our code editor. We use Github actions to push our code to Azure.
- Install packages and configure variables We install packages needed for production and add a .production file with some config settings for Azure.
- Create requirements.txt file. This will tell Azure what packages need to be installed.
- Make changes to our settings. We will create a seperate settings file for production.
- Make sure that the production settings are used in deployment.
- Push code updates to GitHub
- Pushing our code to Azure
- Migrating our database schema
- Testing our application
Installing packages and configure variables
The first thing we are going to do is install some additional packages our application will need in production. These packages make sure that our static files and database operations can be handled.
pip install psycopg2
pip install python-dotenv
pip install whitenoise
Next, we will create a new file in the highest level of our application called .production. In this file we specify some environment variables we want to set in Azure when deploying our application.
[config]
SCM_DO_BUILD_DURING_DEPLOYMENT=true
PRODUCTION = YES
The SCM_DO_BUILD_DURING_DEPLOYMENT makes sure that our application is build when we deploy. We will use the PRODUCTION = YES variable later in this tutorial to split our development and production settings.
We go into our Azure portal to set our SECRET variable. Why? Because if your code is on a public Github repository you don’t want people to see your secret key in the .production file.
Go to the app service and click on configuration. Next click on new application setting.
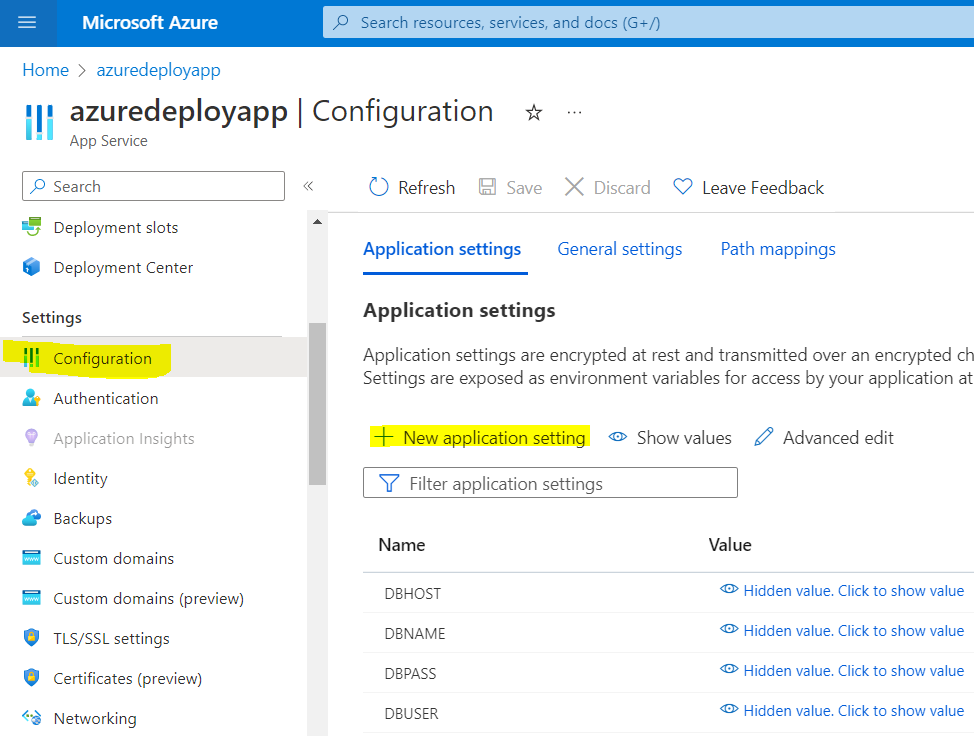
You can now create your variable named SECRET here. Do not use the same string as in your settings.py file, since this one is visible in your repository. I generated a random string here for this example.

Create requirements.txt file
We need to let Azure know which packages we have used to create our application. These need to be installed for everything to work. The best way to do this is by adding a txt file with the name requirement. You can create this in your project by specifying the following command in the terminal of your code editor.
pip freeze > requirements.txtThe output will look like this (in my case)!
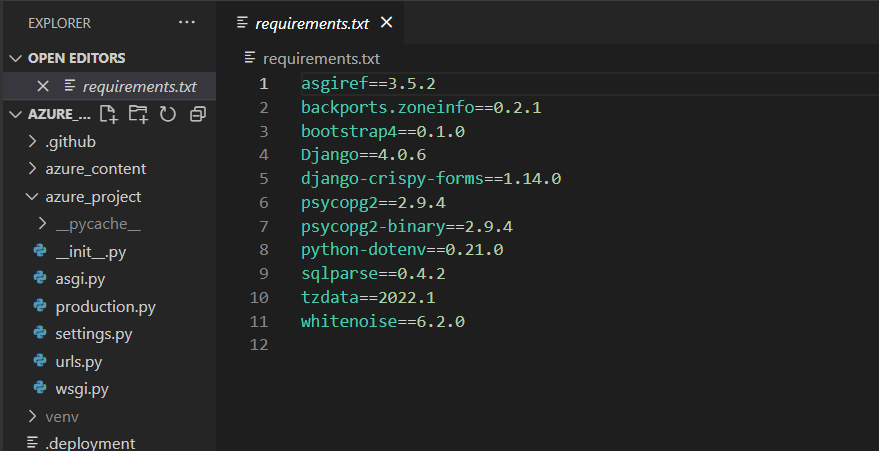
Make sure that the requirements.txt file is on the lowest level of the application. The same level as azure_project
Make changes to our settings
In our development environment we use different settings as the production environment. I want to keep using my application locally and in production, so I need to make sure that I create a seperate settings file for production.
Copy your settings.py file, and rename the file production.py. In this file we will make several important changes:
- SECRET_KEY = [os.environ[‘SECRET’]]. This refers to the secret key we created on Azure earlier in this tutorial.
- DEBUG = False. When we are in production we do not want to see error messages in the browser. These messages sometime contain passwords or other sensitive information.
- ALLOWED_HOSTS = [os.environ[‘WEBSITE_HOSTNAME’]]. When Azure deploys an application it create a hidden WEBSITE_HOSTNAME variable that specifies the URL name. This line of code specifies that our url is the only allowed host for the app.
- CSRF_TRUSTED_ORIGINS = [‘https://’+ os.environ[‘WEBSITE_HOSTNAME’]]. Specifies that our app should only trust our site Cross-Site Request Forgery takes place.
- Add ‘whitenoise.middleware.WhiteNoiseMiddleware‘ to the Middleware below security. WhiteNoise will handle our static files.
- STATICFILES_STORAGE = ‘whitenoise.storage.CompressedManifestStaticFilesStorage’. Tells the app that whitenoise is handling our files.
- STATIC_ROOT = os.path.join(BASE_DIR, ‘staticfiles’). Specifies where whitenoise can save the new folder called staticfiles during production.
- The database must be changed to the settings for PostgreSQL.
hostname = os.environ['DBHOST']
DATABASES = {
'default': {
'ENGINE': 'django.db.backends.postgresql',
'NAME': os.environ['DBNAME'],
'HOST': hostname + ".postgres.database.azure.com",
'USER': os.environ['DBUSER'],
'PASSWORD': os.environ['DBPASS']
}
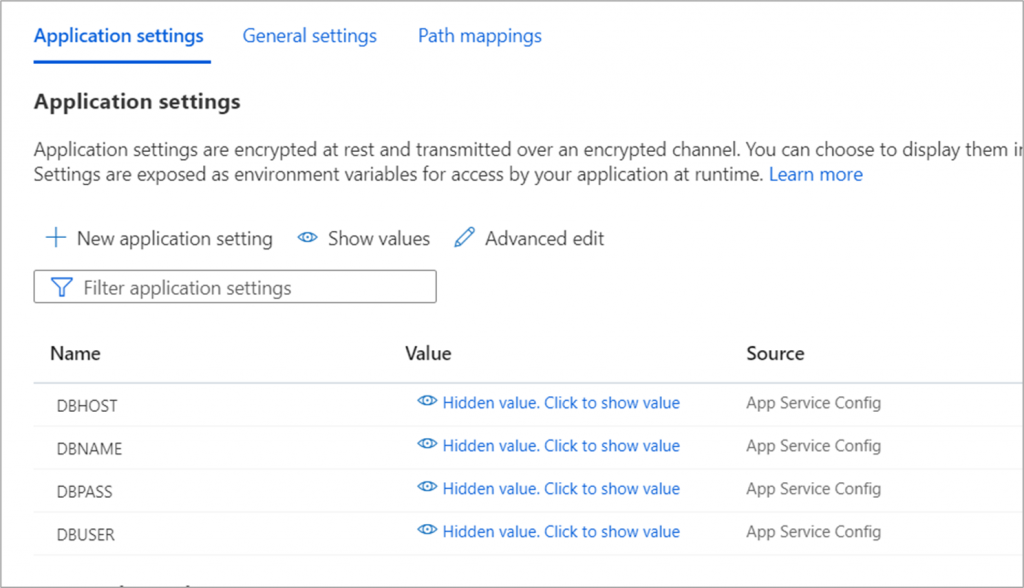
}In the code you see terms like DBNAME, DBUSER, DBPASS and DBHOST. Why did we use these? Well, as we have seen in the previous post (and the image below) these credentials are stored in our app service in Azure. By specifying in os.environ followed by the name in Azure we are able to access the values specified in Azure. This enables us to use the database in our application code. We are essentially connecting our Azure database to our code.
In production you always use environment variables to store passwords. In addition you ALWAYS set debug to false, since you don’t want anyone to see the error logs (these display sensitive info about your database and settings)
My full production.py file is specified below:
from pathlib import Path
import os
# Build paths inside the project like this: BASE_DIR / 'subdir'.
BASE_DIR = Path(__file__).resolve().parent.parent


# Quick-start development settings - unsuitable for production
# See https://docs.djangoproject.com/en/4.0/howto/deployment/checklist/

# SECURITY WARNING: keep the secret key used in production secret!
SECRET_KEY = [os.environ['SECRET']]

# SECURITY WARNING: don't run with debug turned on in production!
DEBUG = False
ALLOWED_HOSTS = [os.environ['WEBSITE_HOSTNAME']]
CSRF_TRUSTED_ORIGINS = ['https://'+ os.environ['WEBSITE_HOSTNAME']]

# Application definition

INSTALLED_APPS = [
    'django.contrib.admin',
    'django.contrib.auth',
    'django.contrib.contenttypes',
    'django.contrib.sessions',
    'django.contrib.messages',
    'django.contrib.staticfiles',
    'crispy_forms',
    'azure_content.apps.AzureContentConfig',

]

MIDDLEWARE = [
    'django.middleware.security.SecurityMiddleware',
    'whitenoise.middleware.WhiteNoiseMiddleware',
    'django.contrib.sessions.middleware.SessionMiddleware',
    'django.middleware.common.CommonMiddleware',
    'django.middleware.csrf.CsrfViewMiddleware',
    'django.contrib.auth.middleware.AuthenticationMiddleware',
    'django.contrib.messages.middleware.MessageMiddleware',
    'django.middleware.clickjacking.XFrameOptionsMiddleware',
]

ROOT_URLCONF = 'azure_project.urls'

TEMPLATES = [
    {
        'BACKEND': 'django.template.backends.django.DjangoTemplates',
        'DIRS': [],
        'APP_DIRS': True,
        'OPTIONS': {
            'context_processors': [
                'django.template.context_processors.debug',
                'django.template.context_processors.request',
                'django.contrib.auth.context_processors.auth',
                'django.contrib.messages.context_processors.messages',
            ],
        },
    },
]

WSGI_APPLICATION = 'azure_project.wsgi.application'


# Database
# https://docs.djangoproject.com/en/4.0/ref/settings/#databases

hostname = os.environ['DBHOST']
DATABASES = {
    'default': {
        'ENGINE': 'django.db.backends.postgresql',
        'NAME': os.environ['DBNAME'],
        'HOST': hostname + ".postgres.database.azure.com",
        'USER': os.environ['DBUSER'],
        'PASSWORD': os.environ['DBPASS']
    }
}

# Password validation
# https://docs.djangoproject.com/en/4.0/ref/settings/#auth-password-validators

AUTH_PASSWORD_VALIDATORS = [
    {
        'NAME': 'django.contrib.auth.password_validation.UserAttributeSimilarityValidator',
    },
    {
        'NAME': 'django.contrib.auth.password_validation.MinimumLengthValidator',
    },
    {
        'NAME': 'django.contrib.auth.password_validation.CommonPasswordValidator',
    },
    {
        'NAME': 'django.contrib.auth.password_validation.NumericPasswordValidator',
    },
]


# Internationalization
# https://docs.djangoproject.com/en/4.0/topics/i18n/

LANGUAGE_CODE = 'en-us'

TIME_ZONE = 'UTC'

USE_I18N = True

USE_TZ = True

CRISPY_TEMPLATE_PACK ='bootstrap4'
# Static files (CSS, JavaScript, Images)
# https://docs.djangoproject.com/en/4.0/howto/static-files/

STATICFILES_STORAGE = 'whitenoise.storage.CompressedManifestStaticFilesStorage'
STATIC_ROOT = os.path.join(BASE_DIR, 'staticfiles')

STATICFILES_DIRS = (str(BASE_DIR.joinpath('azure_content/static')),)
STATIC_URL = '/azure_content/static/'


# Default primary key field type
# https://docs.djangoproject.com/en/4.0/ref/settings/#default-auto-field

DEFAULT_AUTO_FIELD = 'django.db.models.BigAutoField'
Make sure that deployment settings are used by Azure
Now we need to tell our app to use the production settings if we are in production, and the local settings if we are locally running our server. We do this by changing our wsgi.py file.
import os
from django.core.wsgi import get_wsgi_application

# Check for the PRODUCTION environment variable to see if we are running in Azure App Service
# If so, then load the settings from production.py
settings_module = 'azure_project.production' if 'PRODUCTION' in os.environ else 'azure_project.settings'
os.environ.setdefault('DJANGO_SETTINGS_MODULE', settings_module)


application = get_wsgi_application()
Since we created the PRODUCTION variable in our .production file Azure should create the variable when deploying the app. The wsgi file then specifies that when we are in production, we use the production.py file as the settings file. If we are on our local computer, it will use the settings.py.
By creating seperate file for production, you can use the SQLite database locally, whilst running the same code running on Azure. This makes it easy to make changes local and push it to your production environment.
Push code updates to GitHub
We need to push these changes (production.py and requirements.txt) to our Github account. So we use the three commands below to push the changes in our code to our repository.
git add .
git commit -am 'production file'
git push
Pushing our code to Azure
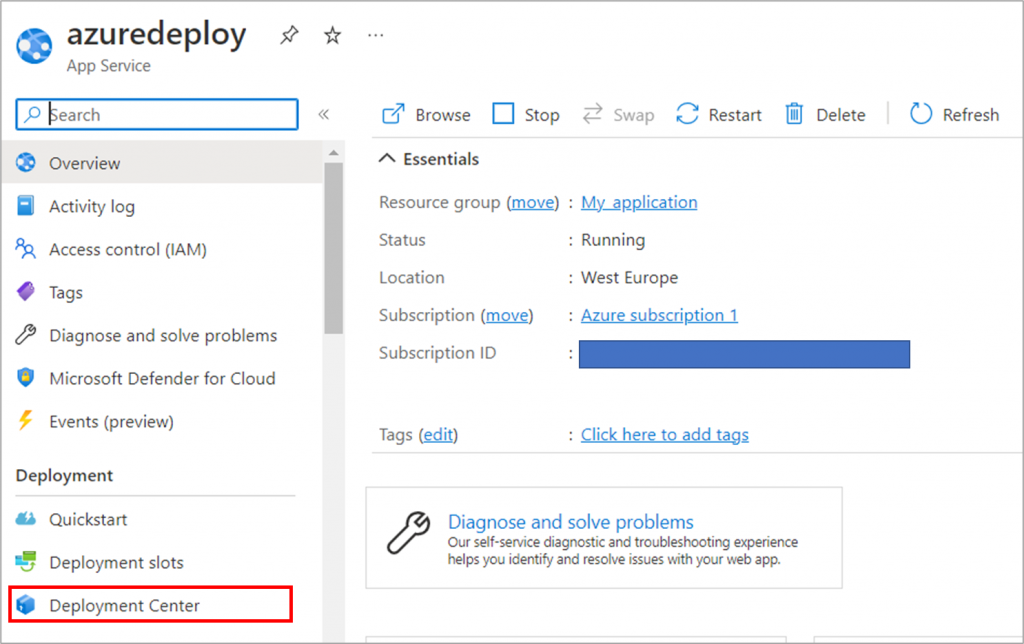
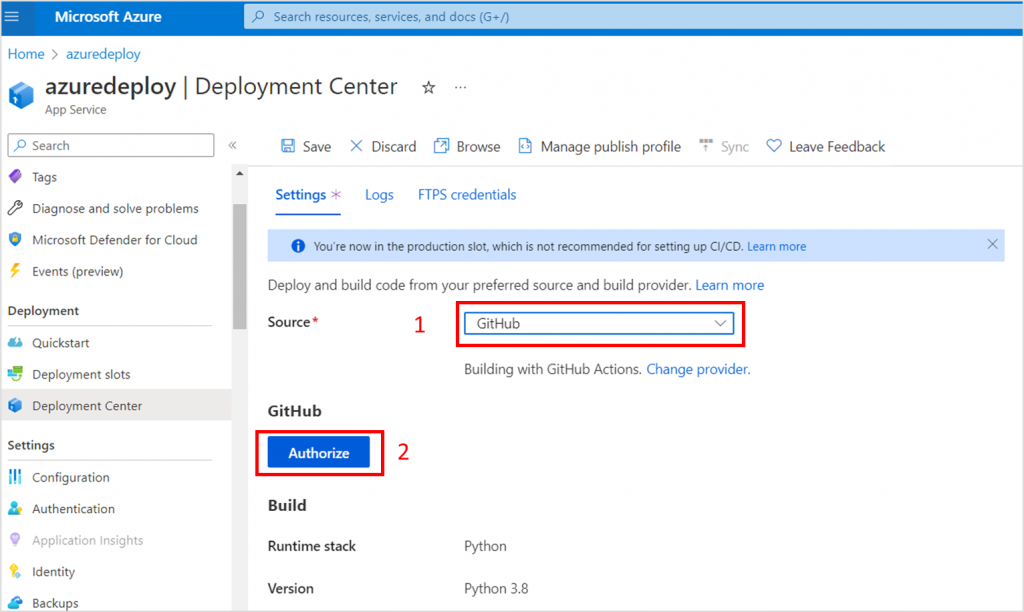
We have made all the changes to our application so we are ready to push our code to Azure with Github Actions. Go into your Azure account, and navigate to your app service (in our case azuredeploy). Click on deployment center in the left menu.
When you push code to Github, Github Actions automatically pushes this renewed code to Azure!
The deployment center will ask us which source we want to use. We select GitHub, which will use Actions to deploy our code. Azure will ask us to authorize.
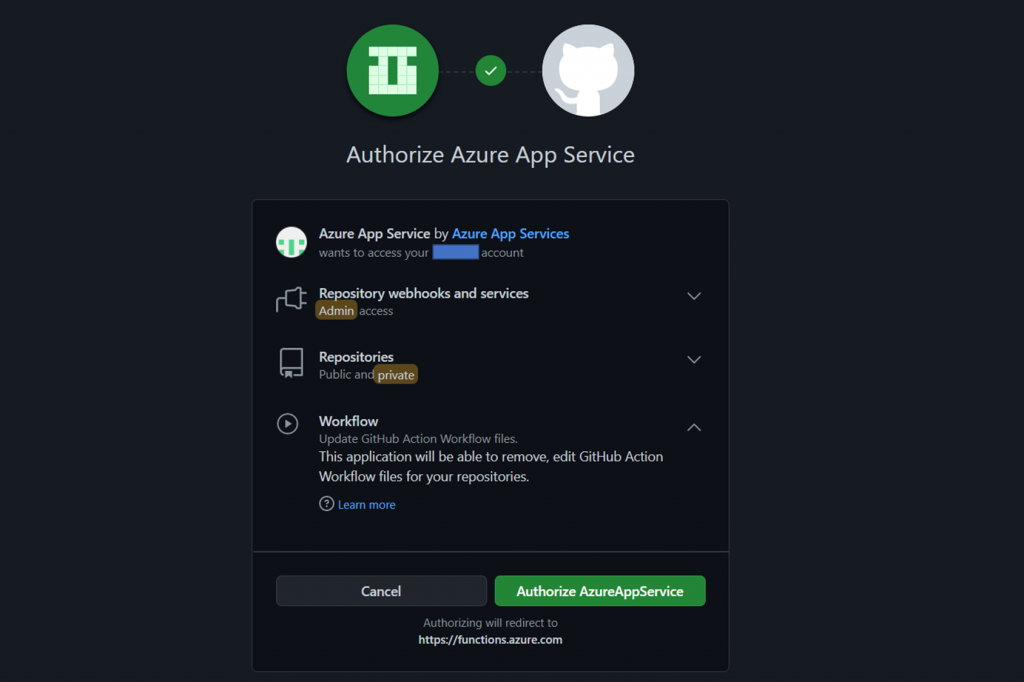
The authorize button will bring you to a GitHub screen. There we click on Authorize AzureAppService. You will need to enter your password and then we are good to go!
If we navigate back to our Azure portal we will see several fields appearing. In organization I select my account. In repository I select the name of the project I want to push. As branch I select main.
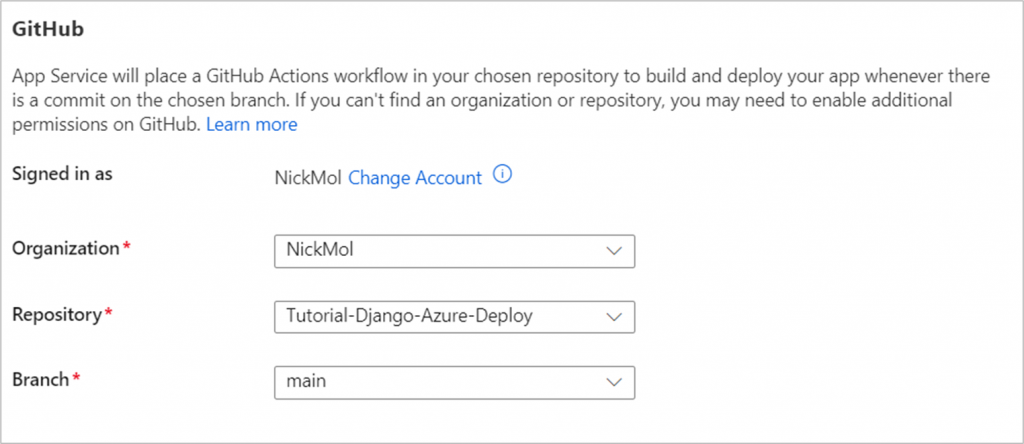
Click on save in the top screen to save the changes we have made! Our deployment has already started on the background. Go to logs to check the status (this can take 5 mins) . After a while you will have succesfully deployed the code!
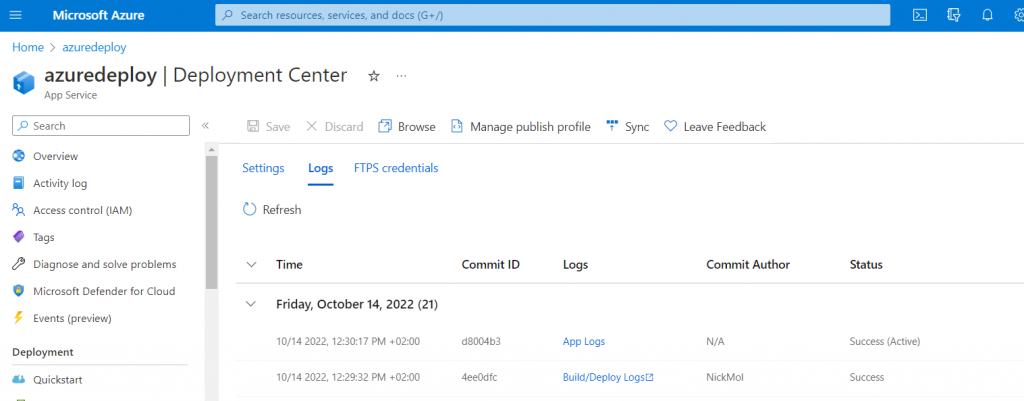
If there is a problem, GitHub actions will send you an email. There you see the error logs and fix your problems. You can trigger the GitHub action yourself on GitHub, or repush the code with git which will automatically trigger another deploy.
Migrating our database schema
We now must migrate our schema from our code to our PostgreSQL database. Go to to the app service, scroll down in the left menu and select SSH under the Development Tools.
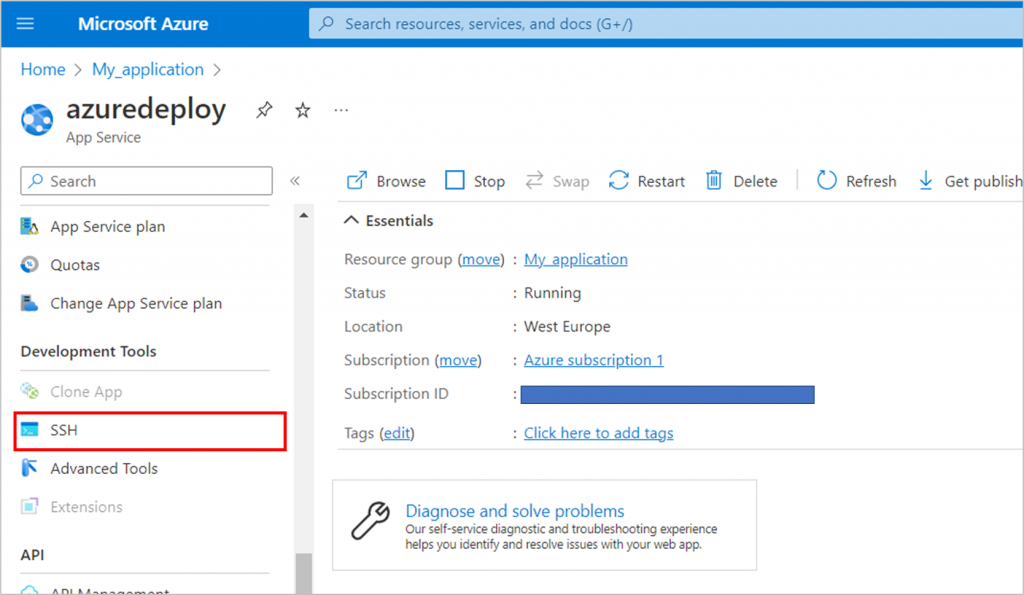
Click on go, a terminal will open on a new page.

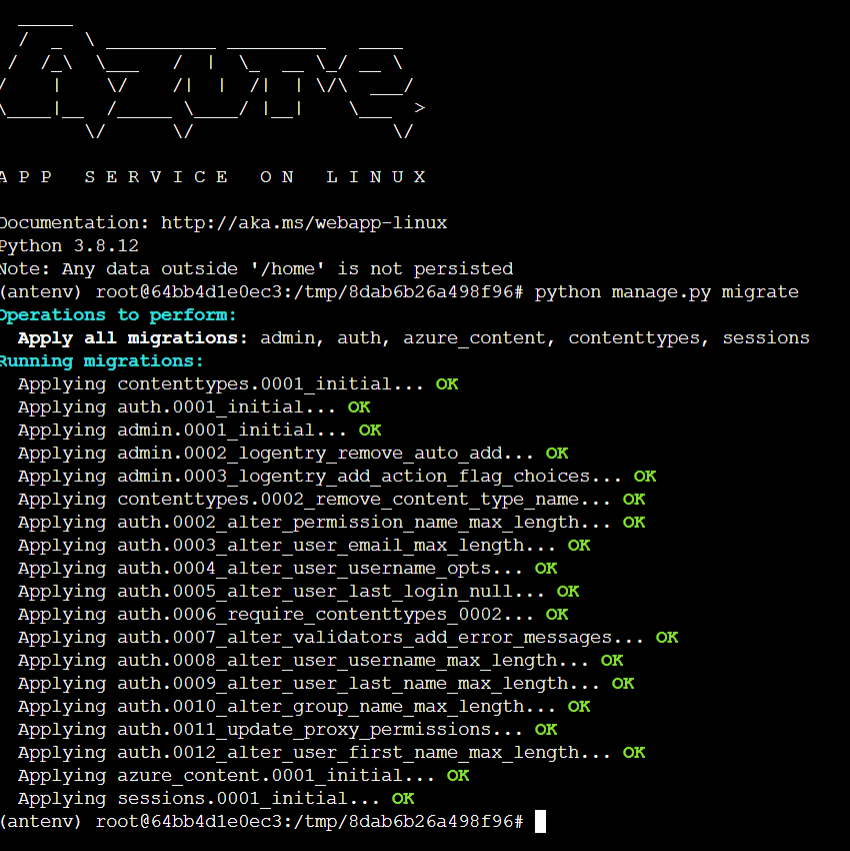
Once the terminal has loaded you can migrate your database with the command below.
python manage.py migrateYou don’t need the manage.py makemigrations command since python will look at your migrations files in your repository.
If everything goes well, you will get an output like the image below.
Testing our application
We now need to test whether our application is actually online. If you go to your Azure App Service, and click on overview. On the right you will find the url of your application.
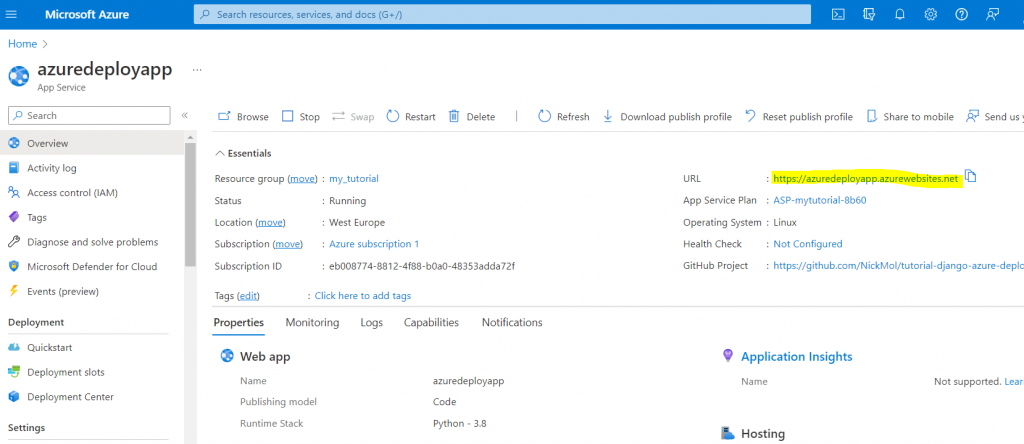
Go to your website, and check whether you can enter your application. Create, edit, and delete records to make sure the database is working correctly. In my case everything works the same as locally!
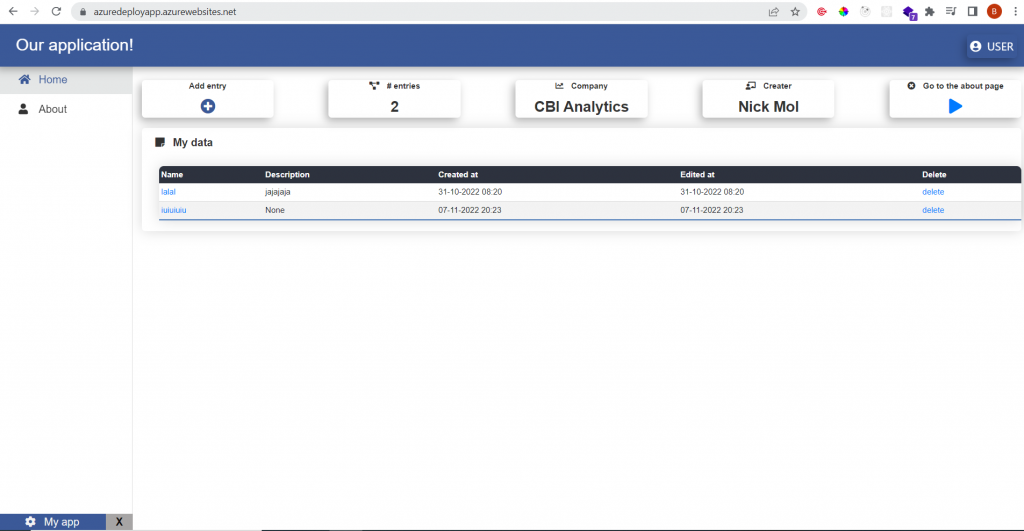
We are done!
The Django application has been deployed to Azure succesfully! Unfortunately, deployment sometimes fails due to wrong settings or small mistakes. If you encounter any errors, you can try the following things:
- Set debug to false in your settings to view the detailed error logs.
- Check the error logs in the Azure portal.
- Go to your Github repository and go to actions. Check if deployment was done correctly.
- Create a question ticket on Microsoft Learn.


