In this tutorial I will show you how you can deploy a Django & React application on Microsoft Azure. Over the course of several posts we will go through the following steps:
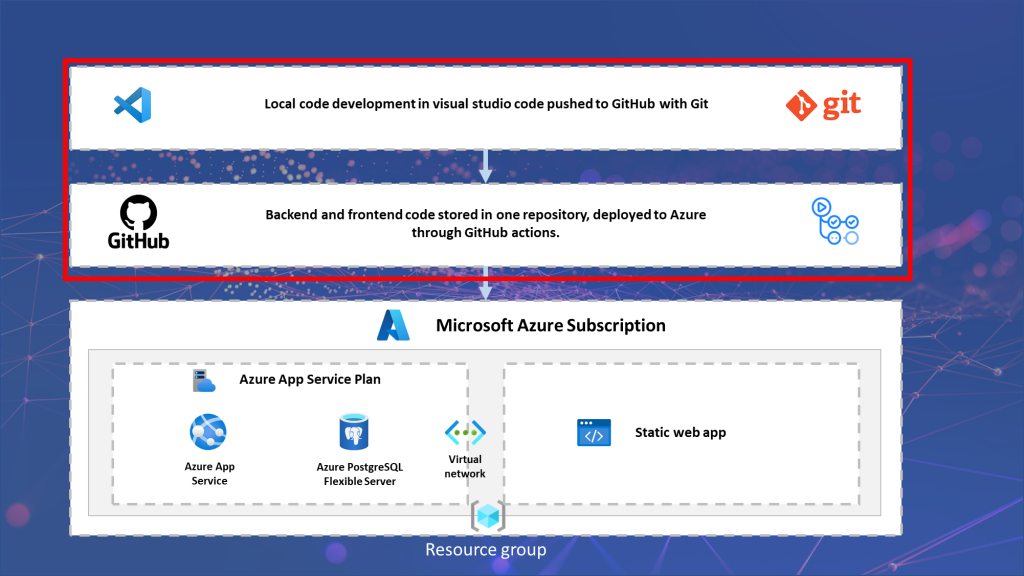
- #1: Architecture of Django & React deployment
- #2: Make changes to our source code
- #3: Push our code to GitHub with Git
- #4: Deploy Django code to Azure
- #5: Deploy React code to Azure
In our previous post we adjusted our backend code so we are ready for deployment. In this post we focus on pushing our code from our local computer to GitHub with Git. This task touches upon the first two steps in our architecture. The full project code is available on GitHub.
Steps we will be completing today!
The first step is to push our code to Github. We will do this with the help of Git. Before continuing you will need to do two critical things:
- Install Git. Go to their website and install the version for your operating system.
- Create an account on Github.
We will follow several steps to deploy our code to Github:
- Configure Git in our project
- Save our code in our Git repository
- Create a SSH key and store in our Github account
- Create our Github Repository and push our code
Configure Git in our project
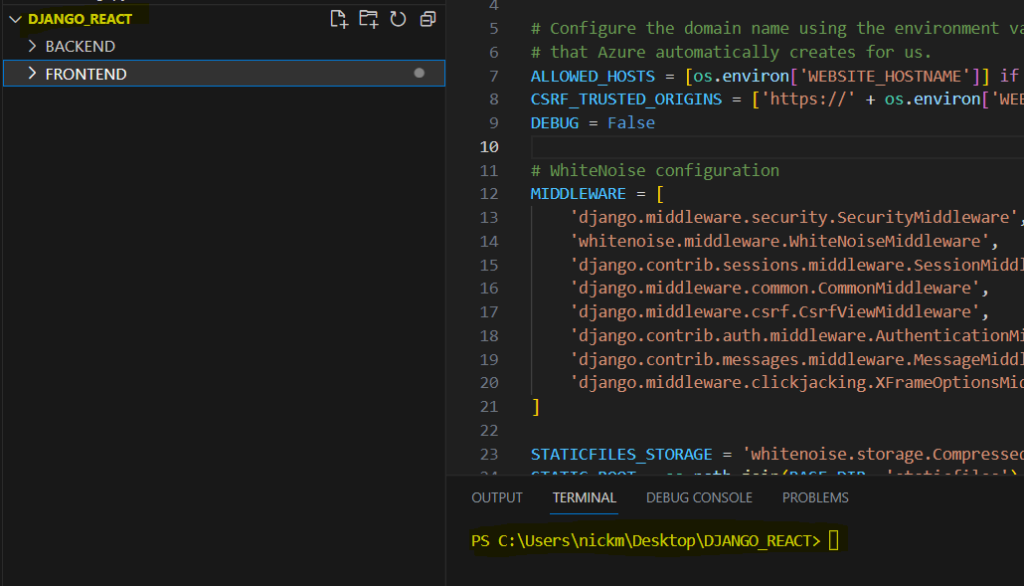
We start by configuring Git in our project. We do this in the top level of our application since I want to push both my Backend and Frontend folder to 1 repository.
Luckily, this is very simple! Go to your terminal/command line of your code editor, and enter the following command. Be sure to use your own name:
Make sure that your terminal is in the highest folder, in my case DJANGO_REACT
git config --global user.name "Your Name"Next, we need to tell Git our email adress.
git config --global user.email "your@email.com"After setting our email we use the following two commands to set some additional settings for code pushing.
git config --global push.default matching
git config --global alias.co checkout
The final command will initialize Git in our project.
git init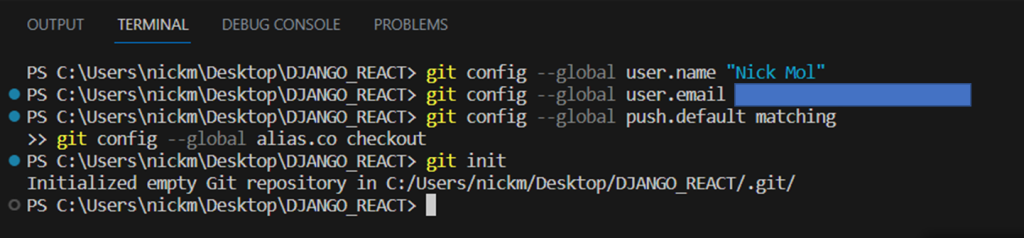
We have now completed our first step!
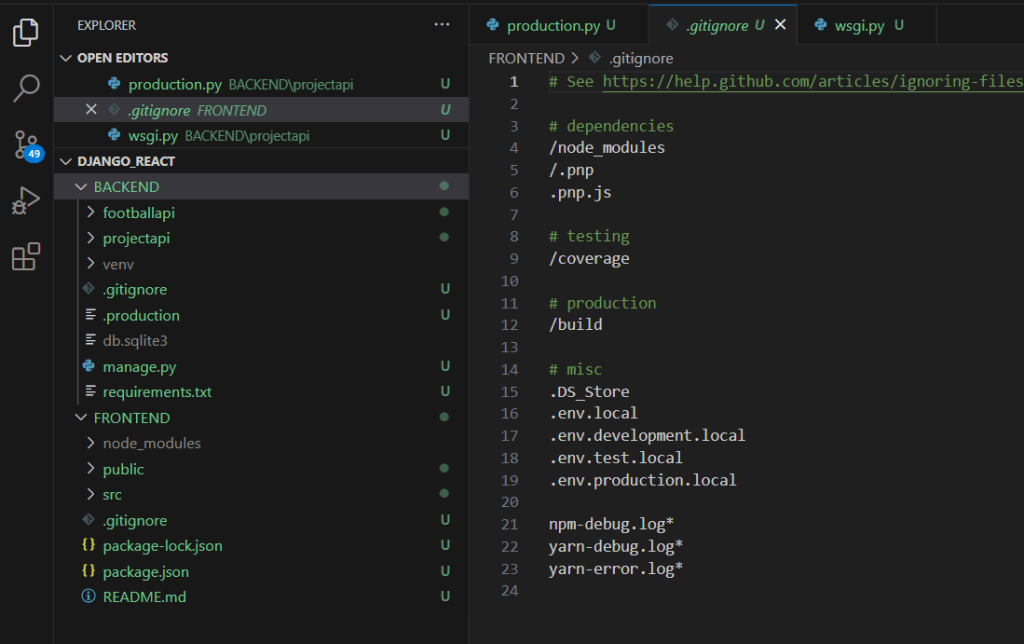
You will immediatly notice the difference in your code. In my case (using Visual Studio Code) all of the files in my project are green and display a U. This means that all of this files are untracked. Essentially, they are all new files for Git which have not been added to the repository.
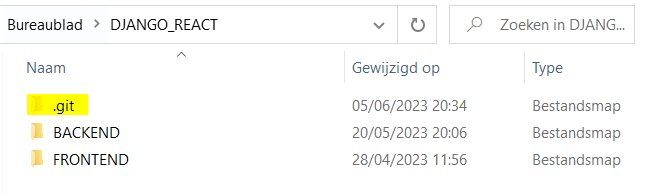
If you go to your project in your file explorer, you will notice a second difference. An additional hidden folder has been created in your project called git.
Save our code in our repository
As mentioned before, all of our files have the status untracked. Let’s change this by storing our changed files in the Git repository. We start by adding all of our files (that’s what the dot means) to our repository.
git add .Thereafter, we actually commit the files, and we add a message so we know what happened in the commit. In this instance we want to show that this was our first commit.
git commit -am 'first commit'This message can be whatever you want it to be, and will be visible later on in our Github account. This makes it easy to track changes over time.
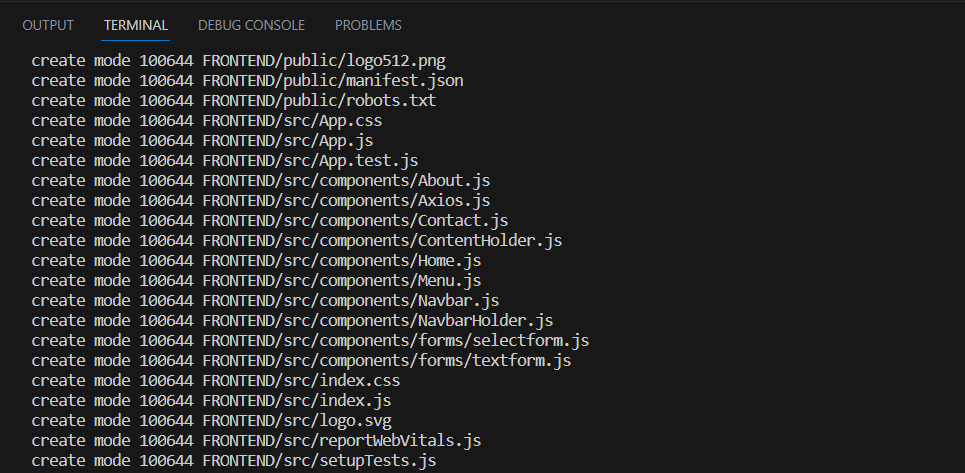
You will have noticed that all of the files have been added to our git folder.
IMPORTANT: In the previous blogpost we have created a gitignore file. This file makes sure that we exclude files we do not need. Please also do this!
Create a SSH key and store in our Github account
By pushing our code from our local computer to Github with Git, we must have some sort of authentication. We need to prove to GitHub that we have the rights to push our content to the account.
You only need to do this once. If you have already done this some other time you can skip this paragraph
One way of doing this is by specifying your username and token every time you make a change. However, this is cumbersome, and it would be easier to use an SSH key.
What is this SSH key? Basically, it is a unique token which will serve as our authentication mechanism. We store the key on our computer, and enter it on Github. Every time we commit a change github will match the key in the account with the key on the computer, taking care of authentication.
Let’s generate the key: Go to the top folder in your terminal and type in the following code.
mkdir ~/.sshBeware: you need to deactivate your virtual environment if you are using one.
The terminal will ask you to set a password to protect the ssh file. I do not use a password, so I clicked enter in password and enter password again. Feel free to add a password if you like.
A ssh file is now created in a new directory. Now navigate into your .ssh folder, and type in the following command to get your full ssh key.
cat id_rsa.pubBeware, you cannot just open the file in the ssh folder and copy the string on your clipboard. The command above will also include a ssh-rsa text, and specify the laptop and laptopname with your key. This is essential, because the key alone is not enough for Github. Believe me.. I spend quite some time on this.
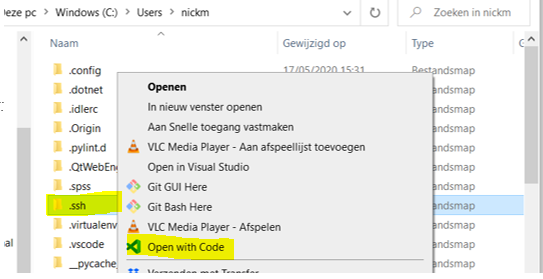
Tip: you can easily navigate to the ssh folder in your code editor by right clicking the folder and selecting open with code.
We need to store the generated key in Github. Login to your Github account, and go to settings. Now click on the menu item SSH keys an GPG keys.
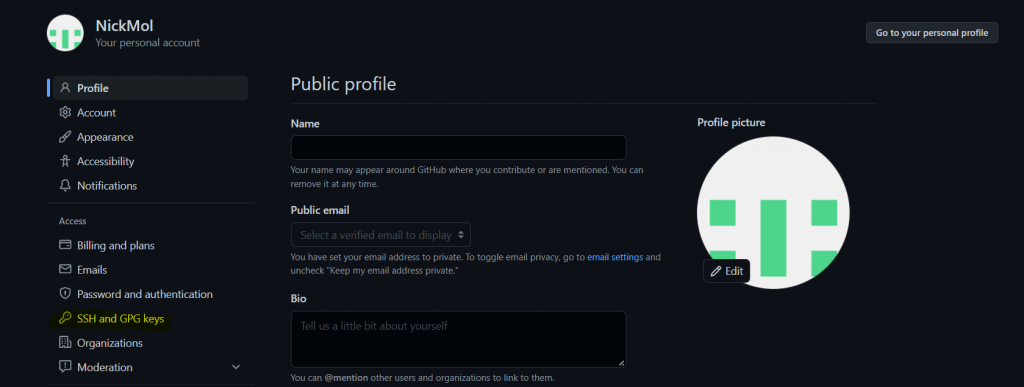
Now add the SSH code that you received in the following step, and save the entry. You do not need to add a title. You will now see your key in the SSH and GPG keys page.
Create our Github Repository and push our code
We have stored our code in the Git repository, and created the link between our computer and Github. So now it is time to create a Github repository, so we can actually push our code to our account!
Within your account click on repositories and then new. We pick a suitable name, and specify a short description. I set the repository on public, since I don’t mind others viewing my project. We click on create repository.
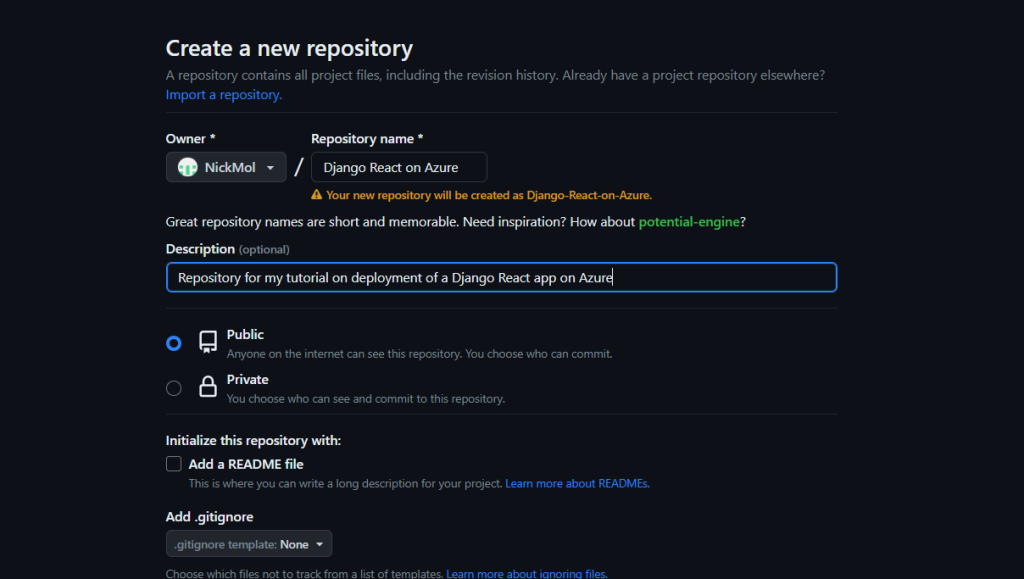
Beware: I strongly advise to pick private it you are building commercial applications or don’t want to expose your code to outsiders.
Github now provides us with the instructions what to do next. We want to push an existing repository from our command line so we need to execute the commands lined in red.
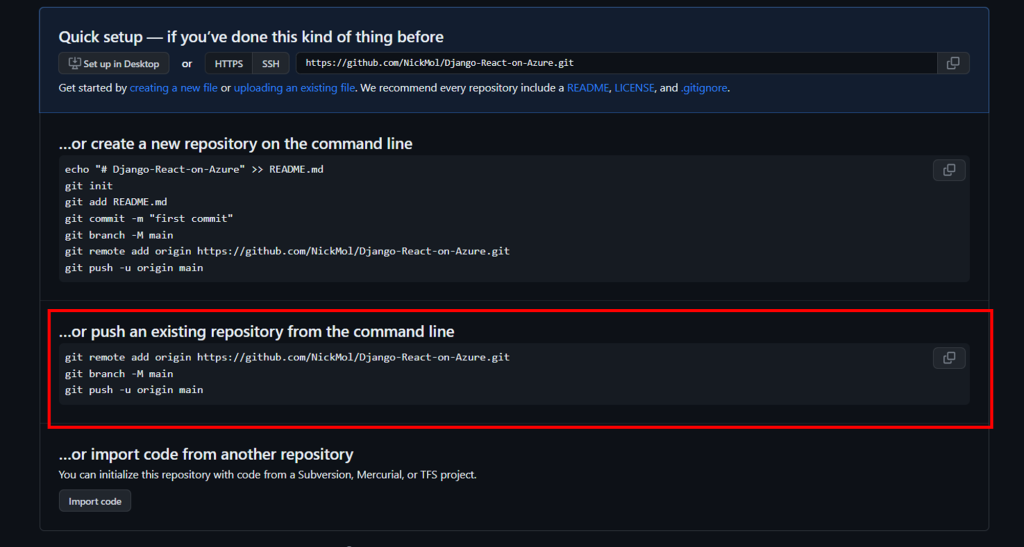
This means that we go back to our terminal/command line, and copy in the code from Github. In my case:
git remote add origin https://github.com/NickMol/Django-React-on-Azure.git
git branch -M main
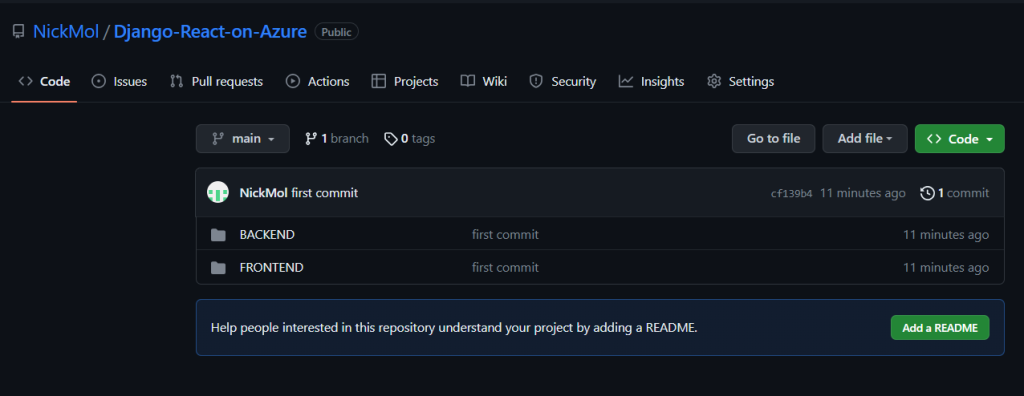
git push -u origin mainIf we refresh our Github page we will see our code including the message first commit from earlier!
Ready to deploy!
We are now ready to set up the Azure resources and deploy our backend and frontend code. More on that in our next blogpost.