In this tutorial series we try out Azure Synapse Analytics. This Microsoft technology is a web-based Software-as-a-Service (Saas) offering that combines data integration, storage, analytics and visualization.
In this article we will show you how you can create a Synapse workspace. We will cover the following steps:
- Creating a new resource group for our Synapse workspace (Optional)
- Creating a Synapse workspace including Azure Data Lake Storage Gen 2
- Entering the Synapse workspace
- Entering the Synapse studio
This article assumes that you have access to an Azure portal.
Creating a resource group
We start by creating a resource group for our new Synapse environment. If you already have a resource group you can work in you can skip this step. In the top of the Azure portal search for resource groups, and click on create.
You will be asked to first select the subscription you want to use. Select the suitable subscription. Next you can pick the resource group name. In the resource details we pick the region that is closest to our current location.
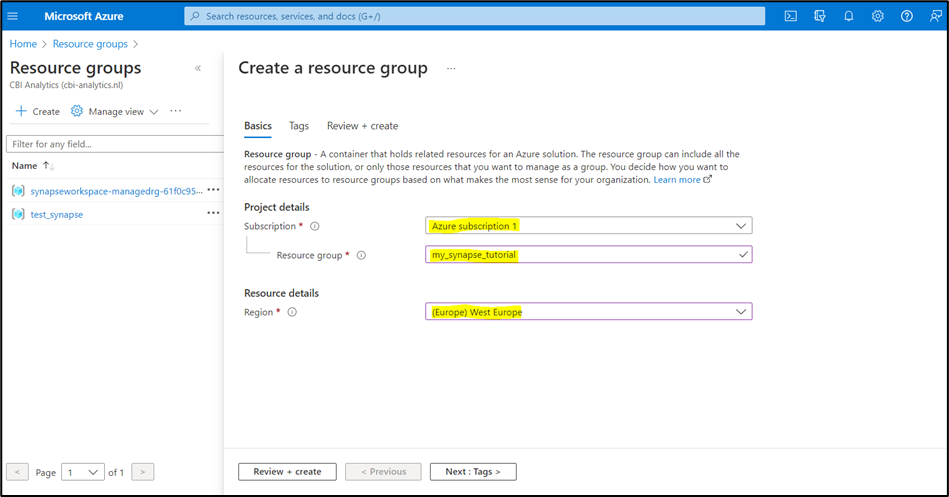
Click on review and create and your resource group will be created on the Azure portal.
Setting up a Synapse workspace
Now that we have a resource group we can search for Azure Synapse Analytics in the Azure portal menu. Click on create to create a new workspace for this service. First you will be asked to provide the subscription you want to use. Under resource group we pick the group that we just created. By default Azure Synapse Analytics also creates a managed resource group. In the text field we specify the name we want to give it. If you leave this field blank Azure will randomly generate a name.
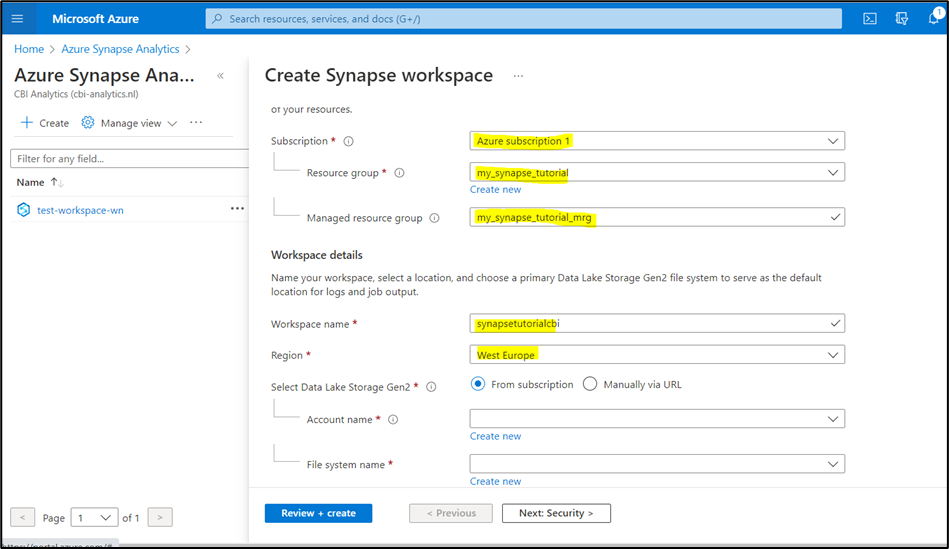
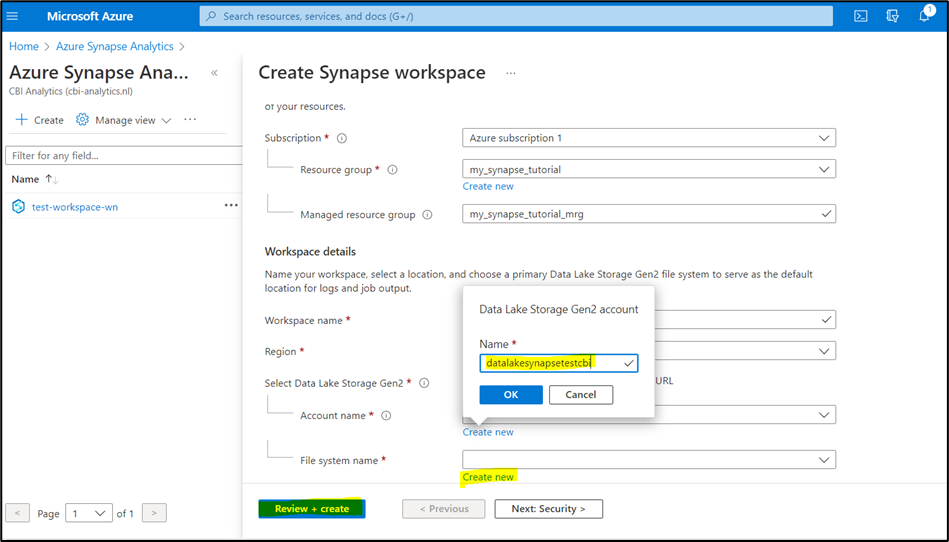
Next, Synapse asks us to provide a unique name for our workspace. Under regio you can again select the region closest to your area. Once these fields are completed you are required to select your Azure Data Lake Storage Gen 2. In this service we can store our ingested data. If you already have a data lake active you can select it from the dropdown. We do not, so therefore we click on create new. We also create a new file system name.
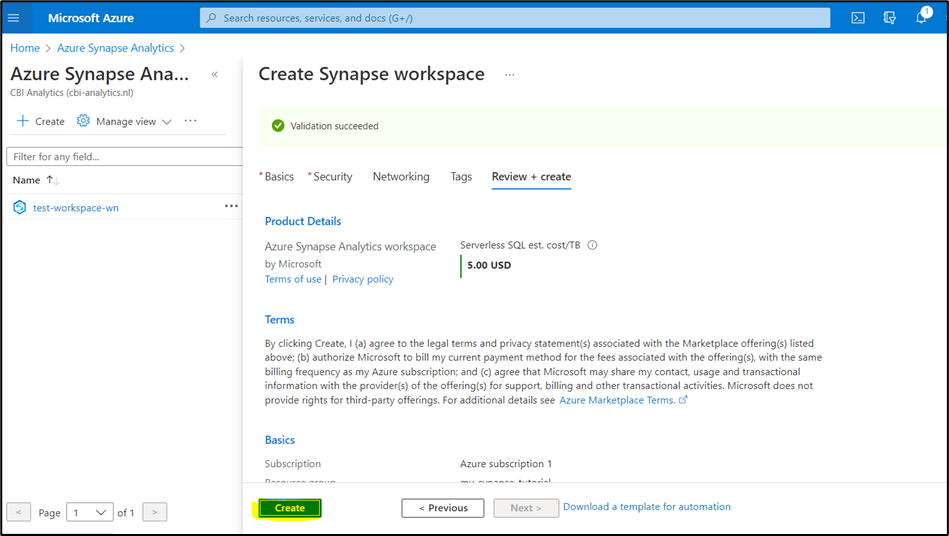
We have inputted al required information so we can now click review and create.
Synapse will now validate the information we provided, and give us an indication of the costs for serverless SQL per TB. Now we can click on create to deploy our workspace.
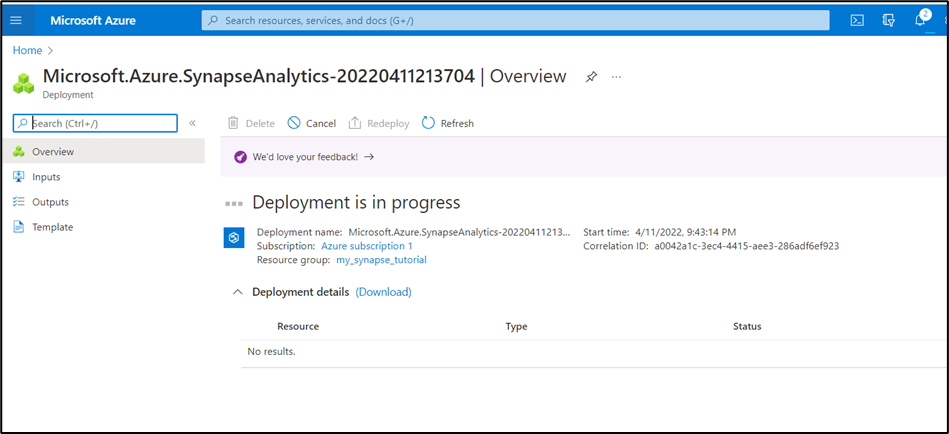
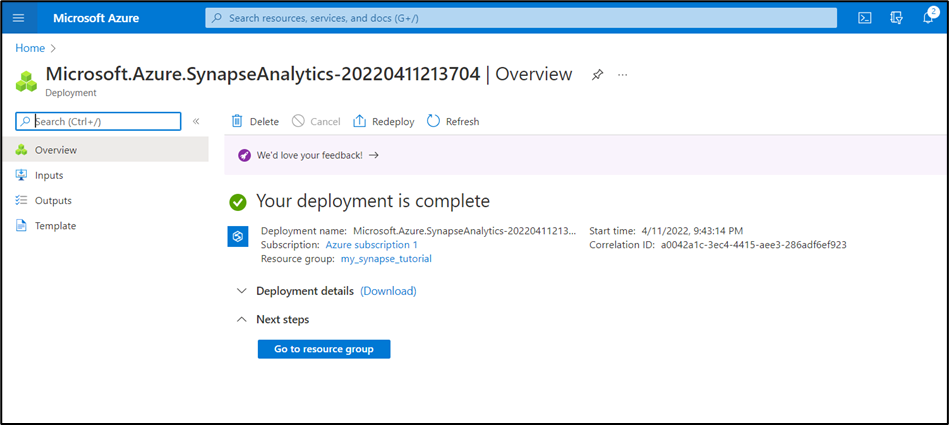
Deploying the workspace can take some time. In the end you will get confirmation that your resource has been deployed successfully.
Navigating to the Synapse studio
We have now created our Synapse workspace. Let’s access the Synapse studio where we can actually work with Synapse. Go to Azure Synapse Analytics, and click on the workspace you created. Now a window will open with a lot of details on your workspace. Scroll down and under getting started you can open the studio!
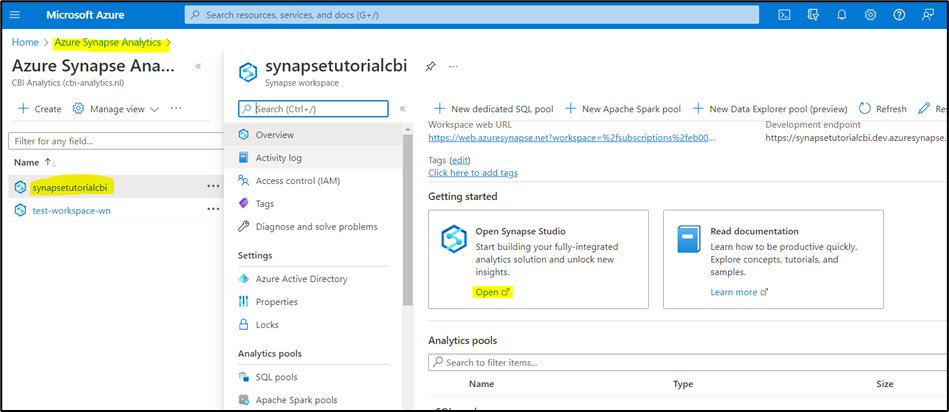
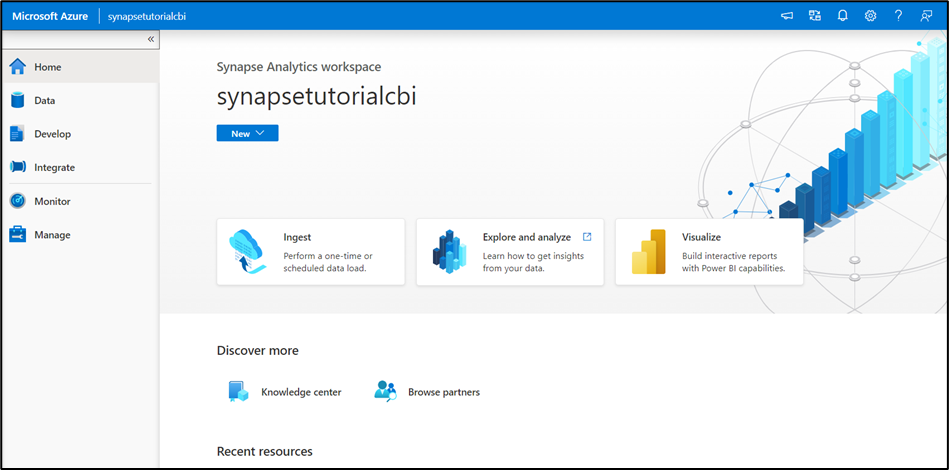
Azure is now going to load your Synapse studio where you can ingest, store, analyze, and visualize data.
We are ready to go!
We have succesfully set up an Azure Synapse workspace. Now you can start working on your data related projects!