


In this tutorial we explain how you can use Django’s ModelMultipleChoiceField. This will enable users to select multiple model objects and submit them to the database. The full code of this tutorial is available on my github page. We need to complete the following actions to create a modelmultiplechoicefield:
- Change the designated model field to a ManyToManyField.
- Create our form with the ModelMultipleChoiceField
- Create our view
- Put the forms in the template
- Check the results
Our models: Creating a ManyToManyField
In this example we use two models to collect data about football clubs. The table TableData has attributes for the name, attendance, stadium and characteristics. For the variable characteristics we want to record multiple responses. We want to get these reponses from our Characteristics table. In this table, I already put some records we can choose from.
models.py
from django.db import models

class Characteristics(models.Model):
    name = models.CharField(max_length=200,blank=True, null=True)
    created_at = models.DateTimeField(auto_now_add=True)
    edited_at = models.DateTimeField(auto_now=True)

    def __str__(self):
        return self.name

class TableData(models.Model):
    name = models.CharField(max_length=200, unique=True)
    attendance = models.IntegerField(blank=True, null=True)
    stadium = models.CharField(max_length=200,blank=True, null=True)
    characteristics = models.ManyToManyField(Characteristics,blank=True, null=True)
    created_at = models.DateTimeField(auto_now_add=True)
    edited_at = models.DateTimeField(auto_now=True)

    def __str__(self):
        return self.name
You will notice that in the TableData model the characteristics attribute is a ManyToManyField. This is key for our multiple choice field. since this field type will help us with storing multiple options for 1 TableData instance in a seperate table. I will show how that works later on!
Creating our form
We can now create the form that we want to use to store the TableData entries. Our characteristics field uses the django ModelMultipleChoiceField. We first specify the queryset, where we tell the form which options we wanto to display to the users. In this instance, we want to use all Characteristics objects, sorted by their name.
forms.py
from django import forms
from django.forms import ModelForm, DateInput
from django.contrib.auth.models import User
from .models import *
class TableDataForm(ModelForm):
name = forms.CharField(label="Name", required=True)
characteristics = forms.ModelMultipleChoiceField(
queryset=Characteristics.objects.all().order_by('name'),
label="Characteristics",
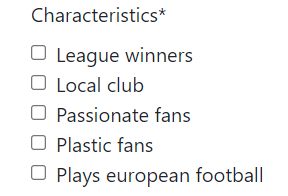
widget=forms.CheckboxSelectMultiple)
attendance = forms.CharField(label="Attendance", required=True)
stadium = forms.CharField(label="Stadium", required=False)
class Meta:
model = TableData
exclude = ['created_at','edited_at']
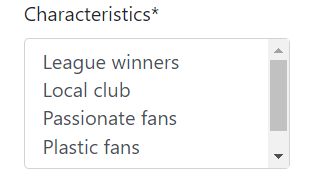
In the widget attribute, we specify that we want to use checkboxes to select our choices. The other option is to not specify a widget, this will provide users with a list where they are able to select multiple records by holding control and clicking. I personally prefer the checkboxes.
There are external packages than can help you with creating other layouts for the multiple choice form (e.g. dropdown).
Creating our view
In our views.py file we need to write the logic that saves our form to the database. We do that with the code below:
views.py
def modelmultiplechoicefield(request):
    form = TableDataForm(request.POST or None)
    if request.POST and form.is_valid():
        name = form.cleaned_data['name']
        stadium = form.cleaned_data['stadium']
        attendance = form.cleaned_data['attendance']

        obj = TableData(
            name=name,
            stadium = stadium,
            attendance = attendance,
        )

        obj.save()
        form2 = TableDataForm(request.POST, instance=obj)
        form2.save(commit=False)
        form2.save_m2m()
        return redirect('home')

    context = {'form':form}
    return render(request, 'table/modelmultiplechoicefield.html',context)
In our code you will see that we first specify the form we are using (TableDataForm). Next, we state that if a POST request is made, and the form is valid, we want to execute several actions:
- First, we take our non multiple choice fields and use these to create and save the object in the TableData table.
- Second, we need to save our manytomany response to the database. When you create a many to many field in your database Django automatically creates a new table to record multiple responses for each record. To store and link this data to out TableData table, we first need to specify our form again, with the object that we just created as the instance. Now Django knows which record to link to our reponses. Next, we save the form, but with commit false. Last, we save the form with the save_m2m() command, allowing us to store each selected option as a row in the table with the id of our original object.
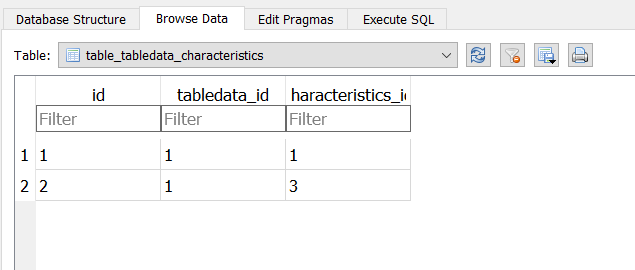
You will notice in your database that a new table has been created for capturing the many to many relationship. This table combines the primary keys of our TableData table, and links this to the different characteristics options that we have selected.
Put the forms in our template
The final thing we need to do is putting our forms in our template. I have rendered them individually in this example.
html file

    <form method="post">
    {% csrf_token %}
        <div class="pageholder">
            <div class="titleholder">
                <button class="ourbutton"type="submit"> Submit</button>
                <div class="title"><i class="fa-solid fa-table"></i> Model multiple choice field! </div>

            </div>

            <div class="linkholder">

               {{form.name|as_crispy_field}}
               {{form.stadium|as_crispy_field}}
               {{form.attendance|as_crispy_field}}
               {{form.characteristics|as_crispy_field}}

            </div>
        </div>
    </form>
Crispy forms
In this project I use crispy forms to make sure that the forms are styled. This is not required. If you want to do this as well, first install the following package:
pip install django-crispy-forms
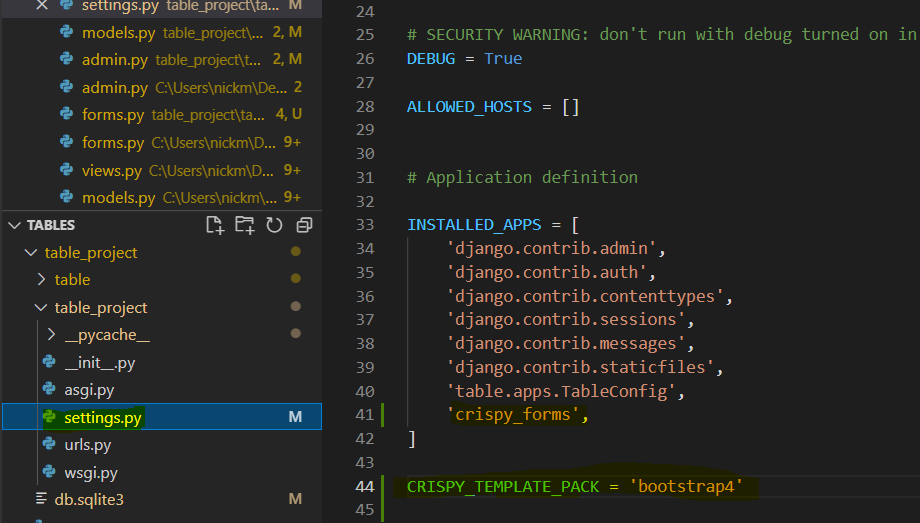
In addition, go to your settings.py file and put crispy_forms in the installed apps section (image below). Be sure to also set the CRISPY_TEMPLATE_PACK to bootstrap 4.
Also, use the following link in your html file to use bootstraps css classes.
<link rel="stylesheet" href="https://stackpath.bootstrapcdn.com/bootstrap/4.1.3/css/bootstrap.min.css" integrity="sha384-MCw98/SFnGE8fJT3GXwEOngsV7Zt27NXFoaoApmYm81iuXoPkFOJwJ8ERdknLPMO" crossorigin="anonymous">We are ready!
We can now submit data with our form, and records multiple choices for the characteristics. The full code is available on my github page.


