In this blogpost series we will zoom in on the use of DataTables in a Django application with HTML frontend. In this post we will focus on styling our table with CSS commands. The complete code of this tutorial can be found on my Github account.

This tutorial follows the examples from our previous posts. You do not need these to follow along. Previous posts:
- Python Django DataTables: #1 Creating a basic jQuery DataTable
- Python Django DataTables: #2 Jquery DataTable Display Data with JSON Response
- Python Django DataTables: #3 Jquery DataTable Formatting Dates
Adding an id and class
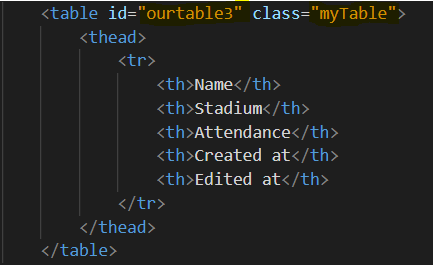
Since we already created some tables in our previous tutorials, we will change the id and className to make sure that the that the CSS is only applied to this table. We set the id to ourtable3 and the class to mytable.
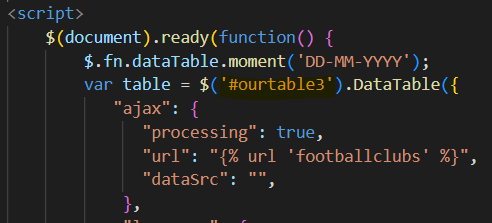
If you are following along from a previous tutorial, make sure that you also change the id in the script to ourtable3.
Setting the width
The first action for us is increasing the width of the table. If you inspect the table, you will see that it is surrounded by a wrapper, which includes the filters, paginations and other functionalities.

In our main.css file we will use the id ourtable3_wrapper to set the width.
main.css

#ourtable3_wrapper{
    width:98%;
    margin-left: 1%;
    margin-right: 1%;
    margin-top: 20px;
    margin-bottom: 20px;
}
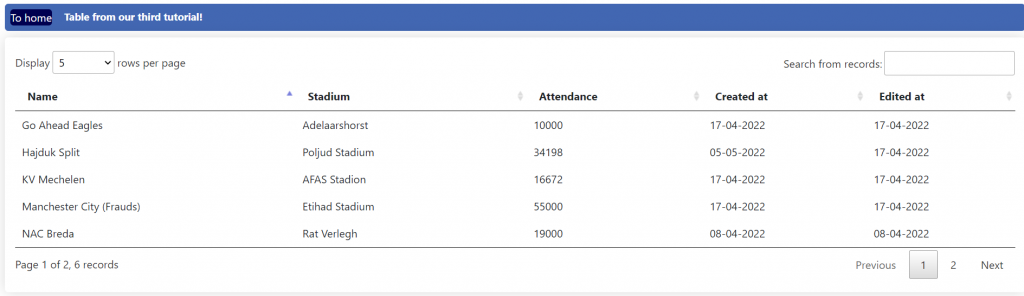
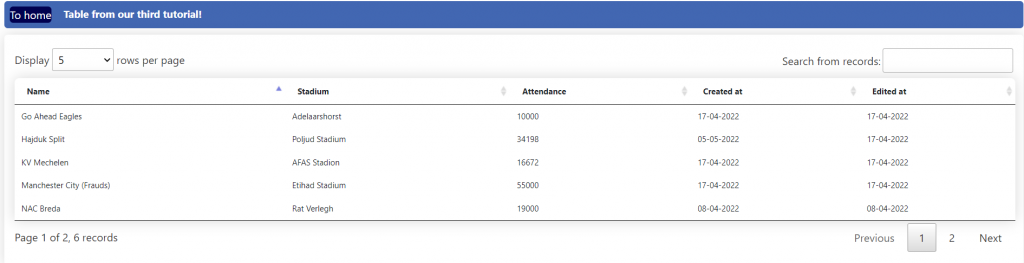
After this change our table is now almost full width.
Changing general table features
We are now going to change the margins, font, and some additional features. We add the following code to our main.css file:
main.css

.myTable{
    font-size: 12px;
    min-width: 400px;
    overflow: hidden;
    border-radius: 7px 7px 0 0;
    box-shadow: 0 0 20px rgba(0, 0, 0, .15);
}
We use the class name of the table (myTable) to link the code to our table. We added the following attributes:
- font-size: Sets the size of the text to 12 pixels.
- min-width: Makes sure that our table is never smaller than 400 pixels. Smaller than 400 pixels is unreadable for the user.
- border-radius: Ensures that the top left and right corners are rounded with 7 pixels.
- overflow: Makes sure that our border radius keeps working when we add colour to the table header later on.
- box-shadow: Creates a shadow around our table.
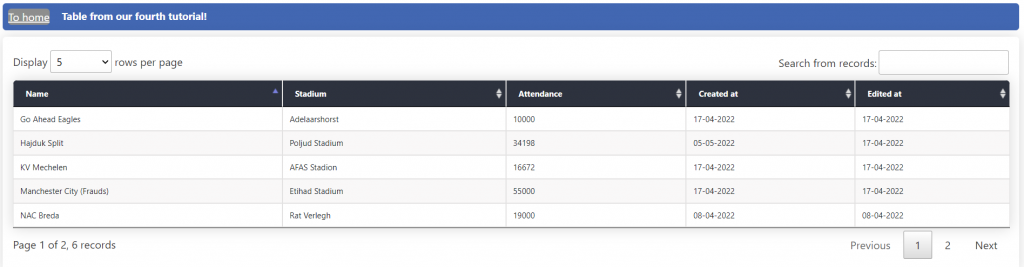
In my application the table now looks like this:
Formatting the table header
We continue with formatting out table headers. We do this by specifying the class in combination with th (table header).
main.css
.myTable th {
    background-color: #2D323E;
    color: white;
    font-weight: bold;

  }
We first set the background color (dark blue) and the color (white) of the text. We also make sure that the text is bold by adding the font-weight attribute.

Changing colors of even rows
To create a distinction between the rows I will add border to the header and rows and a lightgrey background to the even rows.
main.css

.myTable td, .myTable th {
    border: 0.01em solid #e3e2e2;
  }

.myTable tr:nth-child(even){background-color: #f9f8f8;}
Formatting the filter, pagination, and other functionalities
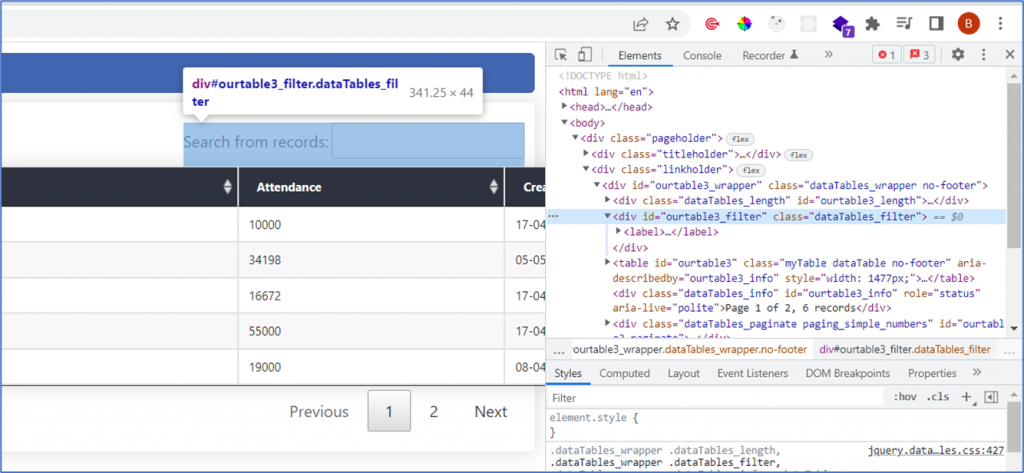
The table looks fine for now, but the built in functionalities from datatables are not formatted yet. One way to do this is by inspecting the elements (CTR+SH+C) and listing their ids in our CSS file. We can then format the text of these functions.
main.css
/* Formats the text*/
#ourtable3_filter,
#ourtable3_length,
#ourtable3_info,
#ourtable3_paginate{
font-size: 12px;
font-weight: bold;
color: #333;
}
/* Formats the input fields*/
#ourtable3_filter input,
#ourtable3_length select{
border: 1px solid rgb(3, 154, 204);
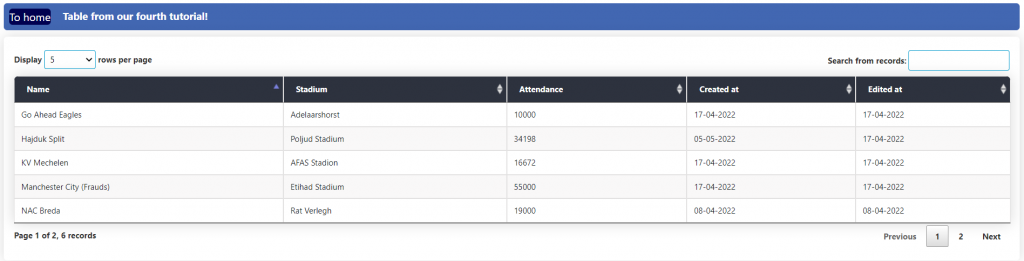
}With our css we first format the text of the filter, length attributes, the info, and the pagination. In addition, we change the borders from the select and input field to light blue. After these modifications the built in functionalities look more like the rest of the table!
Next tutorial, filters!
This concludes this tutorial. The end result might not be your style, but it does show you how you can format the datatable with CSS. In the next tutorial we will show how you can create custom filters that can help users with slicing and dicing the data in the table. The complete code of this tutorial can be found on my Github account.