

In this tutorial we build a full stack scheduling application with Python Django in the backend, and ReactJs in the frontend. In this article we will create a database model for our appointments, and illustrate how API endpoints of Django Rest Framework operate.
The full code is available here.
Database models
As mentioned in our previous article, we use Django as our backend framework, meaning that Django is the communication layer between our frontend (React) and our database. Before we can start communicating, we need to define the structure of our database. In Django, we write the database schema in the models.py file. So we navigate to our models.py file in our api_events folder, and write the following code:
scheduler_project\api_events\models.py

from django.db import models

class AppointmentType(models.Model):
    name = models.CharField(max_length=100, unique=True)
    description = models.TextField(max_length=800,blank=True, null=True)

    def __str__(self):
        return self.name

class AppointmentStatus(models.Model):
    name = models.CharField(max_length=100, unique=True)
    description = models.TextField(max_length=800,blank=True, null=True)

    def __str__(self):
        return self.name

class AppointmentReason(models.Model):
    name = models.CharField(max_length=100, unique=True)
    description = models.TextField(max_length=800,blank=True, null=True)

    def __str__(self):
        return self.name

class Appointment(models.Model):
    type = models.ForeignKey(AppointmentType, on_delete = models.CASCADE)
    status = models.ForeignKey(AppointmentStatus, on_delete = models.CASCADE)
    reason = models.ManyToManyField(AppointmentReason,blank=True, null=True)
    name = models.CharField(max_length=100, unique=True)
    start_date = models.DateTimeField()
    end_date = models.DateTimeField()
    created_at = models.DateTimeField(auto_now_add=True)
    edited_at = models.DateTimeField(auto_now=True)

    def __str__(self):
        return self.name
Our main model is the Appointment model, which provides all the necessary information about an appointment. The other schema’s serve as supporting tables. The AppointmentType will provide options for the type field of Appointment. The AppointmentStatus will do the same, but for the status field of appointment. The AppointmentReason provides options for the reason ManyToManyField for Appointment.
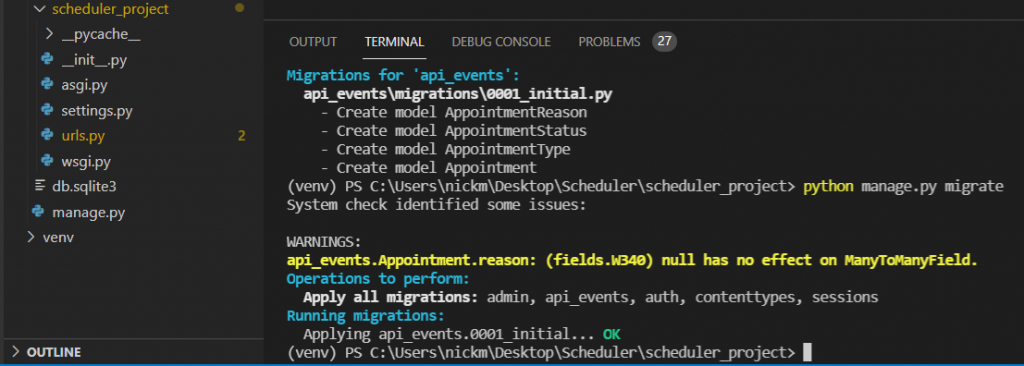
To make sure that the database is updated to our defined structure we run the following two commands.
python manage.py makemigrations
python manage.py migrate
Once the migration is complete you should see the following outout in your terminal.
But how do you actually know that your database fields have been created? To get a user interface for your sqlite database I downloaded DB Browser for SQLite. You can open the database file in this program, and actually see your database tables, columns, and all the datapoints.
Creating a superuser and Django Admin
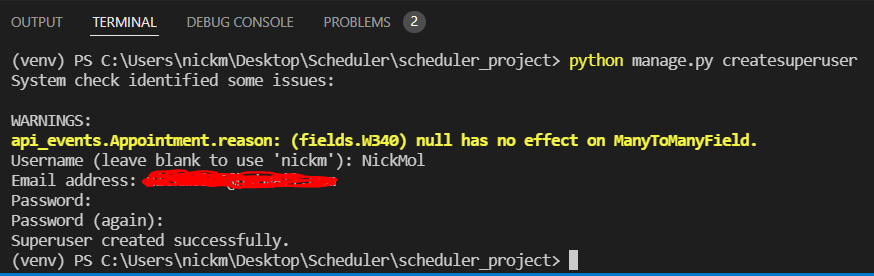
We are now going to create a superuser and login to our django admin. There we will be able to create records for AppointmentType and AppointmentStatus. We will need this records later in this tutorial. You create a superuser with the following command:
(venv) PS C:\Users\nickm\Desktop\Scheduler\scheduler_project>
python manage.py createsuperuser
The terminal will now ask you to enter a username, email adress, a password, and a confirmation of the password. Beware: The password will not appear on the screen.
Now we will register the models in the admin file. This will enable us to create records in the Django admin portal. Go to the Django admin.py file in the api_events folder.
scheduler_project\api_events\admin.py
from django.contrib import admin
from .models import *
admin.site.register(Appointment)
admin.site.register(AppointmentReason)
admin.site.register(AppointmentStatus)
admin.site.register(AppointmentType)
Now run the server (python manage.py runserver) and navigate to http://localhost:8000/admin. Use the superuser credentials to login. Now we create some records for AppointmentStatus and AppointmentType. For status I create Open, Delayed, Completed. For type I create Type 1, Type 2, and Type 3.

Serializers
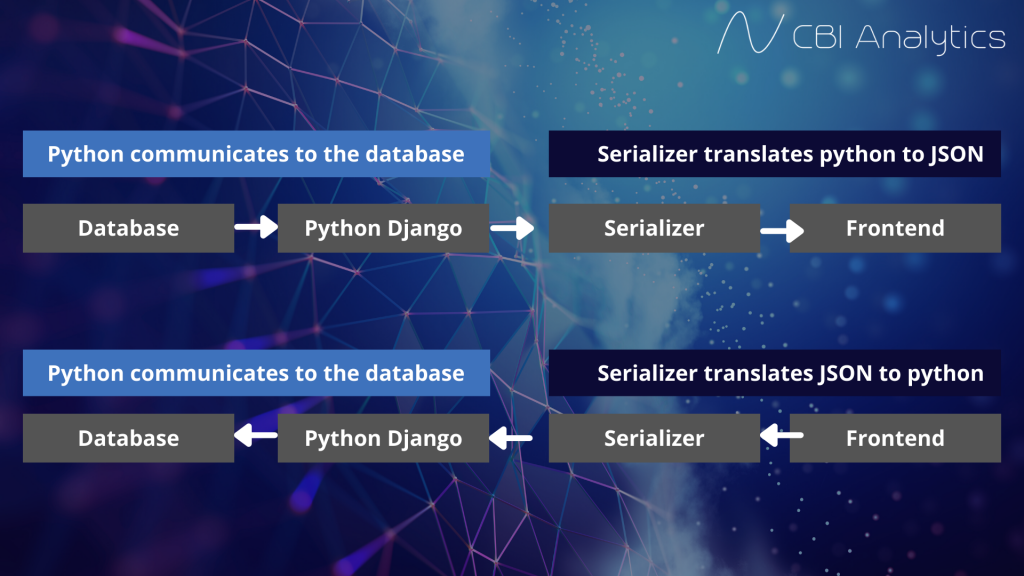
The entire process of webapplications consist of continuous back and forth communication between the database and the frontend through our Django backend. But our backend is written in Python, whilst our frontend is Javascript. How do we make sure that they speak the same language? This is where a serializer comes in.
When you send data from the database to the frontend, the serializer translates the Python commands to a JSON format that can be consumed by our React frontend. When data is send from the frontend to our database, the JSON is translated to Python. The serializer enables the communication between our frontend and database through our backend.
Now let’s create our very own serializer. First we create a file named serializers.py in our api_events app. Then we create a serializer for our Appointments model. On top of our serializers file we first import serializers from rest_framework and all the models from our models.py file. We need these two prerequisites to create our serializer. Then we write a class named AppointmentSerializer, where our model is Appointment, and we include all the fields.
scheduler_project\api_events\serializers.py

from rest_framework import serializers
from .models import *

class AppointmentSerializer(serializers.ModelSerializer):
    class Meta:
        model = Appointment
        fields = '__all__'
Views en API endpoints
We have now setup our database schema, and created serializers which enables us to communicate with the frontend. Now we need to create views and api endpoints (urls). The urls will tell us where we can reach our endpoints and communicatie with the database. The view is going to outline what data we want to pass to the frontend (the query) and the serializer we need to use. We first make a view and url endpoint in our application for appointment.
scheduler_project\api_events\views.py

from django.shortcuts import render
from rest_framework import generics
from .models import *
from .serializers import *

class AppointmentView(generics.CreateAPIView):
    queryset = Appointment.objects.all()
    serializer_class = AppointmentSerializer

scheduler_project\api_events\urls.py

from .views import *
from django.urls import path, include

urlpatterns = [
   path('appointment/api', AppointmentView.as_view()),
]
In our views.py file we changed the views to the AppointmentView. In this view we use the CreateAPIView, which indicates that it allows you to create records in this view. In the queryset we specify all objects from our Appointment model. We select the AppointmentSerizalizer as our serializer to translate between the frontend and backend. In our urls.py file we specify the endpoint of the view. Let’s check what happens if we start the server and navigate to the /appointment/api endpoint. Start the server with the following command:
(venv) PS C:\Users\nickm\Desktop\Scheduler\scheduler_project>
python manage.py runserver
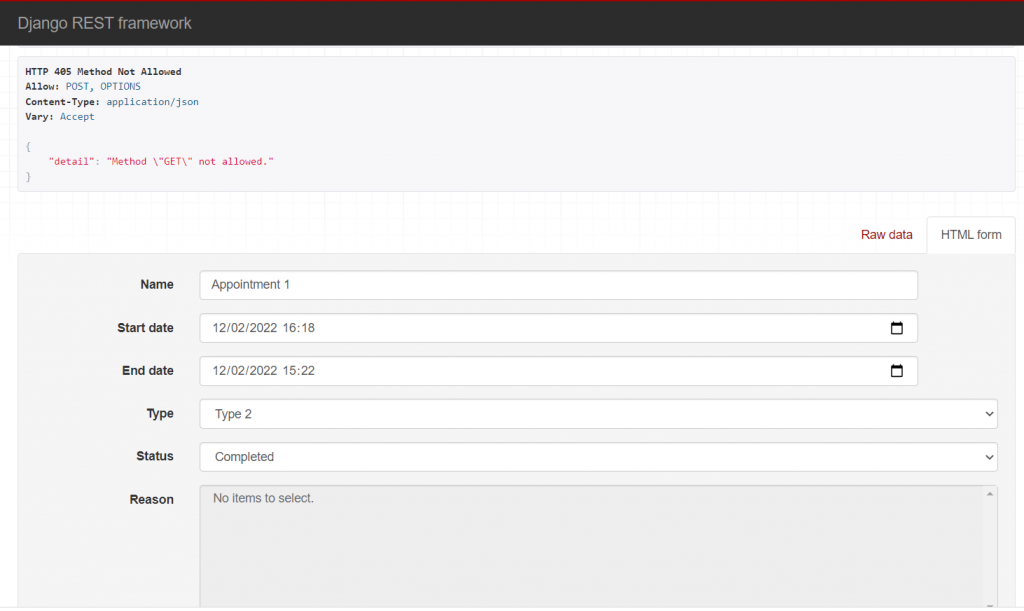
If you now navigate to http://127.0.0.1:8000/appointment/api in your browser you will see our endpoint on the screen. You are now able to create a record through the api interface.
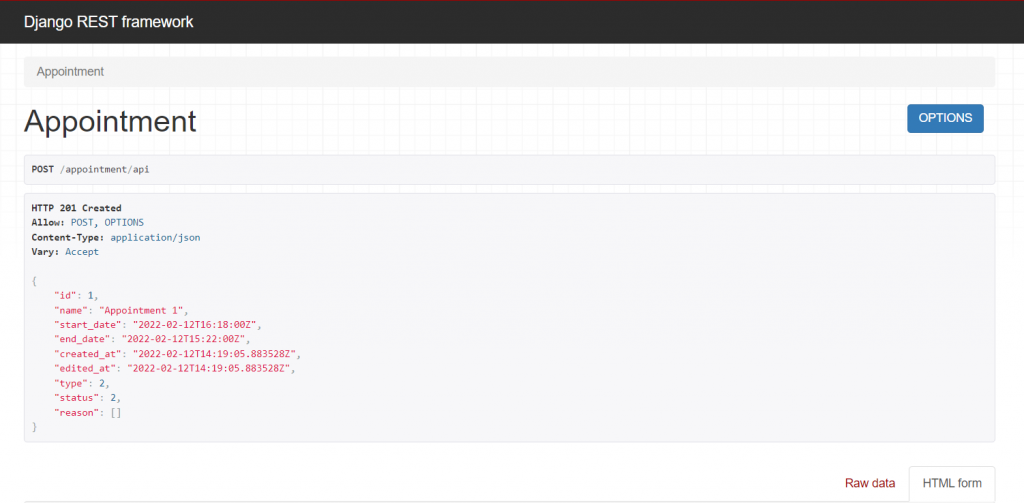
Once you click on post you will see the output that you created on the top of the screen.
This is the end of this tutorial. We have seen how we can use Django Rest Framework to create API endpoints. In the next episode we will start connecting the React frontend to our application.


