


In this tutorial we build a full stack scheduling application with Python Django in the backend, and ReactJs in the frontend. In our previous post we Integrated ReactJs in our application. In this blogpost we will explain how React works, and how we can navigate between diferent pages with React Router.
The full source code of this tutorial is available on my github.
Writing React JS code in our application!
ReactJS is ofter categorized as a single page application. Reason behind this is that all pages in React come together in 1 html file. In that file we decide what React code is shown and hidden, allowing the user to navigate between different parts of content. This is also the reason that React is so fast. When you use html you constantly load new html pages when you navigate to a diferent link. With React you visit one page, but different javascript components are shown based on urls.
Currently, all content we see in our application is coming from our App.js file. This file simply states: This is what we will see in our application!.
App.js


import React, { Component } from "react"
import {render} from "react-dom"


export default class App extends Component{
    constructor(props) {
        super(props);
    }

    render(){
        return <p>This is what we will see in our application!</p>
    }
}

const appDiv = document.getElementById("app");
render(<App />, appDiv);
In this post we will drastically change our App.js file. We are going to make sure that our App.js file is going to show a certain JavaScript file based on the link the user visits. That way, we are able to constantly show a different JS file based on the users selection. React Router will enable us to do this! Three steps to achieve this:
- Creating new JS files with the content of our different pages.
- Importing our new JS files to our App.js file.
- Use React Router to Switch between components.
- Creating urls to make sure that we see the desired JS file.
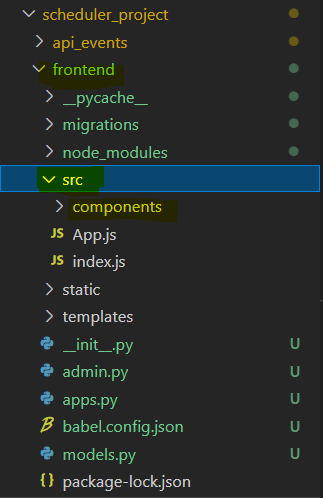
Now, before we start, create a folder named components in the src folder inside the frontend folder. There we will store our different components in our application,
Creating new JavaScript files
We are going to create 3 different files in our components folder within our frontend folder. First, we create a file called Home.js. In this file we write the code for our homepage. Paste the following code in that file:
Home.js

import React from 'react';
import PropTypes from 'prop-types';

function Home(props) {
  return (

    <h1> This is our homepage</h1>

  );
}

Home.propTypes = {
  window: PropTypes.func,
};

export default Home;
The structure of the file is currently very simple. On top of the file we import React and prop-types. Below we have a function called Home, which returns the code that will show up in our application (this is our homepage). on the bottom file we pass our props and export our function. By exporting it in this file we are able to import it later in our App.js file.
Now we create an additional page called Calendar.js. This file will have the same structure, but with different text and function name. Later in our tutorial we will add a calendar with events on this page.
Calendar.js

import React from 'react';
import PropTypes from 'prop-types';

function Calendar(props) {
  return (

    <h1> This is our calendar page</h1>

  );
}

Calendar.propTypes = {
  window: PropTypes.func,
};

export default Calendar;
One more page can be added to the components folder. The name of this file will be CreateEvent.js. On this page we will eventually be able to create new events in our application.
CreateEvent.js

import React from 'react';
import PropTypes from 'prop-types';

function CreateEvent(props) {
  return (

    <h1> This is our create events page</h1>

  );
}

CreateEvent.propTypes = {
  window: PropTypes.func,
};

export default CreateEvent;
Add the created files to our App.js file
We now need to add the functions from our new files to the App.js file. This will enable us to use these components. Use the highlighted code below in your App.js file to import the new files.
App.js

import React, { Component } from "react"
import {render} from "react-dom"
import Home from "./components/Home";
import Calendar from "./components/Calendar";
import CreateEvent from "./components/CreateEvent";

export default class App extends Component{
    constructor(props) {
        super(props);
    }

    render(){
        return <p>This is what we will see in our application!</p>
    }
}

const appDiv = document.getElementById("app");
render(<App />, appDiv);
Adding React Router to the App.js file
Next, we need to make sure that we are able to switch between the files we have created and imported into our App.js file. We can achieve this with React Router. Change the code in your App.js file with the code below.
Beware: I also changed the App class to a Function, since this is more in line with the other files we created.
App.js

import React, { Component } from "react"
import {render} from "react-dom"
import { BrowserRouter as Router, Routes, Route} from 'react-router-dom';
import Home from "./components/Home";
import Calendar from "./components/Calendar";
import CreateEvent from "./components/CreateEvent";

function App(props) {
    return (
        <Router>
            <Routes>
                <Route path='/' element={<Home/>} />
                <Route path='/calendar' element={<Calendar/>} />
                <Route path='/create' element={<CreateEvent/>} />
            </Routes>

        </Router>
    );
  }

  export default App;

const appDiv = document.getElementById("app");
render(<App />, appDiv);
As you can see everything in our return statement is new. In the middle you find the Routes we defined. We specify a path and a component that we want to see on screen. For example: If the path is equal to /calendar, we want to see our Calendar component from our Calendar.js file.
We wrap our routes in a Routes and Router tag. This allows us to switch components based on the exact path.
Link our exact paths to our Django urls
The last step is linking our exact paths to our Django urls. This connects the frontend to the backend. Go to the urls.py file and paste the code below. It is important that the path specified in the App.js file is the same as the path specified in the urls.py file!
scheduler_project\frontend\urls.py
from django.urls import path
from .views import *

urlpatterns = [
    path('',index),
    path('calendar',index),
    path('create',index),

]
Start our server
Now we need to start our server and see if everything works. First, let’s start our Django server. If you have a virtual environment activate it now. Open a new terminal in your project and execute the following two commands:
(venv) PS C:\Users\nickm\Desktop\Scheduler>
cd scheduler_project
python manage.py runserver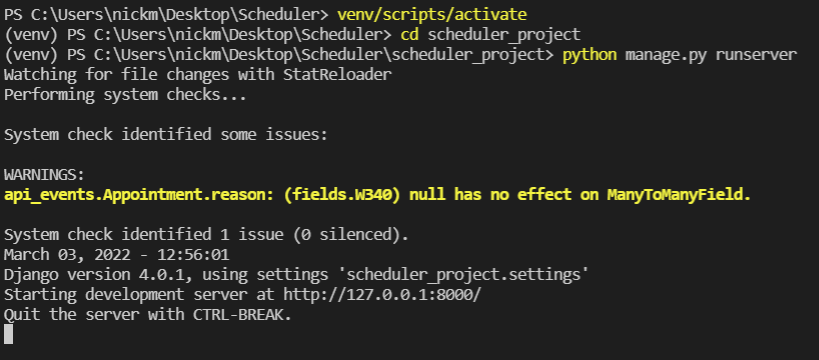
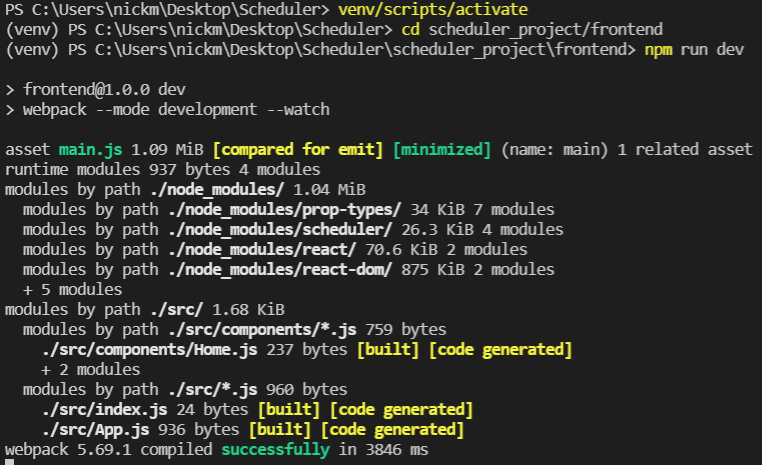
Now we need to open an additional terminal and start our frontend. Open a new terminal and execute the following two commands.
(venv) PS C:\Users\nickm\Desktop\Scheduler>
cd scheduler_project/frontend
npm run devBeware: We navigate to the frontend folder!
Check the result!
Let’s see if out changes have worked. Navigate to http://127.0.0.1:8000/. You should now see the text from our Home.js file. If you change the url endpoint to http://127.0.0.1:8000/calendar the webpage should display the text from the calendar page.
Next time : Adding a navigation menu to switch pages.
Switching to different pages now works, but our pages look bad, and we have to type in the link to get there. In the next tutorial we will fix this by creating a navigation menu that will allow us to switch pages!
Next up: Creating a responsive navbar with Material UI!
The full code of this tutorial is provided on my github account!


