

In this tutorial series we will focus on sending emails through our Django app with Gmail. Over the course of three posts we will explain:
- Configuration and Basics of Sending Emails with Gmail
- Using Nice Looking HTML Templates on your emails
- Passing in variables and links into your emails
The full code of the project is available on GitHub. Videos of the tutorial are available on Youtube.
Focus for today
In today’s blog post we will:
- Configure our Gmail account to send emails
- Edit the settings of our app in the settings.py file
- Show a basic example of sending emails with Django
Configure Gmail account
Before you can use your app to send emails we need to change some settings inside your Google account. Our objective is to set up an app password which will enable us to send emails through our application with Google.
To do this:
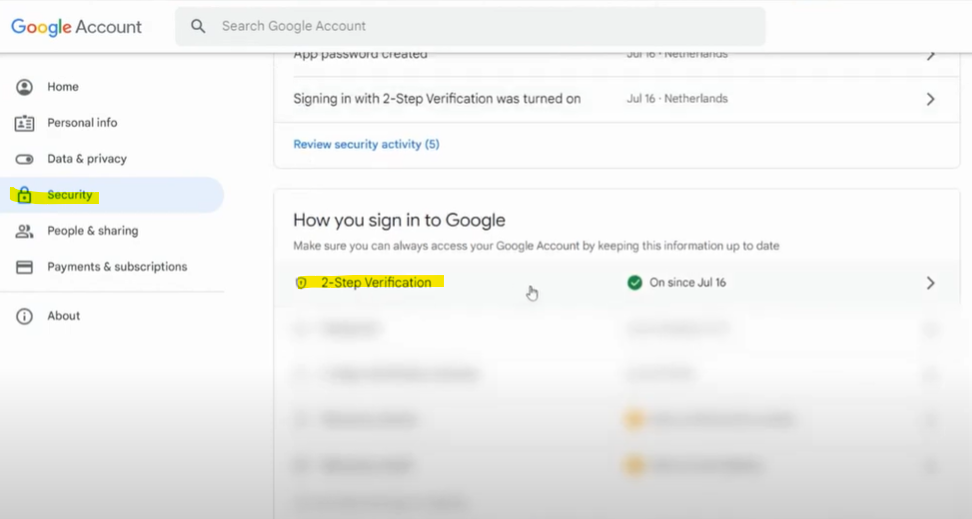
- Go to your Gmail account and click on manage your Google Account in the top right on the screen.

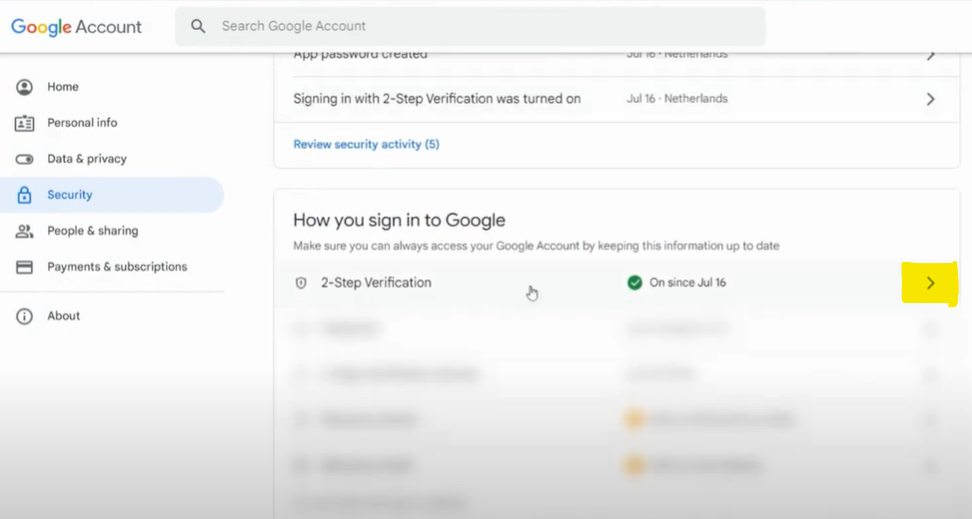
- Go to the Security tab, and enable two step verification on your account.
- Once the 2-Step Verification has been set up, open the 2-step verification window.
- Scroll down until you see to app password. Click on this window to open the app password window.
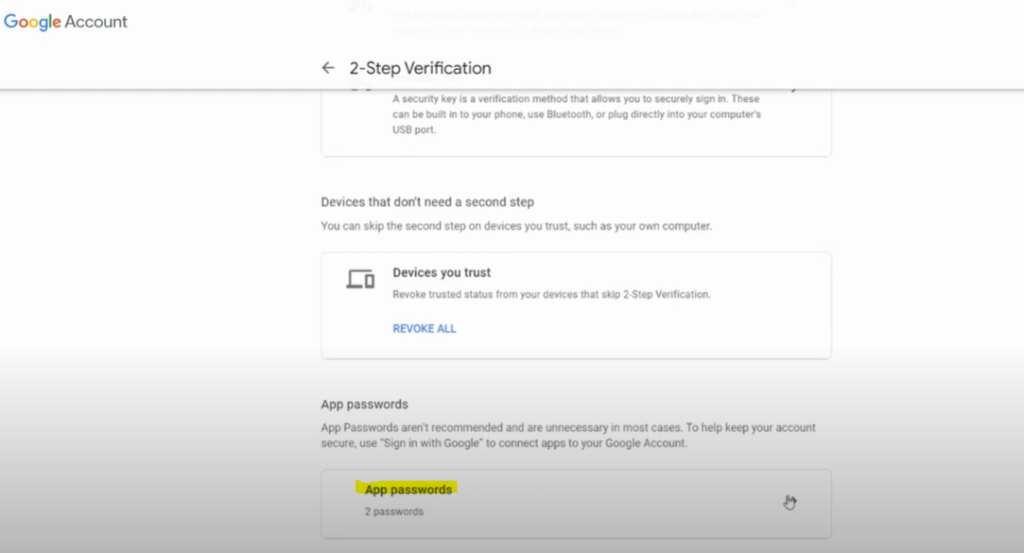
- To generate the app password, select the Other app category.

- Give your app password a name (whatever you want) and click on generate.
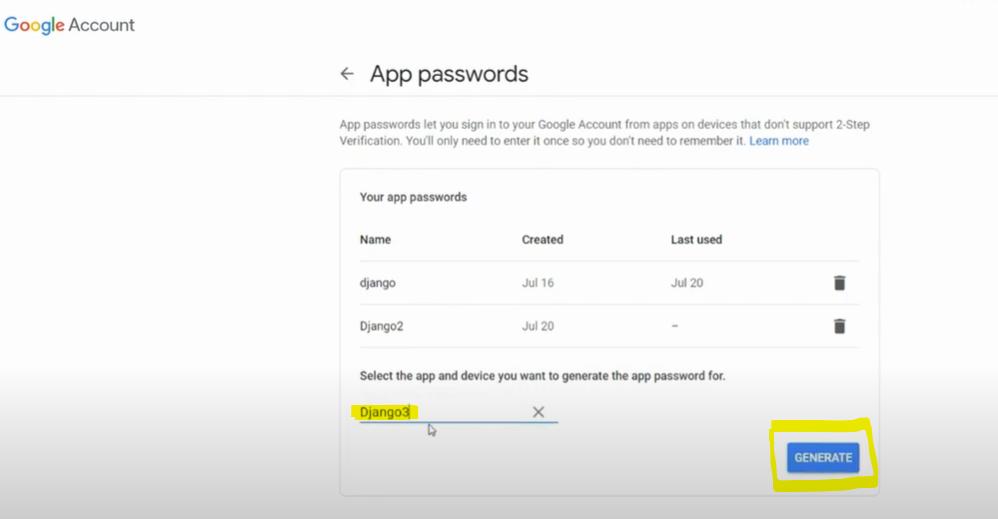
Beware: You can only see the generated app password once. So store it somewhere where you will remember and keep it secure!
- Store your app password somewhere safe!

We can now send emails with Gmail through an application using the app password!
Edit our Django Application Settings
Now that we have enabled Gmail to send emails, we need to enable our App to send emails. To do this we need to add the following settings to our settings.py file.
....
#the email settings

EMAIL_BACKEND = 'django.core.mail.backends.smtp.EmailBackend'
EMAIL_HOST = 'smtp.gmail.com'
EMAIL_PORT = 587
EMAIL_USE_TLS = True
DEFAULT_FROM_EMAIL = "MY APP!"
EMAIL_HOST_USER =  "YOUR_EMAIL"
EMAIL_HOST_PASSWORD = "YOUR_APP_PASSWORD"

...- EMAIL_BACKEND: Specifies that we use djangos email backend
- EMAIL_HOST: Describes that we will be using Gmail to send emails.
- EMAIL_PORT: The port from where we will send emails.
- EMAIL_USE_TLS: Transport Layer Security: Takes care of privacy and security.
- DEFAULT_FROM_EMAIL: The sender name specified when you don’t specify this when sending the email: The highlighted values below is where you will see the value specified in this setting.

- EMAIL_HOST_USER: Your email address.
- EMAIL_HOST_PASSWORD: Your app password from Google.
IMPORTANT: Please use environment variables. NEVER show usernames or passwords in your code! This is NOT SECURE.
In the video I explain how you can set environment variables to keep your password and email safe.
Sending emails with Django
We can now send emails in our Django views by using the send_mail function. To do this we need to import the send mail package from Django and provide the required parameters for the function.
from django.core.mail import send_mail

...
send_mail(
            subject = <YOUR SUBJECT TEXT>,
            message = <YOUR EMAIL MESSAGE>,
            recipient_list = [<YOUR RECIPIENT>],
            from_email = None,
            fail_silently=False,
        )

...- subject = The email subject
- message = The email message text.
- recipient_list = The recipients email address(es).
- from_email = I keep this value empty, since it will then use the value specified in the DEFAULT_FROM_EMAIL from my settings.py file.
- fail_silently = False, since I do want an error to be raised if something goes wrong. If this value is True, you will not notice it when the email has not been send.
In my view I have added a more advanced use case where I send an email address through my form, and then send a mail based on the email address. I also store the email send in my database.
Beware, you will need to set up the forms and models similarly to my code to replicate this use case.
from .forms import EmailForm
from .models import Emails
from django.views.generic import ListView,FormView
from django.core.mail import send_mail
from django.http import JsonResponse
from django.template.loader import render_to_string
from django.core.mail import EmailMultiAlternatives
from django.utils.html import strip_tags
from django.contrib.auth.models import User

class BasicEmailView(FormView, ListView):
    template_name = "content/home.html"
    model = Emails
    context_object_name = 'mydata'
    form_class = EmailForm
    success_url = "/"
    def form_valid(self, form):
        my_subject = "Email from our Django app!"
        my_message = "This is a message from our app"
        my_recipient = form.cleaned_data['email']

        send_mail(
            subject = my_subject,
            message = my_message,
            recipient_list = [my_recipient],
            from_email = None,
            #from_email is only required to be filled if you do not want to use the value in our settings
            fail_silently=False,
        )

        obj = Emails(
            email = my_recipient,
            subject = my_subject,
            message = my_message
        )

        obj.save()

        return super().form_valid(form)
Let’s send an email!
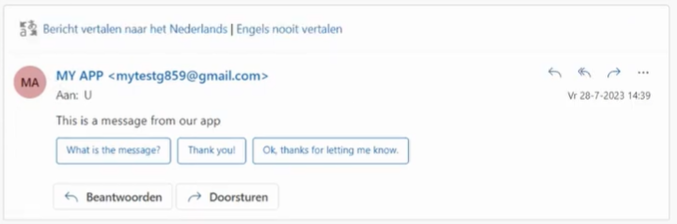
When I send an email through my project, the output now looks like this. Not very pretty right…
In the next post we will see how we can use nice looking templates to improve the mails that we send to our users!


