


In this tutorial I will show you how you can deploy a Django & React application on Microsoft Azure. Over the course of several posts we will go through the following steps:
- #1: Architecture of Django & React deployment
- #2: Make changes to our source code
- #3: Push our code to GitHub with Git
- #4: Deploy Django code to Azure
- #5: Deploy React code to Azure
In the previous post we deployed our Django backend code to Azure. In this post we complete the deployment with our frontend!
The full project code is available on GitHub.
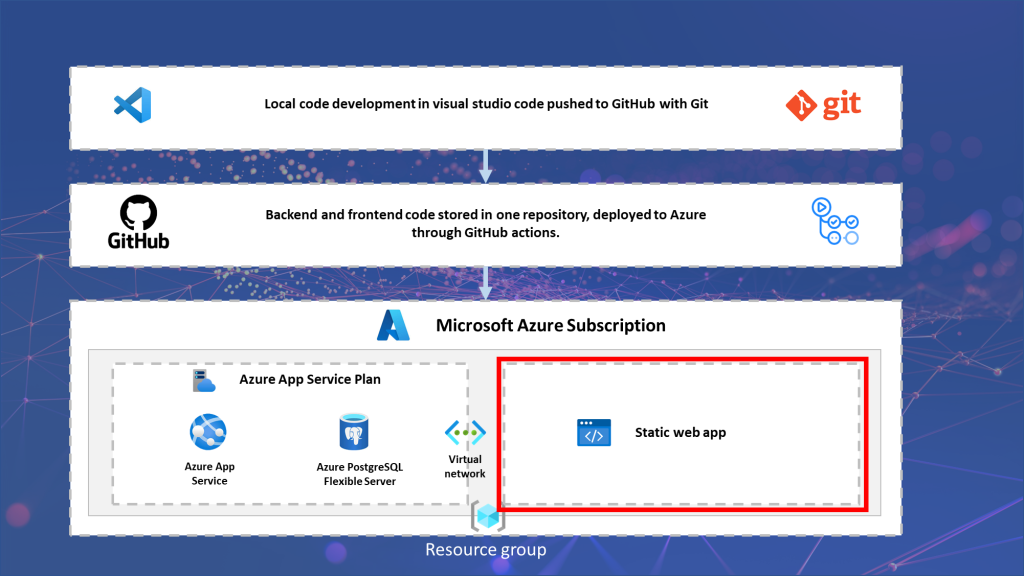
Steps for React deployment on Azure
Luckily, the React deployment will be a lot simpler than the backend deployment. To complete this deployment we will take the following steps:
- Create Static Web app and deploy React code
- Check our React on Azure deployment
- Changing the backend production CORS settings
- Create React environment variable
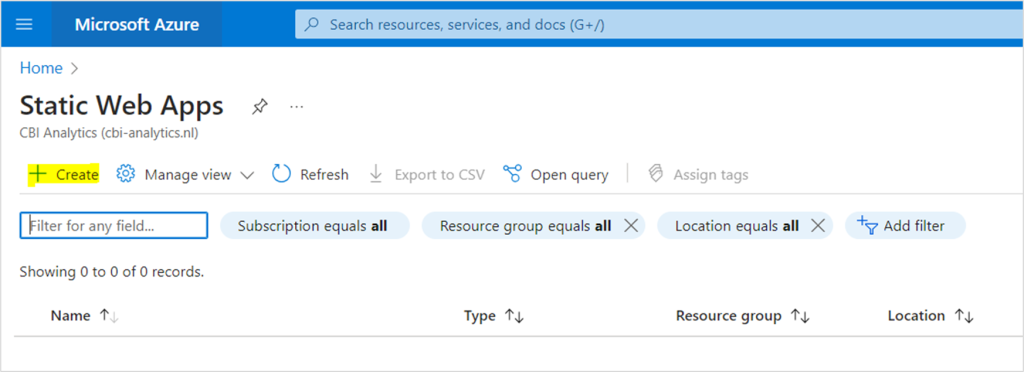
Create static web app and deploy React code
We go to the Azure Portal and search for the static web app service in the search bar.

Click on create.
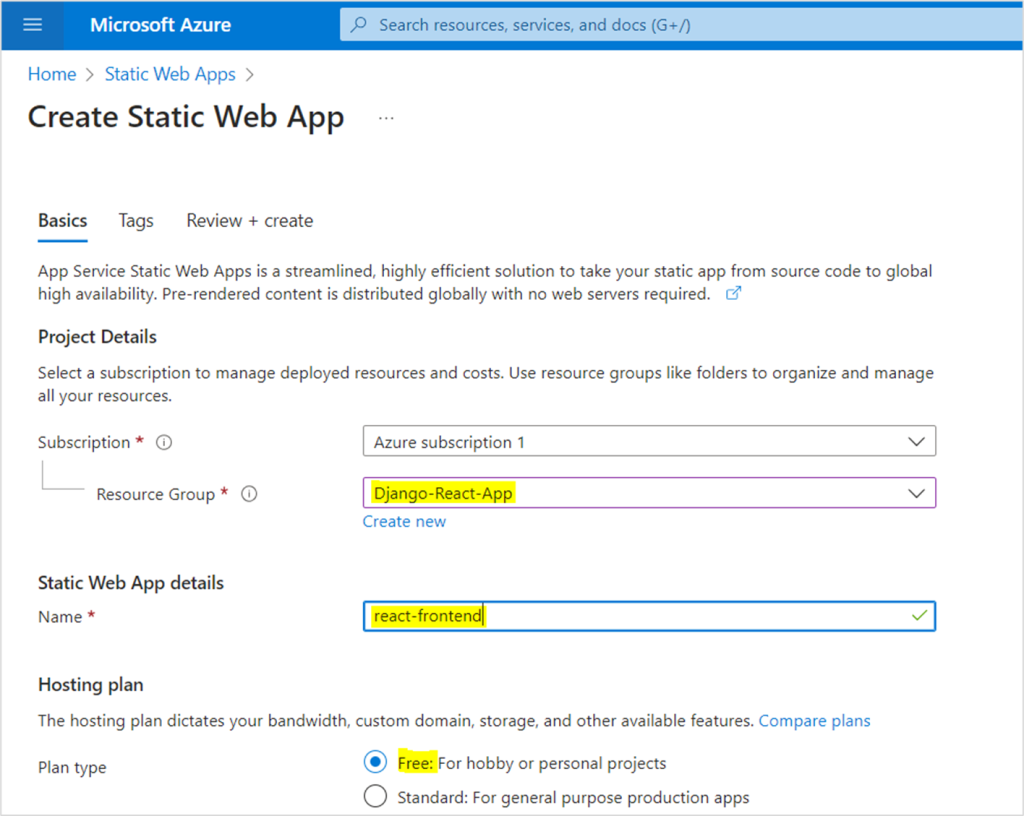
We need to provide some input in the fields:
- Resource group: We specify the resource group we created in the previous post during our backend deployment.
- Name: Pick a name that describes your frontend.
- Hosting plan: We select free since this is an example. You can change this later.
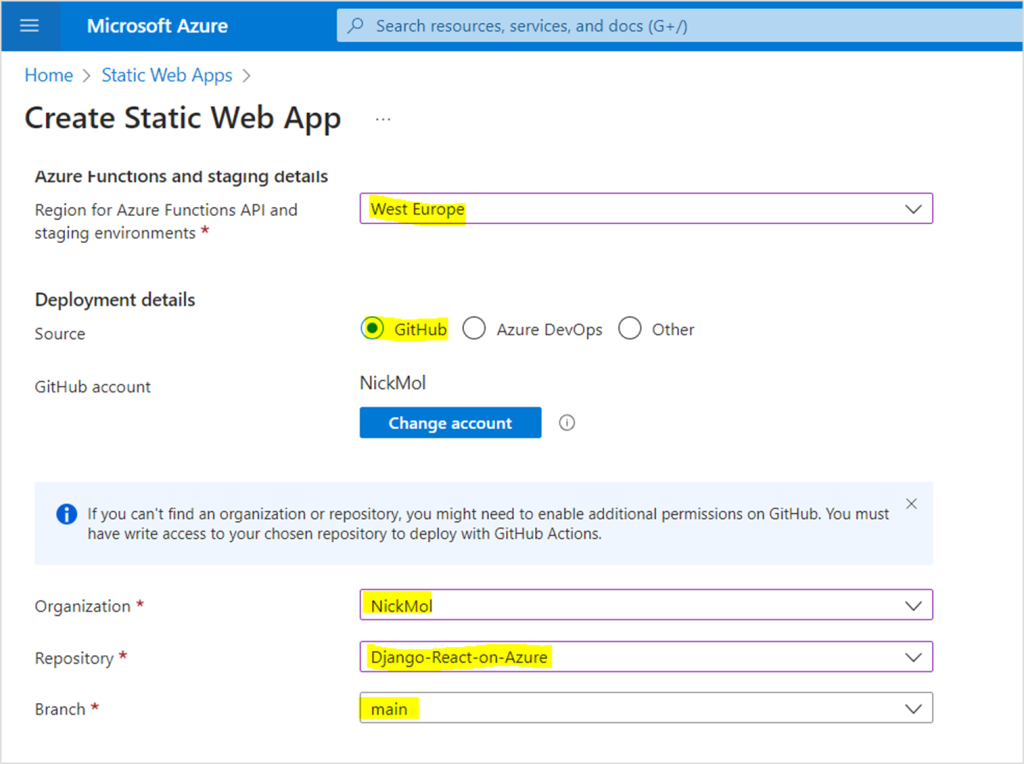
We scroll down to provide more information for the deployment..
- Region: We select the region closest to us.
- Deployment details: We select GitHub as the deployment method, login with your account if you have not done this before.
- Organization, Repository, branch: We select our correct GitHub organization and repository of our frontend, and select the main branch.
We go even further down and finish the last settings…
- Build presets: We select React since we have a React frontend.
- App location: In my case I select the FRONTEND folder, since my repository has both my BACKEND and FRONTEND code. If you have split these you do not need to do this.
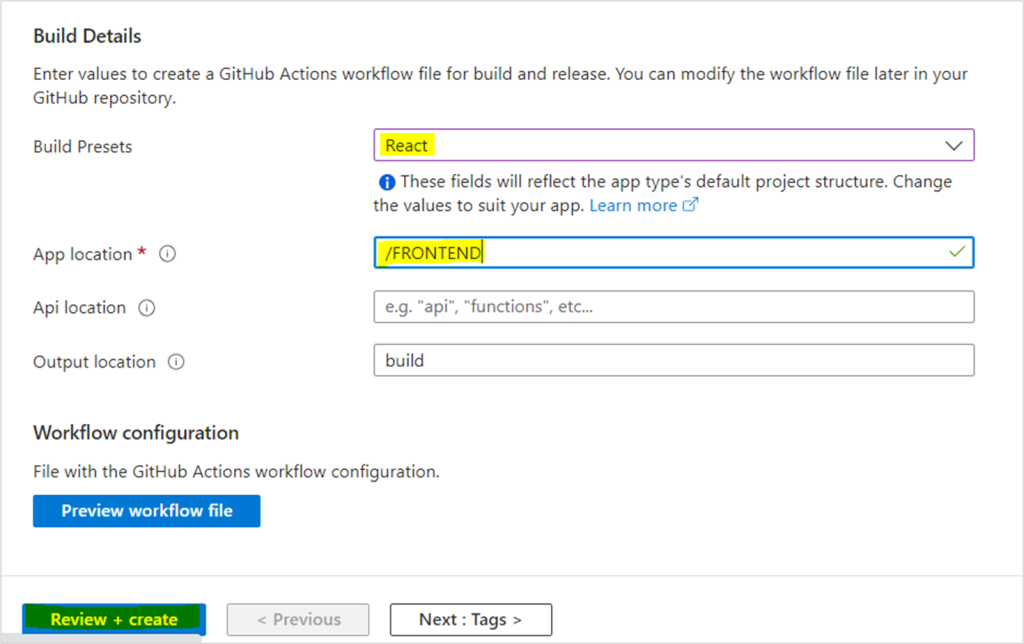
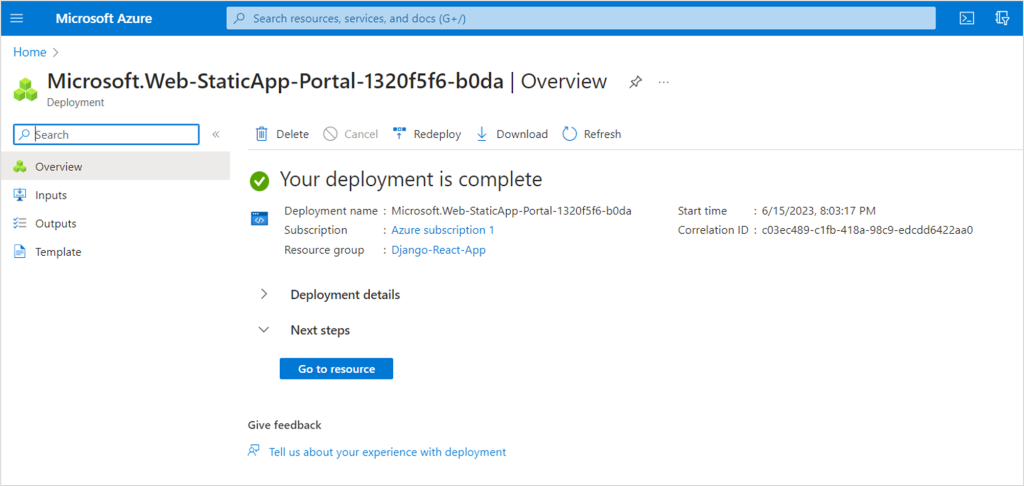
Now click Review + Create and then on create. Deployment will now start.
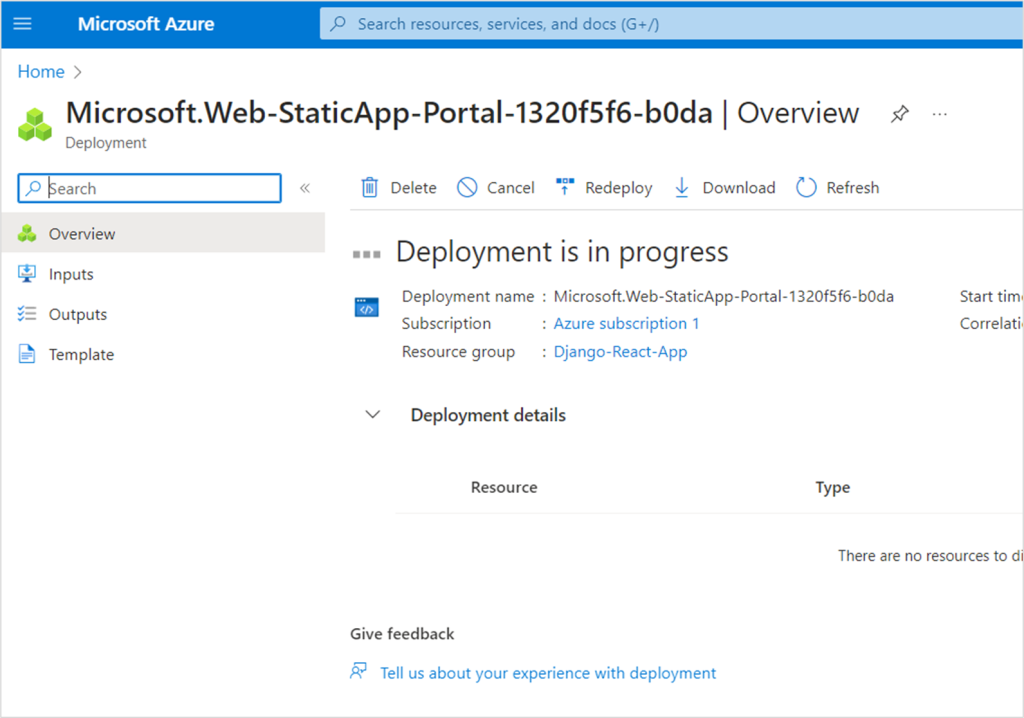
And the deployment will complete after a minute.
Check our React on Azure deployment
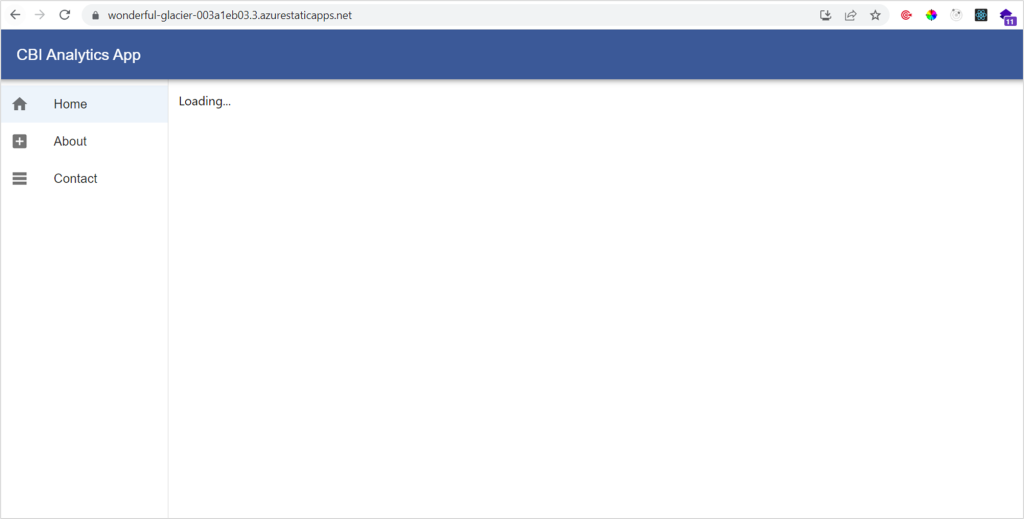
Let’s go to the resource! Go to your resource group and click on the static web app. On the overview page we will see the url of our deployment on the right. Let’s click it!

In my first try I had some problems. The cause was that I imported packages in my files which I did not use. Make sure that all components that are import in the files are actually used. You can check why a deployement doesn’t work in the GitHub actions workflow.
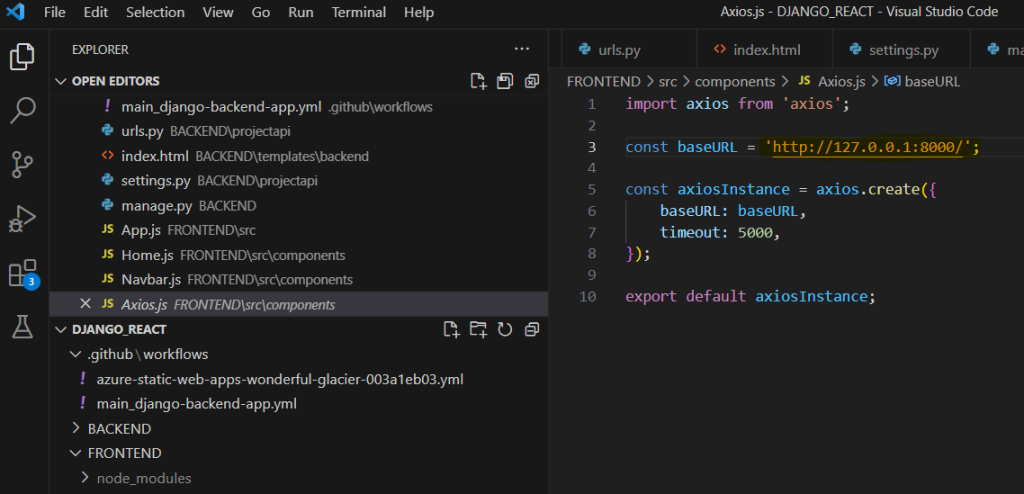
We see our app which is good, but my API keeps on loading. The reason for this is that the BASE_URL for my API is still pointing to my localhost, and I have not told my backend that this frontend site can make requests…
We need to change two things for the code to work!
- Adding our new frontend url into a list of allowed websites that can make requests to our backend. We do this by changing our production.py file, specifically the CORS_ALLOWED_ORIGINS.
- Use environment variables so we use the correct url for our APIs.
Changing the backend production CORS settings
We go to our BACKEND code and add the code below to our production.py file.
...
CORS_ALLOWED_ORIGINS = [
    "https://wonderful-glacier-003a1eb03.3.azurestaticapps.net",
]
...
Create React environment variable
As mentioned before, our API does not work since it points to our localhost.
Let’s change this! We go to our Frontend code and we create two .env files in the top level of our code. First the env file for development called .env.development.
REACT_APP_API_URL=http://localhost:8000/The second env file will be for production and is called .env.production. We can get the url or our backend from the Azure App Service.
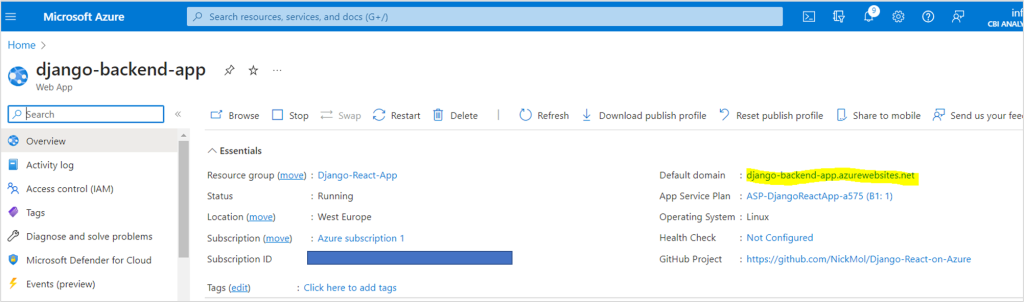
REACT_APP_API_URL=https://django-backend-app.azurewebsites.net/Make sure to add https:// before the production url, and end both urls with a slash.
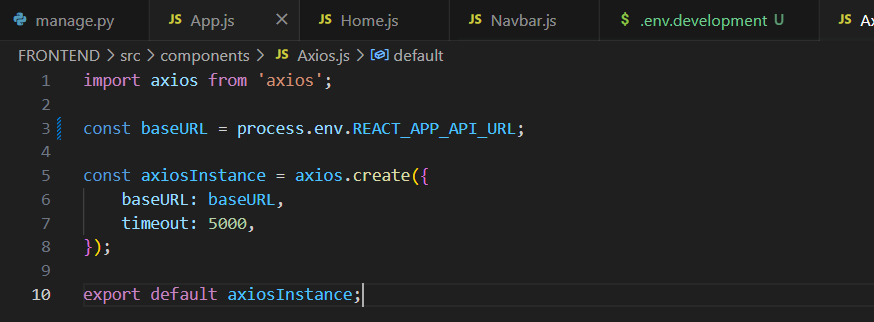
I change the baseURL in my axios request to the value in the .env file.
...
const baseURL = process.env.REACT_APP_API_URL;
...
Now we need to make sure that we use the right url in the right environment. When we are in development I want to use the development env and the other way around. WE ARE LUCKY! React does this automatically!
Important to note. I use Create React App to build my React application. I am not sure if there are different ways to do this..
Now we need to trigger the pipeline again. We do this by committing the changes to GitHub. This automatically triggers all pipelines.
git add.
git commit -am "Created env files for React"
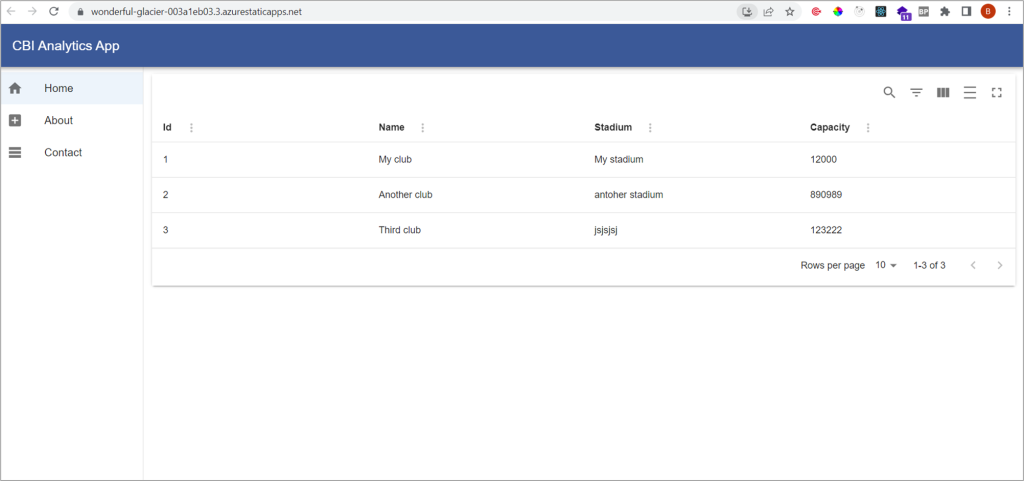
git pushAfter a few minutes I check the frontend url and I no longer see the message! I have created some more records in my Django Admin Portal and everything is now visible in our frontend!
Don’t forget to commit the changes!
We are finally done!
Our Django React application is now live on Azure! I hope that all steps are clear and that you have also succeeded. If not, let me know what the problem is in the comments.


I have followed this way of deploying into production and it works well.
I have also implemented MSAL for the front end and for the back end but after implementing it in the back end, I just cannot seem to query the data.
What is the best way to resolve this?